Bronzing vs. Contouring | Differences and My Favourite Products – Blogmas Day #11


In a recent blogger twitter chat, the topic was contouring. It was when a few people expressed confusion over what contouring actually is and how it differs from bronzing. I am not claiming to be a makeup artist, but over the years of watching my fair few YouTube videos and reading blogs, I feel I have a firm grasp on all of this. So today I thought I would discuss in detail how I like to sculpt and warm up my face, and hopefully some of you may find this useful…


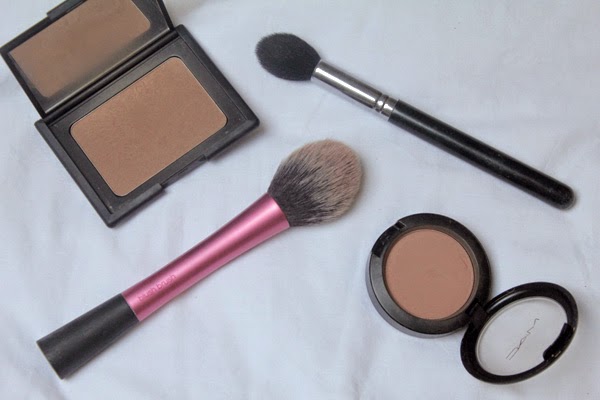
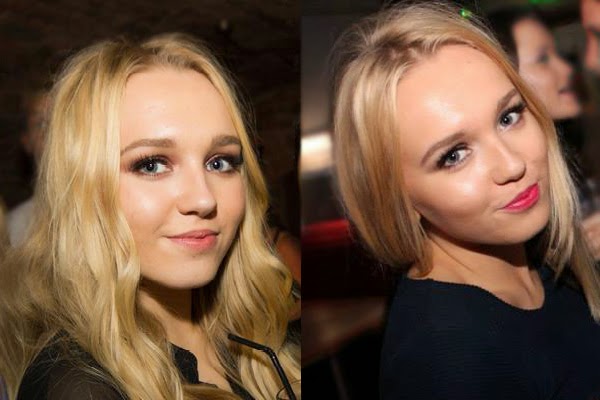
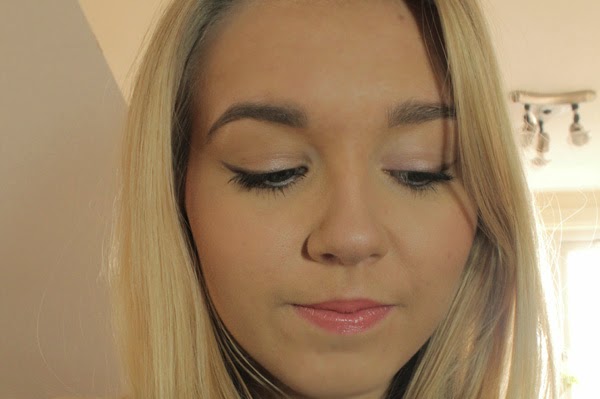
So, let’s start with bronzing. The easiest way to think about bronzing is to use it as a way to warm up the skin. I like to out bronzer on the high points of the face – in other words, where the sun would naturally hit. As you hopefully can tell in the picture above, my skin is warmest on the cheeks, temples and forehead. If I’m going for a super bronzed look, then I will hit the bridge of the nose as well. Effectively, this application of bronzer is to mimic a tan, or a sunkissed glow. It also helps to bring colour to the face and keeps it from being one flat colour, which can sometimes look unnatural. It is also handy to bronze down the neck, as for many of us, that is much lighter than the rest of the body. This can help make the transition from your face to your neck look a lot more seamless and, again, natural. My favourite bronzer – one I have mentioned many times and even dedicated a whole blog post to here – is the Nars Bronzing Powder in Laguna. For my skin tone (I go between a NC20 and NC30), this is the perfect colour, but this obviously will be different for everyone. For application, I love the Real Techniques Blush Brush – the tapered end allows for precise application, but the rest of the bristles help to blend it seamlessly. 
Moving on to contouring, this is arguably the most popular trend in makeup right now. There are constant pictures on Instagram of the extreme intense cream contouring a la Kim Kardashian, but today I thought I’d discuss a more wearable version. Contouring is sculpting the face – you create depth and dimension by mimicking shadows and darkening the areas on your face that you wish to recede. The most common place to contour is underneath your cheekbones, which I have done fairly naturally in the picture above. To find where to contour your cheekbones, you can suck in your cheeks to make the typical fish face, or a pretty foolproof method is to imagine a line from the top of your ear to the corner of your mouth. To make this look natural though, I would never bring this colour past the middle of the cheek – if you a imagine a line going straight down from your pupil, you don’t want to have any shadow past that. You can also contour other parts of your face, depending on what suits you and where you would like to sculpt. A popular place is also the nose, but I feel like this is something quite difficult to master and make look natural. If you want a more pouty-looking lip, you can apply a little underneath your bottom lip which will make it look fuller. These are only a few ways to contour, and the possibilities are endless.
Personally, I think the most natural method for contouring is using a powder. When looking for one, you want to find one that is a lot more cool-toned than your bronzer – i.e. it should look considerably more grey in tone. This is because this will look more like a natural shadow rather than an orangey-toned line on your cheek. It is also essential that your powder is matte, as any shimmer will bring attention to the area, when the key is to make it recede and draw attention to the highlighted or non-contoured parts of the face. My go-to contour product is the Mac Harmony Blush, and I would see this being perfect for fair to medium skin tones. My favourite brush for contouring is the Sigma F35 Tapered Highlighter Brush – it is tapered enough that it only applies a small concentrated amount of product, but much like the Real Techniques brush, the outer bristles help to blend everything out. 
I hope this rather wordy post has been somewhat useful to you, and if I haven’t explained myself very clearly then please let me know! It’s important to remember that the key to contouring, like any aspect of makeup, is practice. Nobody gets it perfect on their first try, and part of the fun of makeup is experimenting and finding what’s best for you. Do you love contouring and bronzing as much as me? 
RachelElizabeth

Makeup for Photography | Blogmas Day #10


With the festive season well and truly underway, it’s likely that many of you will be invited to more events than usual. Whether they’re nights out, christmas parties, or general reunions, you will probably encounter some sort of camera, and when you put so much effort into your makeup when getting ready, you want to make sure you’re camera ready. I’ll admit I’m not often photographed, but after many club nights and their ‘professional’ photos, I’ve picked up a few key tips that I thought I would share with you…

Avoid SPF
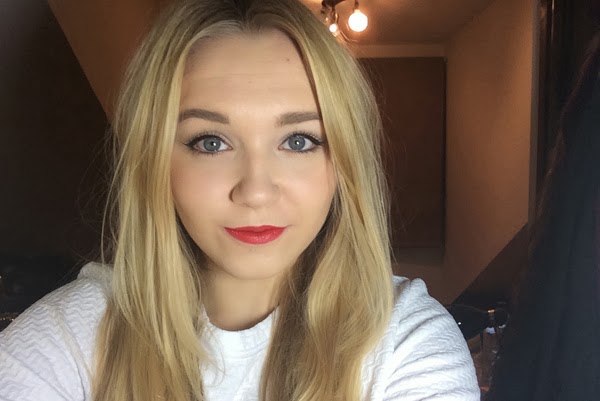
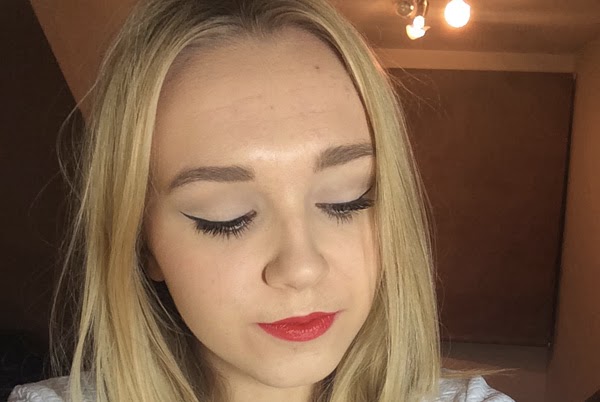
It’s a well-known fact in the beauty world that the ingredients that make up sun protection (zinc oxide and titanium dioxide to be exact) can cause flashback in photography. Have you ever looked back at pictures of yourself and though that your face looked extremely pale and ghostly compared to your face? This could be the reason. You need to check all products you use – moisturiser, primer, foundation and powder should ideally be sans-SPF. Having said this, some products with SPF that I own photograph beautifully (L’Oreal True Match being one of those), but if you’ve never tested them, it’s safer to err on the side of caution. My favourite foundation for photography is by far the Giorgio Armani Luminous Silk Foundation – I am wearing it in both the pictures above, and – if I do say so myself – I think it captures the light beautifully, leaving my skin looking glowy and healthy. 
Contour, Contour, Contour
Features can definitely get lost in photos, so I definitely make sure to bring back colour and definition to my face. I am planning on doing a post all on contouring soon, but to keep things short and simple, I use Mac Harmony Blush with a Sigma F35 Tapered Highlighter Brush to sculpt out my cheekbones and temples. I also find it important to bring back some warmth and colour to my skin, so to the high points of my face (i.e. where the sun would naturally hit) I apply bronzer – usually Nars Bronzing Powder in Laguna. I also always apply blush, as you can sometimes look a little washed out and lost in photos. All these steps are done with a much heavier hand than I would ever do in the daytime in order for them to even show up in pictures. This also means you have to spend a little longer blending everything out, and I like to just go back over everything with the brush I used for my foundation.
Define those Eyes
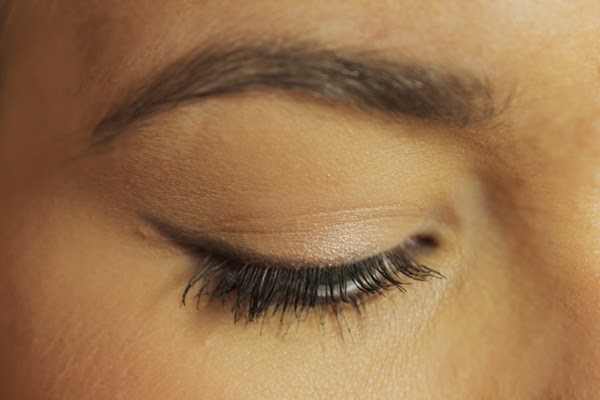
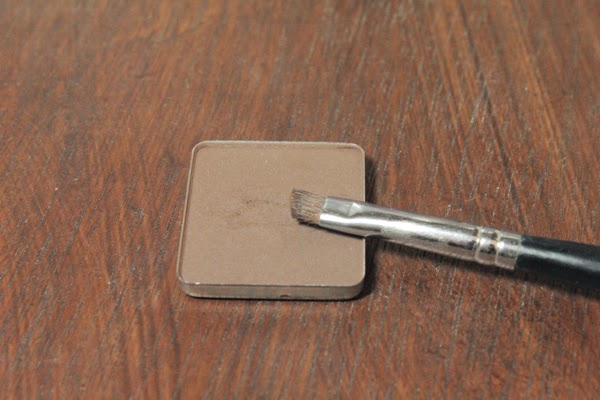
You don’t necessarily need to be the master of smokey eyes to look great in pictures. I think the most important element of your eye makeup is defining the upper lash line. I personally love to line my eyes with a gel liner – something like the Mac Blacktrack Fluidline. It is equally important to tight line – this is lining the inside of the eye. I find this a little unflattering on the lower waterline, but doing it on the upper really helps to darken the lash line and create drama. Lashes are also a must for me; they make your eyes stand out and really pop in photos. My ultimate favourites for my eye shade are the Ardell Demi Wispies. My final tip is to give some love to your eyebrows. I tend to go in much heaver with my brow pencil, my favourite being the Anastasia Beverley Hills Brow Wiz in Taupe. As you can see from the pictures I still don’t go over the top, but they are lot more defined than I would go for an everyday look. 
Hopefully this post has been somewhat useful or interesting and I hope that you can use some of these tips when you’re next being photographed! I am by no means claiming to be an expert, and I am completely self taught. Have you got any tips for makeup for photography?
RachelElizabeth

Eye Brushes | My Favourites

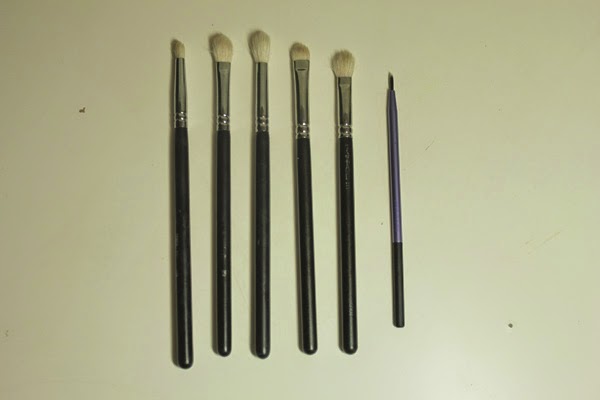
Today I bring you part two of my brush series. In case you missed it, yesterdays post rounded up my favourite face brushes (read it here). Now its only fair that we dedicate a post to eye brushes. The line up again consists of brushes from Sigma and Real Techniques but today we have a couple of Mac thrown in there…

Beginning with Sigma, my first favourite is the E30 Pencil Brush. This I primarily use for applying shadow on the lower lash line or smoking and smudging out eye liner. This is an absolute essential for any smokey eye.

The next three brushes are essential for blending. The Sigma E25 Blending Brush is a godsend when it comes to applying colour to the crease of the eye. If you don’t have a brush like this you need one asap. Something about the slightly tapered shape and the texture just does the work for you, and you will be a blending pro in seconds. The Sigma E35 Tapered Blending Brush is the E25’s slightly fluffier counterpart. I use this with no extra product on the brush and blend out the edges of an eye look. The final blending brush is the infamous Mac 217. This is practically identical to the E25, but I find it definitely comes in handy having more than one blending brush on hand – especially when more elaborate eye looks come into play.

Possibly my favourite eye brush is the Mac 239. This is perfect for packing on shadows on to the lid as it deposits the right amount of shadow. This is great for both pressed and loose shadows, and I am just in love. I personally think this is a Mac brush worth investing in as it works better than any other flat shader brush I’ve tried, including the Sigma.

Finally, we have the Real Techniques Fine Liner Brush. This has fast become my favourite brush to use with gel liner, because, as the name would suggest, the tip is incredibly fine. It makes it so easier to create thin precise line, but it is still easy to build up the thickness and intensity. It also cleans really easily which is ideal as gel liner can be quite stubborn on brushes. 

Thankfully this post was far more concise than yesterdays, and I hope that you found this mini series somewhat useful or interesting! What are your go-to brushes?

RachelElizabeth

Face Brushes | My Favourites


Tools are something that I have never really addressed on the blog, but I am a firm believer in the importance of makeup brushes. Now I’m not talking investing mega bucks – as you will see all the brushes I mention in this post won’t dent your bank balance too badly, and they are definitely worth trying out.


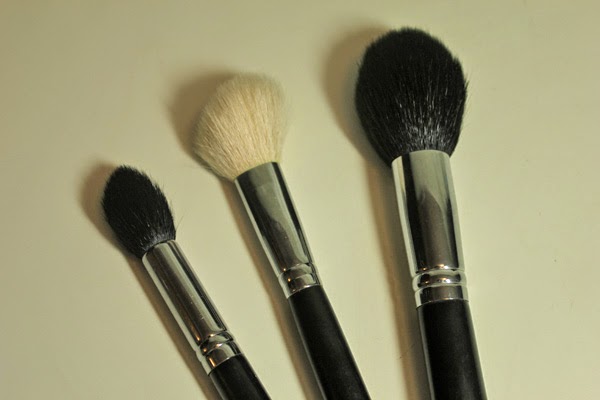
(Sigma F35, F40, F20)

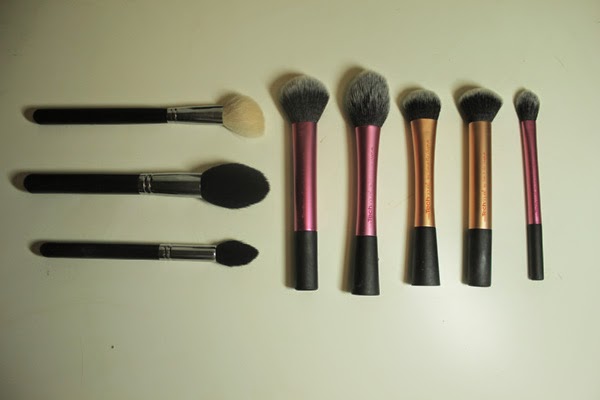
Let’s begin with Sigma. This is where my love affair for makeup brushes began. When Sigma first launched their brush range and when everyone on YouTube was working for them and raving about how incredible they were (and how they were dupes for Mac brushes) I had to get myself a kit. Several years later, I now own more brushes from Sigma than I’ll ever need and there are 3 face brushes that really stand out to me.

The F25 Tapered Face Brush has become my go-to brush for applying face powder. Because of the way its shaped, it only picks up a small amount of product on the tip of the brush. This makes it impossible to apply too much powder to the skin which could make you look cakey. What it is also great for is a more precise application of powder than a typical big fluffy powder brush, and makes it easier to apply powder in more difficult-to-reach areas such as under the eyes and around the nose. This brush is also incredibly soft and is a dream to apply product with.

Next up is the F40 Large Angled Contour Brush which I love for applying blush. I know that it is called a ‘contour’ brush, but sometimes the beauty in brushes is to use for whatever you think is best. For me, this is the perfect size and shape for my cheek and deposits the right amount of product. I do like to wear quite a lot of blush, so if you prefer a little less punch, I would say to go for some sort of duo fibre brush which will help to sheer out the colour. This brush blends product seamlessly and I just love it. 

The final Sigma brush in the line up in the F35 Tapered Highlighter Brush. I actually do like using this brush for its intended purpose – highlighting. The point is fine enough that it applies the perfect amount of highlighter to the tops of the cheekbones, down the bridge of the nose and any other high points of the face. However, I also love this for the exact opposite – contouring. Again the tapered tip allows for precise application, but it is soft enough to blend out as you apply so you don’t end up with a brown stripe on your cheek.


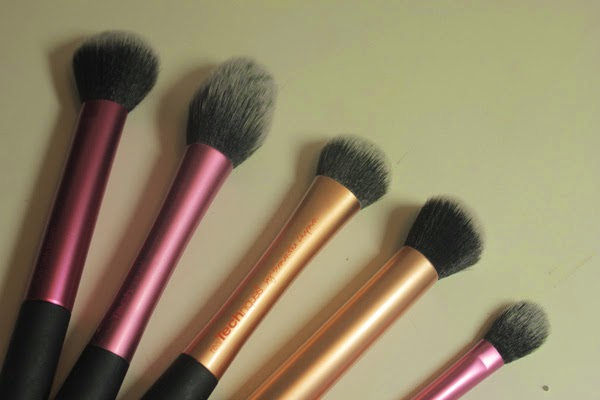
(Real Techniques Multitask, Blush, Expert Face, Buffing, Setting)

Moving on to the ever popular Real TechniquesUndoubtedly, they are the brush brand of the moment, and its well deserved. They are affordable, great quality and not to mention they are made by some of my favourite YouTubers. Right now, there are five brushes that really stand out for me.

Beginning with one of the newest addition to my arsenal, the Multitask Brush. As the name suggests, this can be used for pretty much anything. I predominantly use it for blush – although I already credited the Contour Brush as great for blush, but if you’re anything like me and like to change up your blush colour, its always nice to have a few to chop and change from.

The Blush Brush is my go to for bronzer (controversial, I know). For me, it’s the perfect size to bronze up the face as it  covers quite a large surface area and makes application foolproof. As with all the Real Techniques brushes, its ridiculously soft which makes it that little bit more satisfying to use.

Lumping the next two into one, my go to foundation brushes are the Expert Face Brush and the Buffing Brush. They are very similar, but the Expert Face is a little denser, meaning you get a little bit more coverage, but the finish is pretty much the same. The main difference is that currently only the Expert Face is available to purchase individually, so that may sway your purchase…

Last but not least the Setting Brush. Again, my favourite use for this brush is not for what its intended for. What I use this for is for blending out concealer, both under my eyes and on the face. What is so great about this brush is that it removes any excess product so you don’t end up with cake face, and it blends it out to an airbrushed finish. It also eliminates the need to touch your face, being much more hygienic. 

Phew… Sorry for the very text heavy post, I clearly have a lot to say when it comes to brushes. And I’m still not done… Check back tomorrow for my favourite eye brushes.

RachelElizabeth

Everyday Makeup Look | Soft Winged Eye Liner

I have loved winged eyeliner for years – I find it’s really flattering on my eye shape (and on many eye shapes for that) and shapes the eyes to have a more feline effect. I am normally one for bold black liner, but recently I’ve been finding myself wanting to create softer looks, especially when wearing bold lips. Today I bring you a look I’ve been wearing quite a lot recently – a soft brown wing that still elongates the eyes, but in a much softer and more subtle way.


Instead of a pencil or a gel, I have been reaching for eye shadows to create this look. My favourite option has been the Inglot Matte Eyeshadow Shade 327. It is a warm medium dark brown, and I find it really brings out the blue in my eyes. If you have brown or green eyes, a purple-hued shade would work well to make your eye colour pop. I apply it with the Sigma E65 Small Angle Brush starting by tracing the wing on the outer corner. I then drag the brush down  from the wing and line my eyes to about the middle of my eye. I find that this creates a more subtle look, and by not bringing the shadow into the inner corner of the eye, it makes them appear wider. 


Although very simple, this is becoming one of my favourite natural make up looks as it provides definition without being too obvious. This would also work great with coloured eyeshadow as it would create a fun pop of colour, but not in an obnoxious way.

RachelElizabeth

Festive Makeup Look #1 | Quick Classic Glamour

We are now well into christmas party season so I thought I would do a series of festive makeup looks, suitable for lots of occasions. Today’s look is for those in a hurry, but still want to look glamorous. A classic red lip and winged liner combo is a look I turn to when I need to look nice fast, and it will make it look like you have put much more effort than you actually have. 

Base:
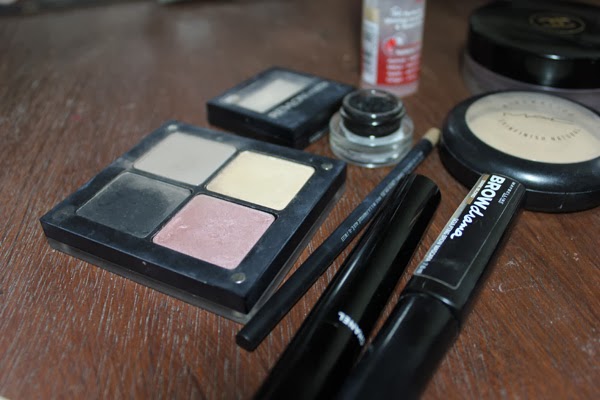
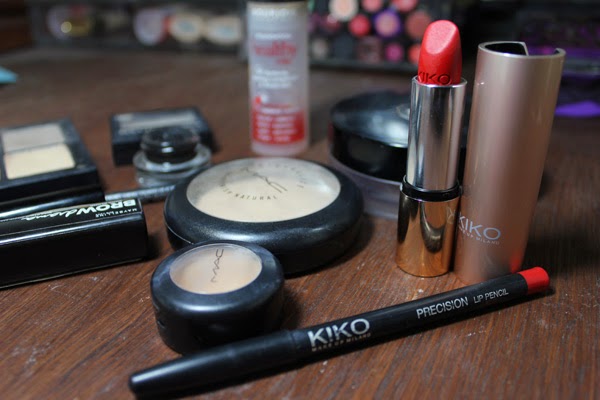
I started off with Bourjois Healthy Mix Foundation in 52 with a Real Techniques Expert Face Brush which gives me quick medium coverage, that isn’t completely matte but is one of those foundations that gives the look of a glow from within. I concealed under the eyes and on any blemishes with the Mac Studio Finish Concealer in NC20, then set everything with the Mac Mineralize Skinfinish Natural in Light Plus.

Eyes:
I first filled in my brows with the Mac Eye Brows in Fling and then set them in place with the Maybelline Brow Drama Sculpting Mascara in Dark Blonde. I primed the eyes with Urban Decay Eyeshadow Primer Potion and washed Revlon Matte Eyeshadow in Vintage Lace all over the lid and up to the brows to brighten. I believe this shade may have been discontinued, but any shadow a shade or two lighter than your skin tone will work fine. I then contoured my eye slightly with the Inglot Eyeshadow in Matte 349, and by sweeping a light taupey-grey through the crease gives subtle definition without requiring too much blending and effort. I then lined the eyes with Mac Fluidline in Blacktrack with a Sigma E10 Small Eye Liner Brush, and created a medium-sized flick (winged eyeliner post coming soon!). Finally, I curled the lashes and applied lots of the  Chanel Le Volume De Chanel Mascara.

Cheeks:
I contoured the cheeks with the Chanel Soleil Tan De Chanel Bronzing Makeup Base (and I do find this fine to apply over powder) and applied the Tarte Amazonian Clay Blush in Exposed (sadly not available in the UK), which is a great goes-with-anything blush especially for bright lips.

Lips:
I lined and filled in the lips completely with the Kiko Precision Lip Pencil in 306 Geranium Red and applied the Kiko Velvet Mat Satin Lipstick in 606 Fire Red. A completely Kiko lipstick wasn’t intentional, but they are two red lip products that I have been loving recently.

This look could easily be added to if you have more time – some false lashes and glitter would be good additions. Next up in this festive make up series will be a going out christmas look.


RachelElizabeth