
How To Wear a Dark Lip
What’s In My Makeup Bag – New York Edition! | Blogmas Day #14
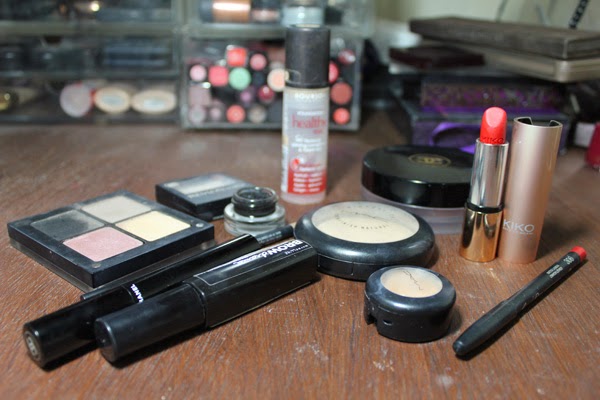
The time has finally come for my birthday trip to New York! This afternoon I am jetting off to NYC with the boyf to celebrate my 21st birthday! This was actually my present from my parents, and it is possibly the best a girl can ask for. However, I have committed myself to Blogmas, and I really want to keep up with posting everyday, so I actually plan on scheduling enough posts until I return on Thursday! I thought I would start off with what makeup I am planning on taking on my trip, as these are some of my favourite posts to read – everyone loves to be nosey…
I will begin by saying that I am by no means a light packer – I like to have options. Having said that I don’t think that I have gone too overboard; I will leave that one up to you.
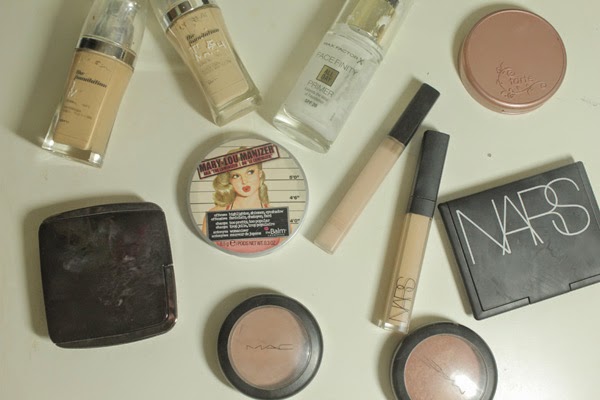
Face
Because the days will be long, I definitely wanted to bring a primer. One of my all time favourites is the Max Factor Facefinity All Day Primer (full post here), and as I’ve almost ran out, I thought I would be able to finish it off on the trip. I then decided to bring my tried and true L’Oreal True Match Foundation (review here)- I am bringing two shades (W1 and W4) because I fake tan, and once it fades I need to mix the shades. I am also bringing two concealers: the Nars Radiant Creamy Concealer in Custard for blemishes and general imperfections and the Maybelline Fit Me Concealer in Fair to highlight the face. Moving on to powder products, I am bringing the Hourglass Ambient Lighting Powder in Dim Light (post here) to set my makeup, and the Nars Bronzing Powder in Laguna and the Mac Blush in Harmony for general bronze and contour goodness (check out my recent post for more details on this!). I decided to bring two blushes – my all time favourite Tarte Amazonion Clay Blush in Exposed and Mac Mineralize Blush in Warm Soul. These are quite similar colours, but Exposed is matte and Warm Soul is very shimmery. Finally, I’m bringing my current favourite highlighter theBalm Mary Lou-Manizer (post here).
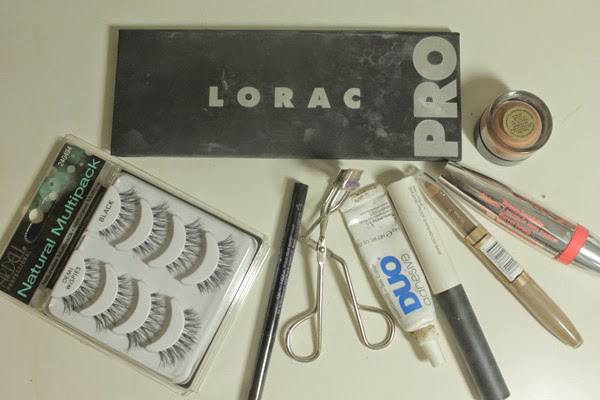
Eyes
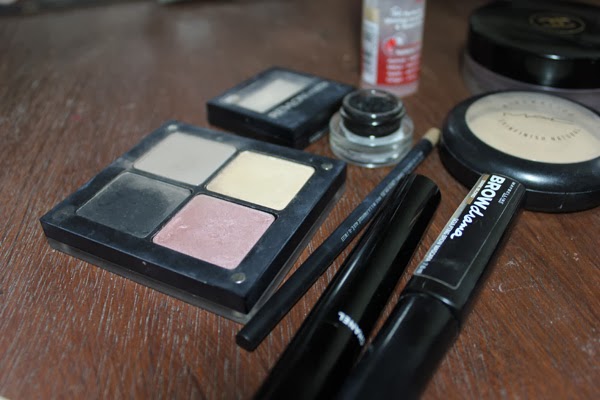
This category is one that I feel I have actually been quite selective. I had to bring my trusty Nars Smudgeproof Eyeshadow Base to keep my eyeshadow looking flawless all day, and I also decided to bring the Estee Lauder Pure Colour Stay On Shadow Paint in Chained for days when I want a quick easy option. I decided to stick to one palette that has everything I need, and this had to be the Lorac Pro Palette – I have a full review and swatches here. This is still quite new to my collection but it is probably my favourite palette, and I know that it will serve me well. Next is the Urban Decay Ink for Eyes liquid eyeliner and for mascara I am bringing the Bourjois Volume 1 Seconde Mascara. And of course I am bringing an essential to my makeup routine – my Tweezerman Eyelash Curlers and my current eyebrow pencil, the Revlon Brow Fantasy in Dark Blonde. As a bit of a glamorous addition to my makeup for my trip I thought I would bring a pack of my favourite eyelashes, the Ardell Demi Wispies.
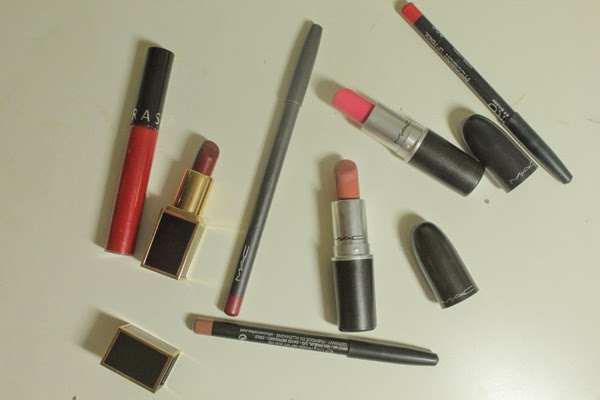
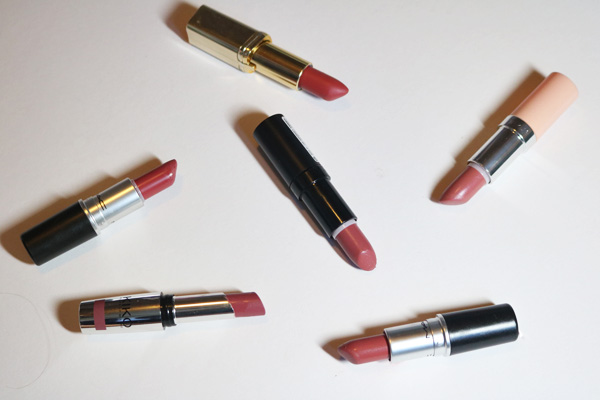
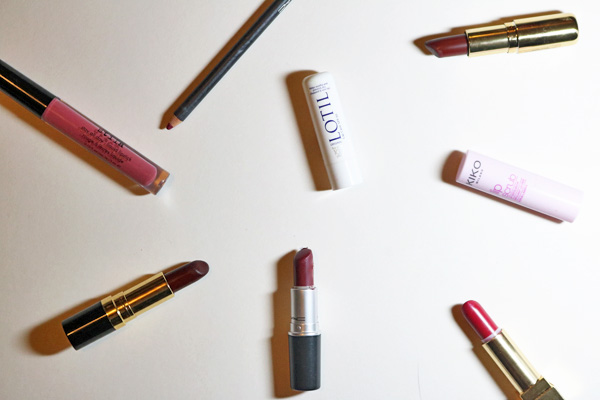
Lips
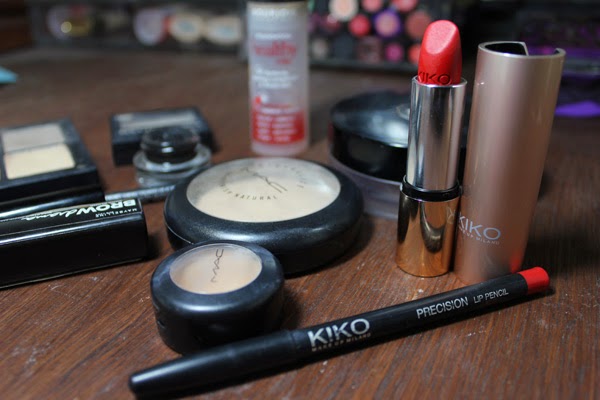
Probably my favourite category, and one that I always struggle to pack for! So I decided to bring the basic choices. For my nude lip option, I have picked the Kiko Precision Lip Pencil in 300 Caffe Latte and the Mac Lipstick in Kinda Sexy. This is one of my favourite go-to combinations at the moment. For a bold red, I chose another Kiko Lip Pencil in 306 Geranium Red and my current obsession, the Sephora Cream Lip Stain in 01 Always Red. In case I’m feeling a bold lip that isn’t red, I decided to bring Mac Impassioned, which is another fave of mine. And finally, the newest lipstick in my collection, Tom Ford Leonardo (full post here) just because it’s stunning. For a lip liner to accompany that, I’m bringing Mac Beet Lip Pencil.
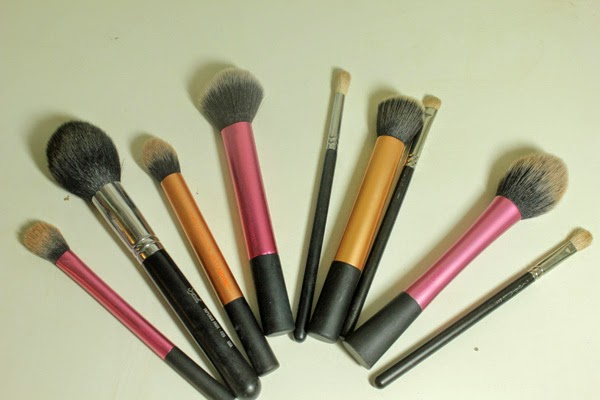
Brushes
The final category is tools. For ease, I will list the brushes I am taking, and if you want to know more about my favourites, check out my posts on brushes here. So from left to right we have: the Real Techniques Setting Brush, the Sigma F25 Tapered Face Brush, the Real Techniques Contour Brush, the Real Techniques Multitask Brush, the Sigma E35 Tapered Blending Brush, the Real Techniques Buffing Brush, the Mac 239 Brush, the Real Techniques Blush Brush and the Mac 217 Brush. I know this may seem like a lot of brushes, but it means that I will have everything I could possibly need on my trip.
I apologise for the incredibly wordy post, but I hope that you enjoyed having a nosey in my makeup bag. Stay tuned tomorrow for all the skincare goodies that will be travelling across the Atlantic with me.
–RachelElizabeth
Manicure Monday #25 | Kiko Nail Lacquer 240 Apple Red | Blogmas Day #1
Welcome to Blogmas! I will be posting every day from now up to Christmas Eve, which is both scary but exciting! Since Manicure Monday is somewhat of a tradition for me now, there seems no better way to kick off this blogathon. Now I have written my fair share about Kiko now, and their nail polishes are definitely something worth looking into. There are a ridiculous number of shades in the line, but today we are talking about one that is very seasonally appropriate…
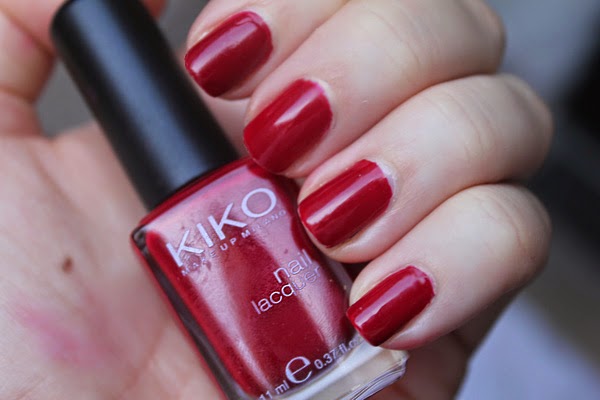
Kiko Nail Lacquer in 240 Apple Red is a classic burgundy shade. It is slightly more brown-toned that blue-toned which makes the ideal A/W shade. As with all the other Kiko polishes I have tried, the formula is on point. It stays chip-free for days, is opaque with two coats, and looks incredibly glossy and amazing on the nails. I’m also a huge fan of the brush on these – I am quite partial to a thinner brush as I find them to be much neater and easier to control.
Burgundy shades are so classic for this time of year, and I think its probably one of the easiest colours than anyone can pull off. It injects colour without being too garish, but isn’t so dark that it is really intense. What is your favourite colour to rock in the festive season?
–RachelElizabeth
FOTD | Halloween Edition – Pop Art

I know Halloween has been and gone, but I still thought it would be fun to share with you what I wore. I had a lot of fun creating this pop art inspired look, and although it took me a long time, I definitely think that the end result was worth it. If you’re interested in how I did this look, keep reading…
I started with my standard foundation routine – the Hourglass Veil Mineral Primer to ensure extra longevity, my L’Oreal True Match in W4 followed by the Nars Radiant Creamy Concealer in Custard under my eyes and on any blemishes. I then set this all in place with the Mac Mineralize Skinfinish Natural in Medium Plus.
Now onto the fun part. I primed the eyes using my standard Nars Smudgeproof Pro Prime Eyeshadow Primer. I then used the hot pink out of the Urban Decay 15th Anniversary Palette (no longer available but any pink would work) all over my eye lid, and created a winged out effect using an angled brush. I then lined my eyes using the Mac Blacktrack Fluidline and extended the line to reach where I had winged the eyeshadow to. With the same liner, I outlined the shape of the eyeshadow, to create a slight cut crease look, and connected it to the inner corner. I lined the waterline with the Nyx Jumbo Eyeshadow Pencil in Milk to create a bright eyed cartoon effect, then lined under the lashline with the fluidline. Next up was the eyebrows. I started by creating the basic shape with a black eyeliner and then went back over that with the fluidline to make sure it was really dark. I created the expression marks in the crease and in between the eyebrows by making a sad expression and following my natural lines.
The tear was pretty simple – I drew the basic shape with a bright blue eyeliner pencil and then set it in place with a corresponding eyeshadow. I then lined that again with the fluidline. Next up was the lips – I started by lining and filling in my lips with my trusty Kiko Precision Lip Pencil in 306 and topped it with the Bourjois Rouge Edition Velvet in Hot Pepper to create a vibrant and long lasting lip shade. I then lined the lips with the fluidline. Next up was the dots – the part I was worried about the most. I used my favourite Maybelline Color Drama Intense Velvet Lip Pencil in Red Essential as the tip was a bit thicker than a regular pencil which actually made drawing on the dots quite easy. They may not have been the neatest – I struggled on my cheeks where my skin was slightly more squidgy – but I think it worked for the overall effect. The finishing touches were to line the perimeter of my face with the gel liner and then spray my hair yellow with coloured hairspray (link here).
So I hope you enjoyed this post. If you were interested in what outfit I wore, it was an aztec style dress from Missguided – but I think any bright dress could have worked for this look. What did you go as for halloween?
Manicure Monday #7 | My Nailcare Essentials

Firstly, I want to explain the lack of posts this blog has seen over the last couple of weeks. I have just come back to university and I had a lot of deadlines at the beginning of the semester and getting back into the workload has been more difficult than I first thought. Excuses aside, today’s post is the start of an attempt to get back in to the swing of things, and what better way to do that than strip it back to basics and talk about my nail care routine…
OPI Nail Envy (£18.65 here)
I use this product for two things – a nail strengthener, as its advertised, and as my base coat. This is a really great product if your nails are in a bad condition. When mine are, I paint a layer on my nails everyday for 7 days and then they are much stronger and healthier-looking. However, I’ve been using this as a base coat for a while, and my nails seem much less susceptible to breaking. If you’re thinking about getting this, it is worth checking out QVC as they have some great value deals, as the price tag can seem a little steep.
Seche Vite Fast Dry Top Coat (£9.00 here)
There is a lot hype and controversy around this product but I definitely think that it is worth the hype. It is by far the best top coat I have tried as it dries so quickly and prolongs the wear of my polishes hugely. It also makes any polish look really shiny and glossy, which is something I really like in a top coat. When I finish this bottle I may try another top coat to see if I can find one just as good without the controversial ingredients.
Kiko Glass Nail File (£2.50 here)
This is my first venture into glass nail files, and I don’t think I will going back to regular files. I find that it creates a smoother line on the nail and it doesn’t feel as harsh or damaging. This file feels much more expensive than it is, and as usual I am so impressed by another product by Kiko.
What I haven’t included in this post is a nail varnish remover, not because I don’t use them, but because I don’t have a favourite. I do really like the Bourjois Magic Nail Polish Remover, which I’m currently out of, but I don’t see it as essential. What I would like to get into is cuticle oils, as I’m quite lazy in that department, and I think my nails would thank me if I did. What are your nail essentials?
–RachelElizabeth
Manicure Monday #4 | Festive Nails
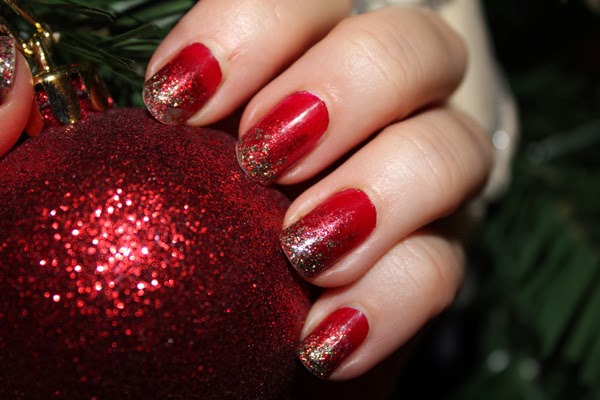
I always overload on the glitter at Christmas, and I decided that this year I would attempt some sort of nail art. I am in no way talented at nail art, so this look is definitely simple and easy to do. This is my attempt at a glitter gradient…
For this look you will need 3 nail varnishes – one colour to go as a base, a glitter that is the same colour as the base, and a second glitter of a different colour (I think multicoloured which have the base colour in look especially good). I started by painting a layer of Kiko Nail Enamel in 240 Apple Red as my base colour and as this is a very opaque polish I only needed one coat. Then I painted Barry M Glitter Nail Paint in 150 Red Glitter (Barry M are great for inexpensive glitter polishes!) on the top two thirds of the nail, making sure the top third of the nail was thicker and gradually painting on less polish towards the bottom. Then finally I used China Glaze Nail Lacquer in Twinkle Lights (unfortunately limited edition!) on the top third of the nail, trying not to create two harsh lines by slightly staggering the glitter.
I think the combination of red, gold and green is so festive, but this look could work for any time of the year by changing up the colours. It would look great on new years eve with dark navy or purple. I don’t know how often I will venture into nail art on Manicure Mondays, but this is a nice tame start…
–RachelElizabeth
Festive Makeup Look #1 | Quick Classic Glamour
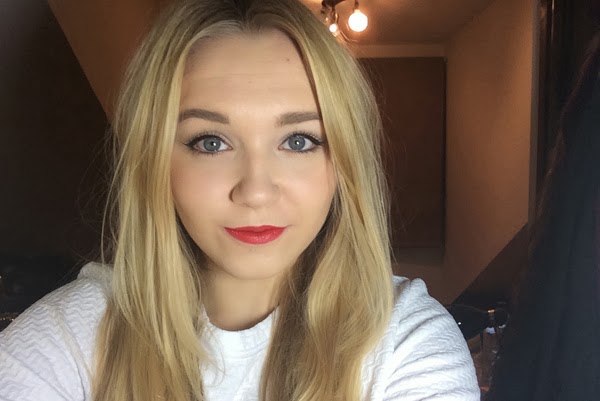
We are now well into christmas party season so I thought I would do a series of festive makeup looks, suitable for lots of occasions. Today’s look is for those in a hurry, but still want to look glamorous. A classic red lip and winged liner combo is a look I turn to when I need to look nice fast, and it will make it look like you have put much more effort than you actually have.
Base:
I started off with Bourjois Healthy Mix Foundation in 52 with a Real Techniques Expert Face Brush which gives me quick medium coverage, that isn’t completely matte but is one of those foundations that gives the look of a glow from within. I concealed under the eyes and on any blemishes with the Mac Studio Finish Concealer in NC20, then set everything with the Mac Mineralize Skinfinish Natural in Light Plus.
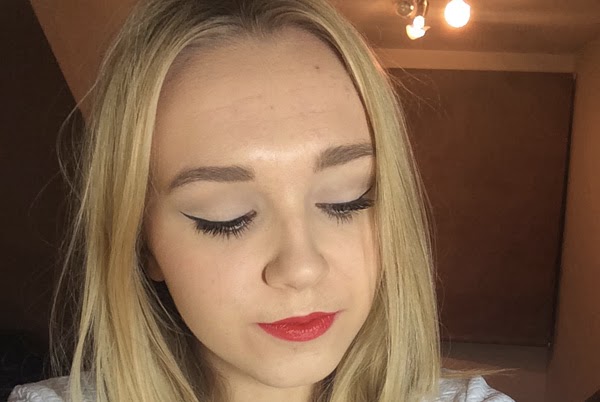
Eyes:
I first filled in my brows with the Mac Eye Brows in Fling and then set them in place with the Maybelline Brow Drama Sculpting Mascara in Dark Blonde. I primed the eyes with Urban Decay Eyeshadow Primer Potion and washed Revlon Matte Eyeshadow in Vintage Lace all over the lid and up to the brows to brighten. I believe this shade may have been discontinued, but any shadow a shade or two lighter than your skin tone will work fine. I then contoured my eye slightly with the Inglot Eyeshadow in Matte 349, and by sweeping a light taupey-grey through the crease gives subtle definition without requiring too much blending and effort. I then lined the eyes with Mac Fluidline in Blacktrack with a Sigma E10 Small Eye Liner Brush, and created a medium-sized flick (winged eyeliner post coming soon!). Finally, I curled the lashes and applied lots of the Chanel Le Volume De Chanel Mascara.
Cheeks:
I contoured the cheeks with the Chanel Soleil Tan De Chanel Bronzing Makeup Base (and I do find this fine to apply over powder) and applied the Tarte Amazonian Clay Blush in Exposed (sadly not available in the UK), which is a great goes-with-anything blush especially for bright lips.
Lips:
I lined and filled in the lips completely with the Kiko Precision Lip Pencil in 306 Geranium Red and applied the Kiko Velvet Mat Satin Lipstick in 606 Fire Red. A completely Kiko lipstick wasn’t intentional, but they are two red lip products that I have been loving recently.
This look could easily be added to if you have more time – some false lashes and glitter would be good additions. Next up in this festive make up series will be a going out christmas look.
–RachelElizabeth
Manicure Monday #1 | Kiko Nail Lacquer in 381 Purple Grey
I have a lot of nail polish – whenever I mention it or somebody sees my collection I am always faced with shocked reactions. I thought of starting Manicure Monday because I love talking about and showing off my polishes, but also as a motivation to wear all the ones I have.
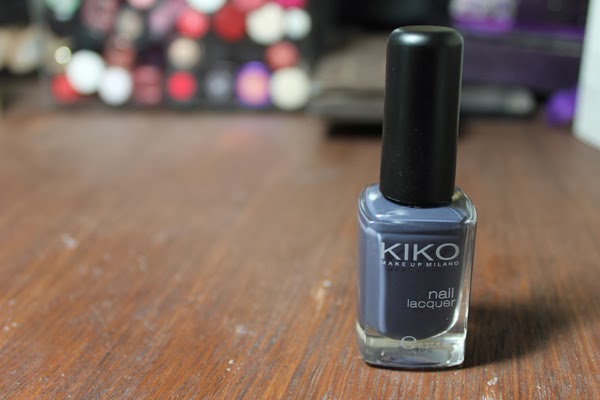
Kiko Nail Laquer in 381 Purple Grey (£3.90 here)
Kiko is an Italian brand, slowly making its way into the UK. The first product I ever had was also a nail varnish which my mum bought me as a present from Italy. I have since ventured into the Westfield shop several times and have tried quite a few products from the brand. This nail varnish, was also a gift from my mum from Italy this summer. They ship to many countries across Europe, and I must admit, I am getting very excited about this brand.
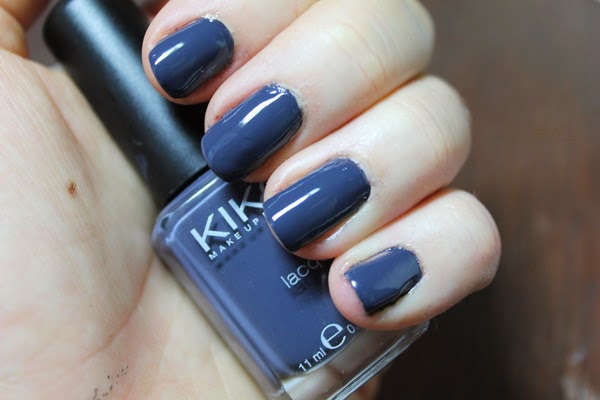
Purple Grey is an apt name for what the polish looks like in the bottle, but on the nails it runs much more blue. It is a dark grey-toned blue, a nice colour for autumn/winter. It is an interesting shade and provides the look of black on the nails without being so harsh. I thought it seemed quite original, but looking through my collection I found that Rimmel Salon Pro Nail Polish Lycra in Punk Rock (£4.49 here) is very similar, but is slightly more purple.
In terms of longevity, I found this average. It lasted about 2 or 3 days without any minor chipping, which is standard for my nails. The brush isn’t too wide or too thin, and the formula is easy to paint on the nails – 2 coats are required for opacity. For the price, I’d say this is a good polish, and I would recommend it if these stormy colours are up your street.
-RachelElizabeth