
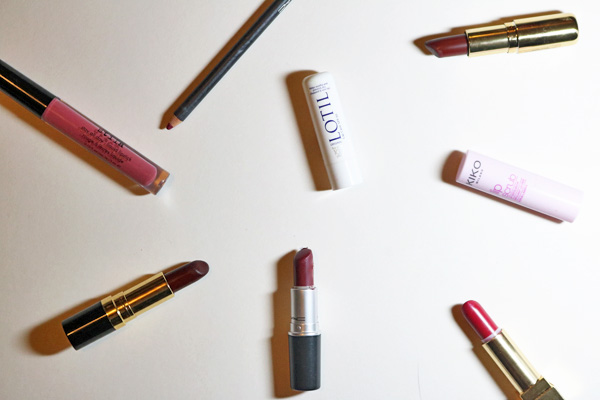
Let’s Talk About Bacne
I apologise if things are getting a little TMI in these parts today, but we shouldn’t be ashamed of talking about our supposedly embarrassing issues. Bacne (or back-acne, body acne etc.) is an issue that I’ve dealt with on and off for quite some time now, but I’m happy to tell you that I have found my solution, and hopefully this can work for all my fellow sufferers out there…
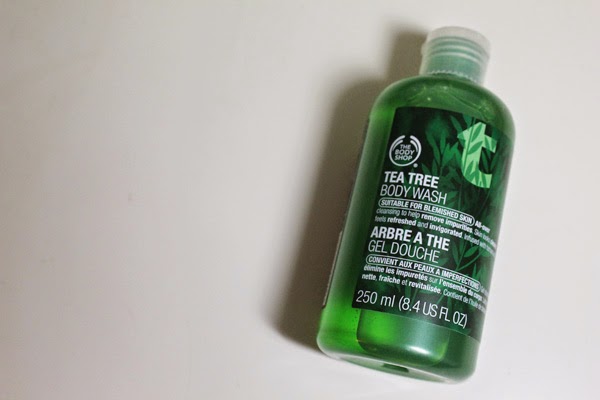
I’ve been much more into working out recently, and working out equals getting very sweaty whilst wearing a sports bra. I was breaking out in the whole area where the bra had been touching and rubbing against my skin, and I knew I had to bring out my tried and tested shower gel. Introducing The Body Shop Tea Tree Body Wash. This stuff works wonders for me. I will use this on any areas I’m breaking out on my body and it tends to clear up in about a week. If you’re unfathomably flexible, then you may be able to reach all areas of your back with just your hand, but I find using some sort of bath lily or loofah really helps. It’s almost important to me that I don’t stay in my sweaty gym clothes for too long after a workout – this seems to really aggravate my skin.
Do let me know if you have any other tips for treating and getting rid of one of the most irritating skin issues, as I’d love to try some other products. Also, if you’re going to give this one a go, make sure you get it when The Body Shop are having an offer (when are they not?) – I got mine for £3.60!
–RachelElizabeth
Bronzing vs. Contouring | Differences and My Favourite Products – Blogmas Day #11
In a recent blogger twitter chat, the topic was contouring. It was when a few people expressed confusion over what contouring actually is and how it differs from bronzing. I am not claiming to be a makeup artist, but over the years of watching my fair few YouTube videos and reading blogs, I feel I have a firm grasp on all of this. So today I thought I would discuss in detail how I like to sculpt and warm up my face, and hopefully some of you may find this useful…

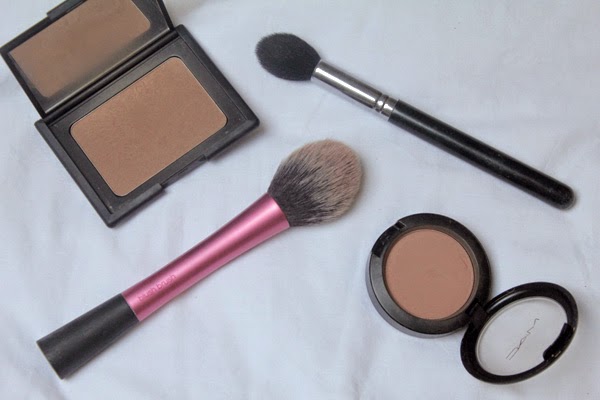
So, let’s start with bronzing. The easiest way to think about bronzing is to use it as a way to warm up the skin. I like to out bronzer on the high points of the face – in other words, where the sun would naturally hit. As you hopefully can tell in the picture above, my skin is warmest on the cheeks, temples and forehead. If I’m going for a super bronzed look, then I will hit the bridge of the nose as well. Effectively, this application of bronzer is to mimic a tan, or a sunkissed glow. It also helps to bring colour to the face and keeps it from being one flat colour, which can sometimes look unnatural. It is also handy to bronze down the neck, as for many of us, that is much lighter than the rest of the body. This can help make the transition from your face to your neck look a lot more seamless and, again, natural. My favourite bronzer – one I have mentioned many times and even dedicated a whole blog post to here – is the Nars Bronzing Powder in Laguna. For my skin tone (I go between a NC20 and NC30), this is the perfect colour, but this obviously will be different for everyone. For application, I love the Real Techniques Blush Brush – the tapered end allows for precise application, but the rest of the bristles help to blend it seamlessly.
Moving on to contouring, this is arguably the most popular trend in makeup right now. There are constant pictures on Instagram of the extreme intense cream contouring a la Kim Kardashian, but today I thought I’d discuss a more wearable version. Contouring is sculpting the face – you create depth and dimension by mimicking shadows and darkening the areas on your face that you wish to recede. The most common place to contour is underneath your cheekbones, which I have done fairly naturally in the picture above. To find where to contour your cheekbones, you can suck in your cheeks to make the typical fish face, or a pretty foolproof method is to imagine a line from the top of your ear to the corner of your mouth. To make this look natural though, I would never bring this colour past the middle of the cheek – if you a imagine a line going straight down from your pupil, you don’t want to have any shadow past that. You can also contour other parts of your face, depending on what suits you and where you would like to sculpt. A popular place is also the nose, but I feel like this is something quite difficult to master and make look natural. If you want a more pouty-looking lip, you can apply a little underneath your bottom lip which will make it look fuller. These are only a few ways to contour, and the possibilities are endless.
Personally, I think the most natural method for contouring is using a powder. When looking for one, you want to find one that is a lot more cool-toned than your bronzer – i.e. it should look considerably more grey in tone. This is because this will look more like a natural shadow rather than an orangey-toned line on your cheek. It is also essential that your powder is matte, as any shimmer will bring attention to the area, when the key is to make it recede and draw attention to the highlighted or non-contoured parts of the face. My go-to contour product is the Mac Harmony Blush, and I would see this being perfect for fair to medium skin tones. My favourite brush for contouring is the Sigma F35 Tapered Highlighter Brush – it is tapered enough that it only applies a small concentrated amount of product, but much like the Real Techniques brush, the outer bristles help to blend everything out.
I hope this rather wordy post has been somewhat useful to you, and if I haven’t explained myself very clearly then please let me know! It’s important to remember that the key to contouring, like any aspect of makeup, is practice. Nobody gets it perfect on their first try, and part of the fun of makeup is experimenting and finding what’s best for you. Do you love contouring and bronzing as much as me?
–RachelElizabeth
Makeup for Photography | Blogmas Day #10
With the festive season well and truly underway, it’s likely that many of you will be invited to more events than usual. Whether they’re nights out, christmas parties, or general reunions, you will probably encounter some sort of camera, and when you put so much effort into your makeup when getting ready, you want to make sure you’re camera ready. I’ll admit I’m not often photographed, but after many club nights and their ‘professional’ photos, I’ve picked up a few key tips that I thought I would share with you…
Avoid SPF
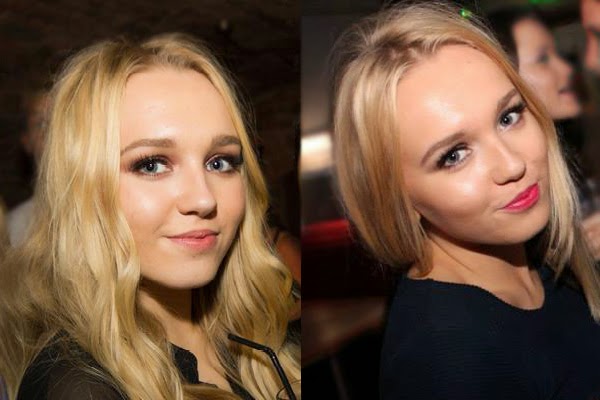
It’s a well-known fact in the beauty world that the ingredients that make up sun protection (zinc oxide and titanium dioxide to be exact) can cause flashback in photography. Have you ever looked back at pictures of yourself and though that your face looked extremely pale and ghostly compared to your face? This could be the reason. You need to check all products you use – moisturiser, primer, foundation and powder should ideally be sans-SPF. Having said this, some products with SPF that I own photograph beautifully (L’Oreal True Match being one of those), but if you’ve never tested them, it’s safer to err on the side of caution. My favourite foundation for photography is by far the Giorgio Armani Luminous Silk Foundation – I am wearing it in both the pictures above, and – if I do say so myself – I think it captures the light beautifully, leaving my skin looking glowy and healthy.
Contour, Contour, Contour
Features can definitely get lost in photos, so I definitely make sure to bring back colour and definition to my face. I am planning on doing a post all on contouring soon, but to keep things short and simple, I use Mac Harmony Blush with a Sigma F35 Tapered Highlighter Brush to sculpt out my cheekbones and temples. I also find it important to bring back some warmth and colour to my skin, so to the high points of my face (i.e. where the sun would naturally hit) I apply bronzer – usually Nars Bronzing Powder in Laguna. I also always apply blush, as you can sometimes look a little washed out and lost in photos. All these steps are done with a much heavier hand than I would ever do in the daytime in order for them to even show up in pictures. This also means you have to spend a little longer blending everything out, and I like to just go back over everything with the brush I used for my foundation.
Define those Eyes
You don’t necessarily need to be the master of smokey eyes to look great in pictures. I think the most important element of your eye makeup is defining the upper lash line. I personally love to line my eyes with a gel liner – something like the Mac Blacktrack Fluidline. It is equally important to tight line – this is lining the inside of the eye. I find this a little unflattering on the lower waterline, but doing it on the upper really helps to darken the lash line and create drama. Lashes are also a must for me; they make your eyes stand out and really pop in photos. My ultimate favourites for my eye shade are the Ardell Demi Wispies. My final tip is to give some love to your eyebrows. I tend to go in much heaver with my brow pencil, my favourite being the Anastasia Beverley Hills Brow Wiz in Taupe. As you can see from the pictures I still don’t go over the top, but they are lot more defined than I would go for an everyday look.
Hopefully this post has been somewhat useful or interesting and I hope that you can use some of these tips when you’re next being photographed! I am by no means claiming to be an expert, and I am completely self taught. Have you got any tips for makeup for photography?
–RachelElizabeth
An Unexpected Combination | Blogmas Day #5
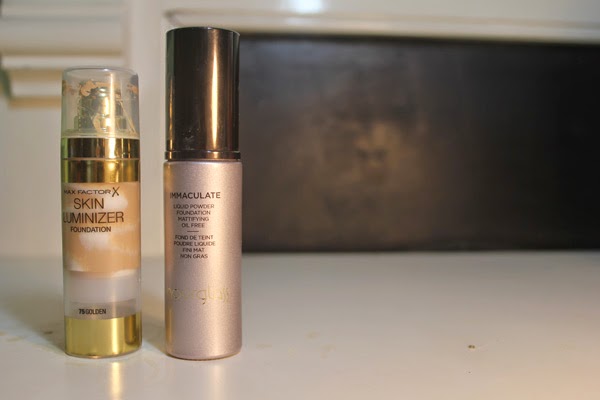
I am all about mixing foundations. Whether it’s to get the perfect shade, or getting the best out of two formulas, sometimes you just have to in order to find the perfect base. Recently I mixed two foundations that were from opposite ends of the spectrum both in terms of finish and and price-point, and I ended up discovering and absolute gem…
The foundations in question are the Hourglass Immaculate Liquid Powder Foundation (full review here) and my recent favourite Max Factor Skin Luminizer Foundation (also full post here). If you read my posts on these, you can see that these are both favourites of mine, but for very different reasons. The Hourglass offering is perfect for oily skins – it is incredibly mattifying, long-lasting and has great coverage. In opposition, the Max Factor foundation is dewy skin in a bottle, and has light to medium coverage. I have the former in a pale shade for when I am sans-fake tan, and the latter in a much darker shade.
My tan was slightly faded, so I needed to create my own custom colour. The reason I choose these two was because, surprisingly, they have a very similar texture. They both are slightly moussey and whipped. Once I mixed them together on the back of my hand, and applied it with a Real Techniques Buffing Brush, was when the magic happened. The result was a natural-looking finish – right in the middle of matte and dewy. It also lasted perfectly throughout the day, and stayed looking luminous and fresh.
I hope this post inspired you, if you don’t already, to start experimenting and mix your foundations as you may just uncover something incredible. What’s your favourite unexpected beauty trick?
–RachelElizabeth