FOTD | Go-to Night Out Makeup

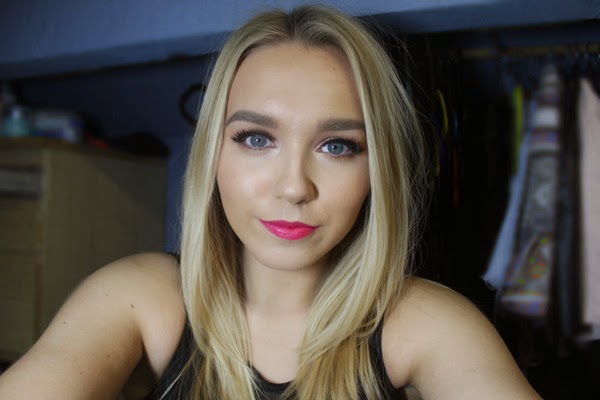
If you’re at university, or you have been, you’ll understand the feeling that you may not have that much time to do your makeup before a ‘spontaneous’ night out. Or maybe you’re not one to spend hours getting ready. Recently I have found my favourite look for a night out that I can throw together pretty quickly, and as an added bonus, it looks really nice in photography. So if you’re into the bold lips, lashes and brows, keep on reading…

I’m always one to focus most of my time on my base. When it comes to a night out, I rarely skip using the Hourglass Veil Mineral Primer as it keeps my makeup in place better than any other product I’ve tried. For foundation lately, my favourite has to be L’Oreal True Match – this is a great budget alternative for my beloved Giorgio Armani Luminous Silk (check out my full review here). I add the Nars Radiant Creamy Concealer anywhere I may need some extra coverage, and I also take a shade lighter under my eyes and on the high points of my face to highlight. I set everything in place with a powder, either the Mac Mineralize Skinfinish Natural or the Hourglass Ambient Lighting Powder in Dim Light. I also found it important to add colour and definition to the cheeks or your face can look pretty flat in pictures. I bronze up the skin with Nars Laguna Bronzing Powder, and have been loving the Anastasia Beverly Hills Contour Kit to add shadows under the cheekbones and on the temples, and I also like using the lighter shades to set my under eye concealer and any highlighting I have done. I’ll top the look off with a little powder highlighter – my favourite recently has been the Bobbi Brown Shimmer Brick in Beige. I add some to the tops of my cheeks, the tip of the nose, the cupids bow and the chin. 


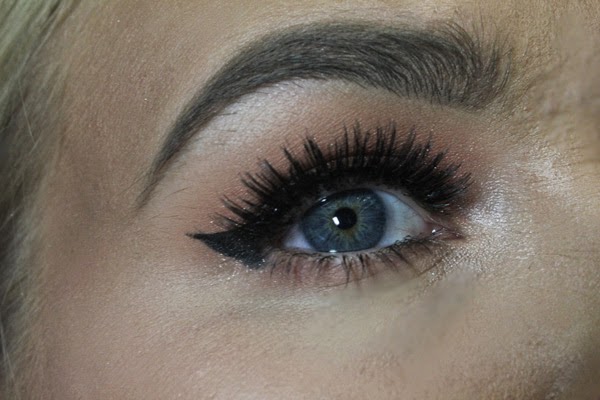
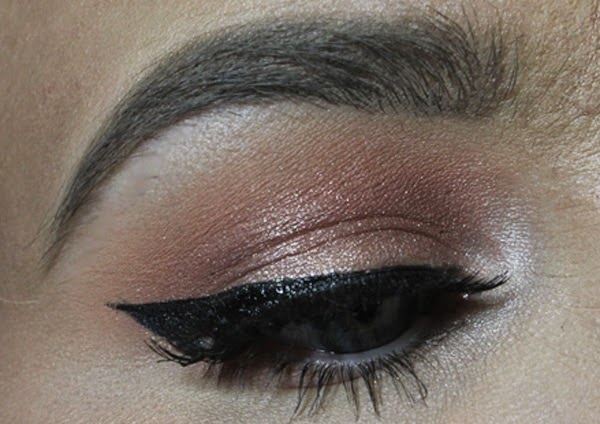
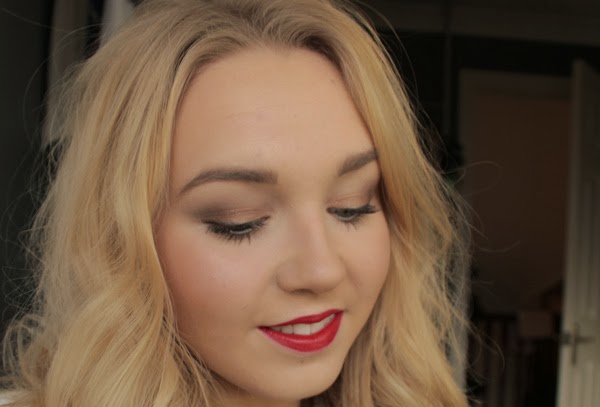
This eye makeup is incredible simple and easy to achieve. I start by defining the crease, and I do this by building up different shades of orangey-browns, increasingly getting darker to achieve a blended and blown out look. Any matte browns will work for this, but I tend to reach for my Makeup Geek Eyeshadows, in particular Peach Smoothie, Creme Brulee and Cocoa Bear. I will then pack a shimmery shade all over the lid, and my absolute favourite for this is Mac Tan Pigment. It catches the light beautifully and is amazing for any warm-toned look. I then create a winged out eyeliner with the Kat Von D Tattoo Liner in Trooper, apply lashings of mascara, and then a pair of false lashes. These will help your eyes really pop and add instant glamour to any look. The pair I’ve used in this look are the Eylure no. 121 which are thick, fluffy and are longer on the outer corner, which help to emphasise the winged-out shape of this look. I’ll then run some of the shades I used in my crease along the lower lash line to balance out the look. To finish off the eyes, I filled in my brows with the Anastasia Dip Brow Pomade in Blonde, going for quite a strong brow which I think works well with this look. 

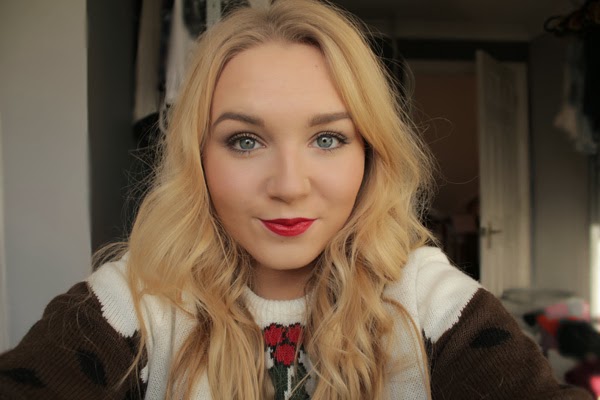
Finally, the star of the show, the bold lip. I find that I can wear any colour with this look, but my favourite shade to wear by far is a bright pink. I’m definitely a lipstick addict, so I have several favourites, but the shade I went for in this look is Mac Viva Glam Miley Cyrus which I have a full post on here. With a bright lip, you tend to need a little added colour on the cheeks, so for blush my go to is Tarte Amazonian Clay Blush in Exposed as it is a no-brainer shade that goes with any look.


I hope you enjoyed this look, and perhaps if you’re not so into bold lips this may have inspired you to give one a go? I think they are so flattering and will also reduce your getting ready time as the eyes really don’t need as much work. Let me know your go-to look for a night out below! 

RachelElizabeth

FOTD | Halloween Edition – Pop Art


I know Halloween has been and gone, but I still thought it would be fun to share with you what I wore. I had a lot of fun creating this pop art inspired look, and although it took me a long time, I definitely think that the end result was worth it. If you’re interested in how I did this look, keep reading…


I started with my standard foundation routine – the Hourglass Veil Mineral Primer to ensure extra longevity, my L’Oreal True Match in W4 followed by the Nars Radiant Creamy Concealer in Custard under my eyes and on any blemishes. I then set this all in place with the Mac Mineralize Skinfinish Natural in Medium Plus

Now onto the fun part. I primed the eyes using my standard Nars Smudgeproof Pro Prime Eyeshadow Primer. I then used the hot pink out of the Urban Decay 15th Anniversary Palette (no longer available but any pink would work) all over my eye lid, and created a winged out effect using an angled brush. I then lined my eyes using the Mac Blacktrack Fluidline and extended the line to reach where I had winged the eyeshadow to. With the same liner, I outlined the shape of the eyeshadow, to create a slight cut crease look, and connected it to the inner corner. I lined the waterline with the Nyx Jumbo Eyeshadow Pencil in Milk to create a bright eyed cartoon effect, then lined under the lashline with the fluidline. Next up was the eyebrows. I started by creating the basic shape with a black eyeliner and then went back over that with the fluidline to make sure it was really dark. I created the expression marks in the crease and in between the eyebrows by making a sad expression and following my natural lines. 

The tear was pretty simple – I drew the basic shape with a bright blue eyeliner pencil and then set it in place with a corresponding eyeshadow. I then lined that again with the fluidline. Next up was the lips – I started by lining and filling in my lips with my trusty Kiko Precision Lip Pencil in 306 and topped it with the Bourjois Rouge Edition Velvet in Hot Pepper to create a vibrant and long lasting lip shade. I then lined the lips with the fluidline. Next up was the dots – the part I was worried about the most. I used my favourite Maybelline Color Drama Intense Velvet Lip Pencil in Red Essential as the tip was a bit thicker than a regular pencil which actually made drawing on the dots quite easy. They may not have been the neatest – I struggled on my cheeks where my skin was slightly more squidgy – but I think it worked for the overall effect. The finishing touches were to line the perimeter of my face with the gel liner and then spray my hair yellow with coloured hairspray (link here).

So I hope you enjoyed this post. If you were interested in what outfit I wore, it was an aztec style dress from Missguided – but I think any bright dress could have worked for this look. What did you go as for halloween? 

FOTD | Makeup For Glasses

I’m not entirely sure why I’ve never spoken about or worn my glasses on my blog before, but I actually have to wear them everyday in real life. I also have contacts, but I’ve never found them comfortable enough to wear daily, and in all honesty, I actually quite like wearing glasses. The only thing that I find annoying is that makeup ultimately gets swallowed up by the frames, and there are also several factors that I have to consider when adapting my makeup for glasses.

So, my frames are Tom Ford (link here) and they are relatively new. On me I prefer a bigger frame, just because I feel it suits my round face shape. I really like the slight cat eye that these glasses have and I always go for tortoise shell frames as they are less harsh against my light features than black. However looking at them from a distance they practically look black meaning that they go with everything.

The main concept I’m going to focus on in this post is definition. Especially with big frames like mine, your face can get pretty lost and end up looking quite flat. I find it hugely important to pay extra attention to the brows – the key here is for them to look groomed, defined but not so intense that they compete with the frames. Today I used the Anastasia Brow Wiz in Taupe (full review here). I think it is also important to focusing on defining the lash line, especially when you have light-coloured eyes like me. I always go for a wing, and my favourite eyeliner of the moment is the Urban Decay Ink For Eyes (full post here). Finally, as cliche it may be when it comes to makeup looks for glasses, I love to rock a bold lip as it really balances out the face. Today I was feeling quite autumnal, so I lined my lips with Mac Beet Lip Pencil and then applied the Yves Saint Laurent Rouge Pur Couture in 60 Antifashion over the top. I love this lip combo as while it is still a berry, it still brings a lot of light and colour to the face.

I don’t believe that there should be any rules or restrictions you have to abide to when it comes to makeup, but sometimes, especially when you’re in a rush, it is nice to have a go-to look to fall back on. Glasses are a great accessory in themselves, so it often means you don’t have to wear as much makeup to make a statement. Do you wear glasses? What are your tips and tricks? 

RachelElizabeth

Festive Makeup #2 | Christmas Day FOTD

Firstly, for all of those who celebrate, I hope you all had a lovely Christmas and ate your weight in gorgeous food – I sure did… Secondly, I really liked how my makeup turned out yesterday, and I used a few new beautiful products so I thought I would share with you my face of the day.

Face
Because I wanted my makeup to last all day I primed with the Hourglass Veil Mineral Primer and then used one of my favourite foundations of late – the Bourjois Healthy Mix Foundation (the old formula – I can’t comment on the current formula!). I then concealed withe the Mac Studio Finish Concealer and set it all with my gorgeous new Hourglass Ambient Lighting Powder in Dim Light  – will review this soon!

Eyes
I primed the eyes with the Urban Decay Primer Potion. I used the Charlotte Tilbury Colour-Coded Eyeshadow Palette in Dolce Vita on my eyes – I used the prime shade (a pale champagne) all over the lid, the smoke shade (a dark cool brown) on the outer corner and into the crease, and packed the pop shade (a gold glitter) on top on the prime shade. I then took a matte black, mine being from the Urban Decay Naked 2 Palette, and lined the upper lash line and smoked it out a little. I then curled my lashes and applied the Chanel Le Volume De Chanel Mascara.

Cheeks
I bronzed up the skin with Nars Bronzing Powder in Laguna, then highlighted with the Kevin Aucoin Celestial Powder in Candlelight. For blush, I went for the Tarte Amazonian Clay Blush in Exposed (sadly not available in the UK!) to keep the cheeks neutral and so they didn’t compete with the red lip.

Lips
For lips I used the Urban Decay Revolution Lipstick in F-Bomb, which is my first venture into this line, which I’ve been dying to try. Spoiler alert: this may be the start of a new addiction…


Gold and red are a classic combination for this time of year, but one that I think can work all year round. There were a lot of luxury products in this look that are heavily coveted in the blogging world, and I will make sure to let you know what I think after I’ve had a chance to work with them a bit longer.

Seeing as it’s Christmas, I want to take the opportunity to thank everyone who has supported my blog in this first month, and I am very excited and motivated for the months to come!

RachelElizabeth