
September Favourites | Makeup
FOTD | Go-to Night Out Makeup
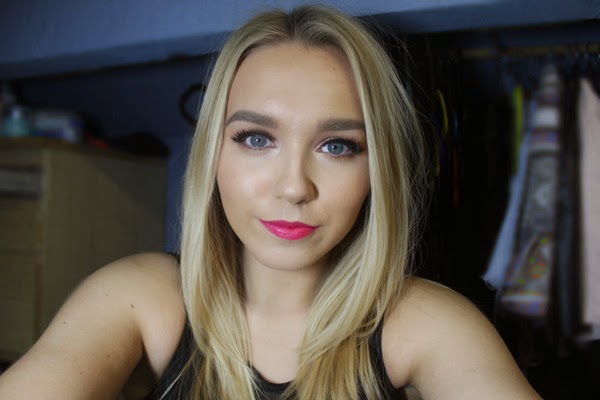
If you’re at university, or you have been, you’ll understand the feeling that you may not have that much time to do your makeup before a ‘spontaneous’ night out. Or maybe you’re not one to spend hours getting ready. Recently I have found my favourite look for a night out that I can throw together pretty quickly, and as an added bonus, it looks really nice in photography. So if you’re into the bold lips, lashes and brows, keep on reading…
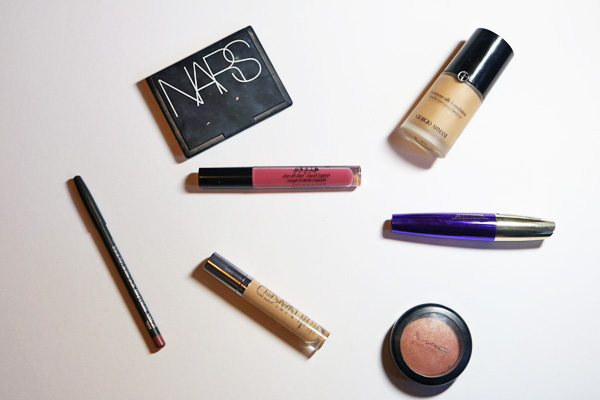
I’m always one to focus most of my time on my base. When it comes to a night out, I rarely skip using the Hourglass Veil Mineral Primer as it keeps my makeup in place better than any other product I’ve tried. For foundation lately, my favourite has to be L’Oreal True Match – this is a great budget alternative for my beloved Giorgio Armani Luminous Silk (check out my full review here). I add the Nars Radiant Creamy Concealer anywhere I may need some extra coverage, and I also take a shade lighter under my eyes and on the high points of my face to highlight. I set everything in place with a powder, either the Mac Mineralize Skinfinish Natural or the Hourglass Ambient Lighting Powder in Dim Light. I also found it important to add colour and definition to the cheeks or your face can look pretty flat in pictures. I bronze up the skin with Nars Laguna Bronzing Powder, and have been loving the Anastasia Beverly Hills Contour Kit to add shadows under the cheekbones and on the temples, and I also like using the lighter shades to set my under eye concealer and any highlighting I have done. I’ll top the look off with a little powder highlighter – my favourite recently has been the Bobbi Brown Shimmer Brick in Beige. I add some to the tops of my cheeks, the tip of the nose, the cupids bow and the chin.
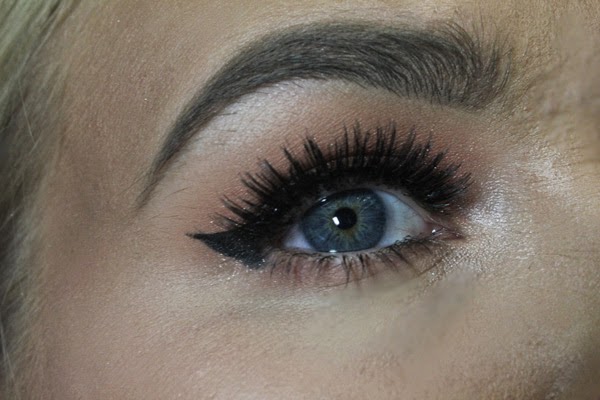
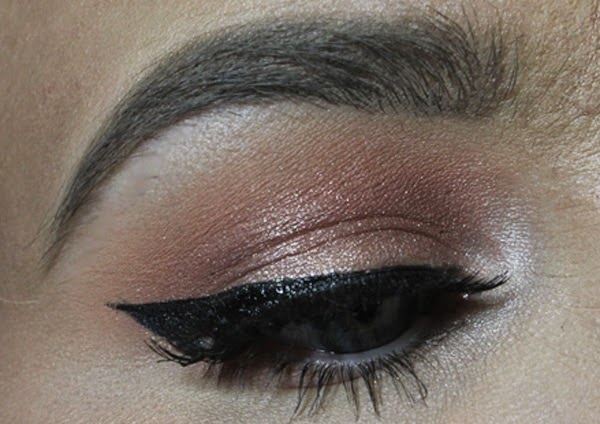
This eye makeup is incredible simple and easy to achieve. I start by defining the crease, and I do this by building up different shades of orangey-browns, increasingly getting darker to achieve a blended and blown out look. Any matte browns will work for this, but I tend to reach for my Makeup Geek Eyeshadows, in particular Peach Smoothie, Creme Brulee and Cocoa Bear. I will then pack a shimmery shade all over the lid, and my absolute favourite for this is Mac Tan Pigment. It catches the light beautifully and is amazing for any warm-toned look. I then create a winged out eyeliner with the Kat Von D Tattoo Liner in Trooper, apply lashings of mascara, and then a pair of false lashes. These will help your eyes really pop and add instant glamour to any look. The pair I’ve used in this look are the Eylure no. 121 which are thick, fluffy and are longer on the outer corner, which help to emphasise the winged-out shape of this look. I’ll then run some of the shades I used in my crease along the lower lash line to balance out the look. To finish off the eyes, I filled in my brows with the Anastasia Dip Brow Pomade in Blonde, going for quite a strong brow which I think works well with this look.
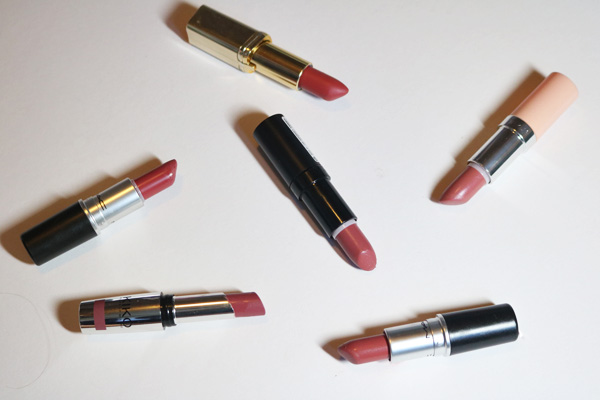
Finally, the star of the show, the bold lip. I find that I can wear any colour with this look, but my favourite shade to wear by far is a bright pink. I’m definitely a lipstick addict, so I have several favourites, but the shade I went for in this look is Mac Viva Glam Miley Cyrus which I have a full post on here. With a bright lip, you tend to need a little added colour on the cheeks, so for blush my go to is Tarte Amazonian Clay Blush in Exposed as it is a no-brainer shade that goes with any look.
I hope you enjoyed this look, and perhaps if you’re not so into bold lips this may have inspired you to give one a go? I think they are so flattering and will also reduce your getting ready time as the eyes really don’t need as much work. Let me know your go-to look for a night out below!
–RachelElizabeth
BEST OF | Pink Makeup
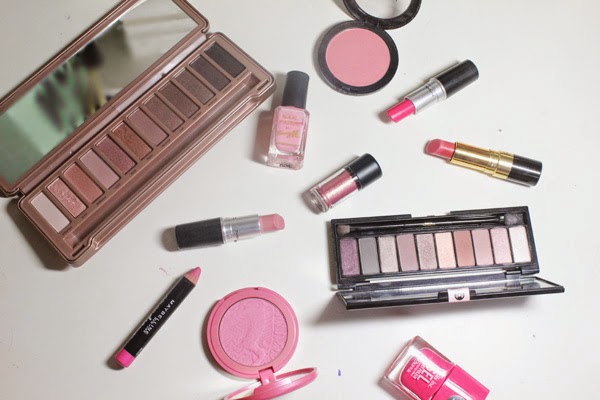
Valentine’s Day may be long gone, but there’s no reason to put down our pink-hued makeup just yet. For me, pink screams Spring. There’s something about the colour that adds a freshness, a youthfulness and a brightness to any makeup look. Whether it is a bright pop of fuchsia you’re craving, or the more toned-down rose option, this post will include something for you…
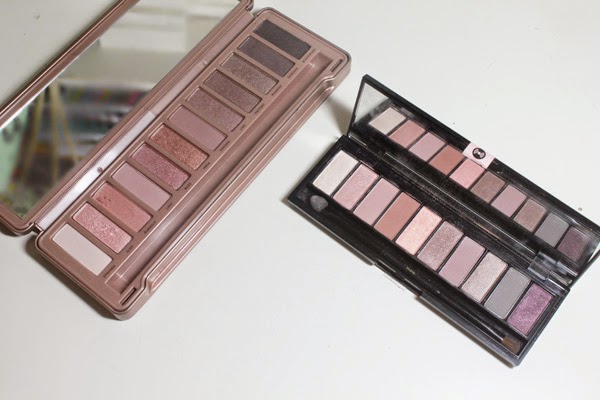
I’ll begin with perhaps the most unapproachable area of makeup when it comes to all things pink – the eyes. I can’t say that I’m a lover of neon fuchsia eyeshadow (although I was known to rock that look many, many years ago) but here I bring you subtle rose-tinted shades that while they add a hint of colour, won’t stretch you too far from the neutral spectrum. The most obvious option is the well-loved Urban Decay Naked 3 Palette, which is a stunning rose-hued neutral palette. I have posted three looks with this palette which you can check out here. If this palette is slightly out of your budget, or if you’re still on the fence about these pink hues, a great affordable alternative comes in the form of the L’Oreal La Paris Nude Palette which delivers many similar shades (full review here). The final stunning pink option (in the top image) is the Mac Pigment in Rose. This is a really interesting mixture of gold and rose, and it is intensely shimmery and metallic. If you’re a neutral lover and you want to add colour to your arsenal, this comes highly recommended.
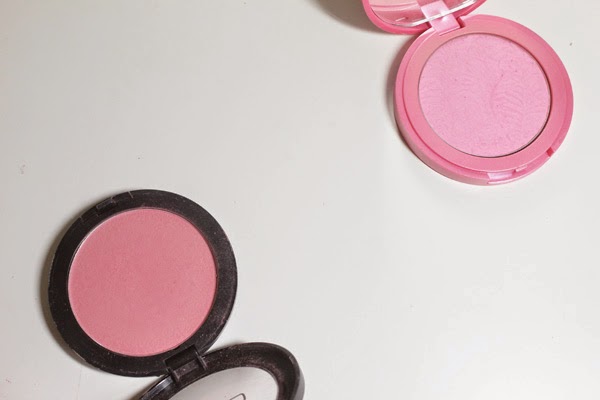
From the hardest feature to the easiest to incorporate pink is the cheeks. A pink blush is the nearest to a natural flush without using a full-on red shade. Finding the right shade of pink can add a gorgeous youthful glow to the skin. The first blush I bring you is from my favourite formula, and it is the Tarte Amazonian Clay Blush in Dollface. These are the most long-lasting and smooth blushes I have ever tried and (apologies to all my non-American readers) you need to try one out ASAP. Ordering from Sephora is achievable these days so it is a little easier to get hold off. This shade is a pop of light pink that isn’t too warm or too cool so it would suit a huge range of skintones. On the more budget-friendly side is the Gosh Blush in Flower Power. This is slightly easier to wear that the bubblegum hues and works great on those with more yellow undertones in the skin. Having said that, I also feel this is a universal shade, and the slight shimmer adds a really pretty, but subtle, sheen to the cheeks.
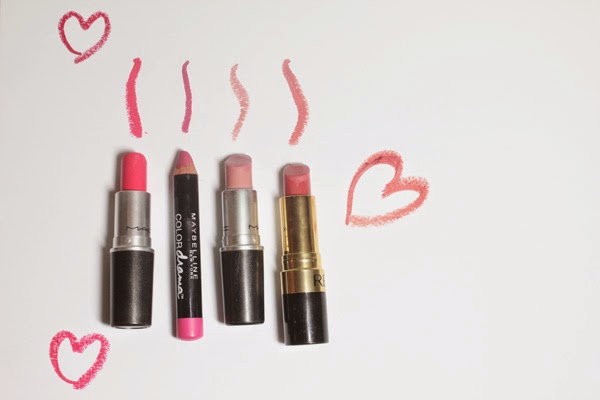
My favourite way to incorporate pink, and my favourite makeup category in general, is definitely lipstick. If you’re like me and love to experiment with your lip colour and wear bold, bright shades, then Mac Lipstick in Impassioned is one of my all-time favourite shades. This colour is probably the shade that suits me the most out of anything I’ve tried, but I can see this working on so many people, fair to dark skin. It is a yellow-toned pink that leans slightly towards red. Stunning. For a slightly more blue hued fuchsia shade, I can’t recommend the Maybelline Color Drama Lip Pencil in Fuschia Desire enough (check out my full review of these here). Moving on to the more parred-down options, for those who love nude-pink shades, Mac Lipstick in Creme Cup will definitely become an instant favourite. The formula is gorgeously creamy and the shade is very flattering. Finally, a favourite everyday shade of mine would have to be Revlon Super Lustrous Lipstick in Pink in the Afternoon. This is a stunning warm-toned mid pink. It adds colour to your lips but it isn’t so much of a statement. This is definitely the one I’d recommend for those who are new to or slightly wary of pink on the lips.
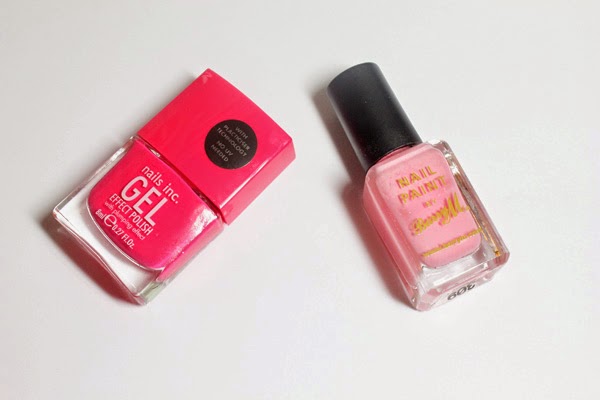
And finally, we finish on nails. For the bright, in-your-face option, this Nails Inc Gel Effect Polish in Covent Garden Place is a fun and intense fuchsia, which i think looks amazing on the toes especially. This Barry M Nail Paint in Strawberry Ice Cream is definitely more everyday appropriate, but still adds enough pink to make it fresh and fun.
So that rounds up my pink-themed makeup picks. It’s funny because I wouldn’t really associate myself as a pink gal, but there’s something about pink makeup that is just really incredible, and it is a universally flattering shade. What are your favourite pink picks?
–RachelElizabeth
What’s In My Makeup Bag – New York Edition! | Blogmas Day #14
The time has finally come for my birthday trip to New York! This afternoon I am jetting off to NYC with the boyf to celebrate my 21st birthday! This was actually my present from my parents, and it is possibly the best a girl can ask for. However, I have committed myself to Blogmas, and I really want to keep up with posting everyday, so I actually plan on scheduling enough posts until I return on Thursday! I thought I would start off with what makeup I am planning on taking on my trip, as these are some of my favourite posts to read – everyone loves to be nosey…
I will begin by saying that I am by no means a light packer – I like to have options. Having said that I don’t think that I have gone too overboard; I will leave that one up to you.
Face
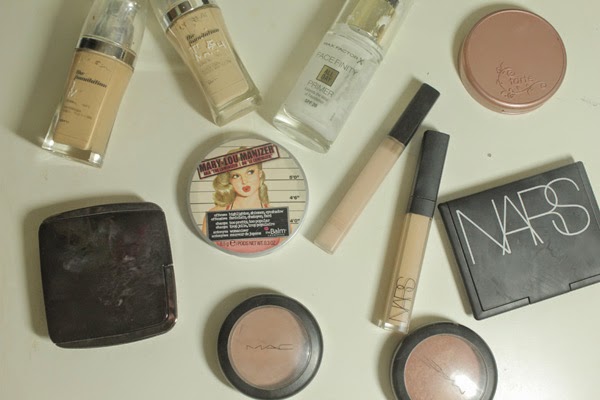
Because the days will be long, I definitely wanted to bring a primer. One of my all time favourites is the Max Factor Facefinity All Day Primer (full post here), and as I’ve almost ran out, I thought I would be able to finish it off on the trip. I then decided to bring my tried and true L’Oreal True Match Foundation (review here)- I am bringing two shades (W1 and W4) because I fake tan, and once it fades I need to mix the shades. I am also bringing two concealers: the Nars Radiant Creamy Concealer in Custard for blemishes and general imperfections and the Maybelline Fit Me Concealer in Fair to highlight the face. Moving on to powder products, I am bringing the Hourglass Ambient Lighting Powder in Dim Light (post here) to set my makeup, and the Nars Bronzing Powder in Laguna and the Mac Blush in Harmony for general bronze and contour goodness (check out my recent post for more details on this!). I decided to bring two blushes – my all time favourite Tarte Amazonion Clay Blush in Exposed and Mac Mineralize Blush in Warm Soul. These are quite similar colours, but Exposed is matte and Warm Soul is very shimmery. Finally, I’m bringing my current favourite highlighter theBalm Mary Lou-Manizer (post here).
Eyes
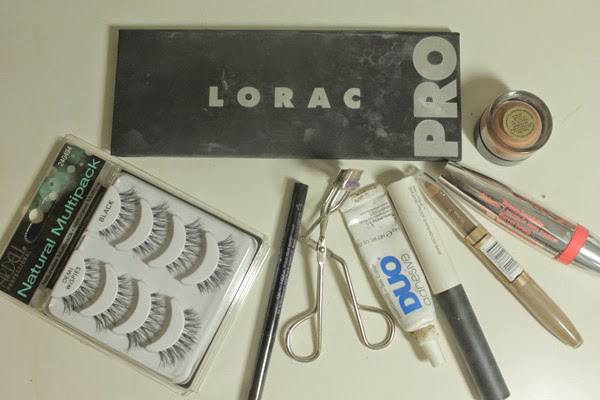
This category is one that I feel I have actually been quite selective. I had to bring my trusty Nars Smudgeproof Eyeshadow Base to keep my eyeshadow looking flawless all day, and I also decided to bring the Estee Lauder Pure Colour Stay On Shadow Paint in Chained for days when I want a quick easy option. I decided to stick to one palette that has everything I need, and this had to be the Lorac Pro Palette – I have a full review and swatches here. This is still quite new to my collection but it is probably my favourite palette, and I know that it will serve me well. Next is the Urban Decay Ink for Eyes liquid eyeliner and for mascara I am bringing the Bourjois Volume 1 Seconde Mascara. And of course I am bringing an essential to my makeup routine – my Tweezerman Eyelash Curlers and my current eyebrow pencil, the Revlon Brow Fantasy in Dark Blonde. As a bit of a glamorous addition to my makeup for my trip I thought I would bring a pack of my favourite eyelashes, the Ardell Demi Wispies.
Lips
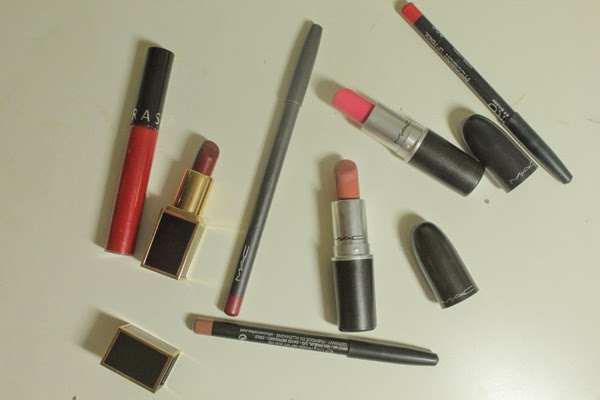
Probably my favourite category, and one that I always struggle to pack for! So I decided to bring the basic choices. For my nude lip option, I have picked the Kiko Precision Lip Pencil in 300 Caffe Latte and the Mac Lipstick in Kinda Sexy. This is one of my favourite go-to combinations at the moment. For a bold red, I chose another Kiko Lip Pencil in 306 Geranium Red and my current obsession, the Sephora Cream Lip Stain in 01 Always Red. In case I’m feeling a bold lip that isn’t red, I decided to bring Mac Impassioned, which is another fave of mine. And finally, the newest lipstick in my collection, Tom Ford Leonardo (full post here) just because it’s stunning. For a lip liner to accompany that, I’m bringing Mac Beet Lip Pencil.
Brushes
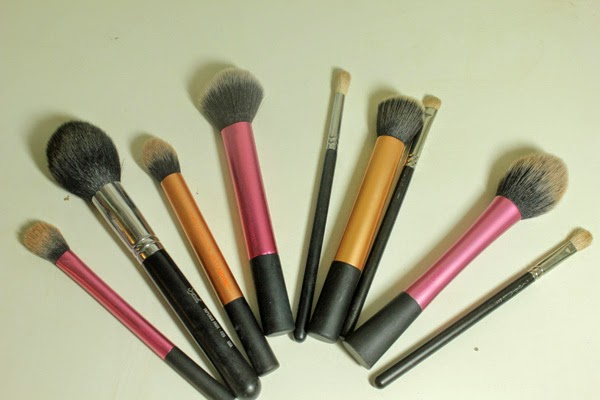
The final category is tools. For ease, I will list the brushes I am taking, and if you want to know more about my favourites, check out my posts on brushes here. So from left to right we have: the Real Techniques Setting Brush, the Sigma F25 Tapered Face Brush, the Real Techniques Contour Brush, the Real Techniques Multitask Brush, the Sigma E35 Tapered Blending Brush, the Real Techniques Buffing Brush, the Mac 239 Brush, the Real Techniques Blush Brush and the Mac 217 Brush. I know this may seem like a lot of brushes, but it means that I will have everything I could possibly need on my trip.
I apologise for the incredibly wordy post, but I hope that you enjoyed having a nosey in my makeup bag. Stay tuned tomorrow for all the skincare goodies that will be travelling across the Atlantic with me.
–RachelElizabeth
Makeup for Photography | Blogmas Day #10
With the festive season well and truly underway, it’s likely that many of you will be invited to more events than usual. Whether they’re nights out, christmas parties, or general reunions, you will probably encounter some sort of camera, and when you put so much effort into your makeup when getting ready, you want to make sure you’re camera ready. I’ll admit I’m not often photographed, but after many club nights and their ‘professional’ photos, I’ve picked up a few key tips that I thought I would share with you…
Avoid SPF
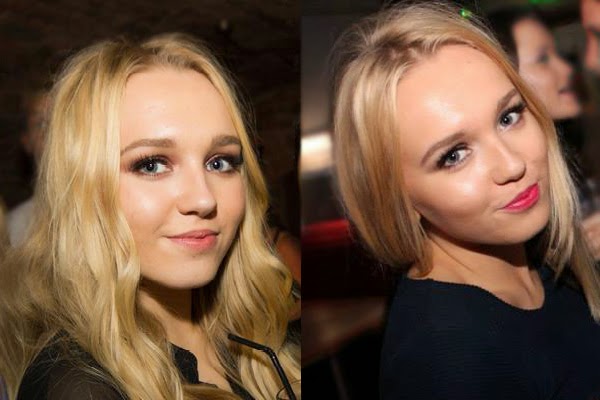
It’s a well-known fact in the beauty world that the ingredients that make up sun protection (zinc oxide and titanium dioxide to be exact) can cause flashback in photography. Have you ever looked back at pictures of yourself and though that your face looked extremely pale and ghostly compared to your face? This could be the reason. You need to check all products you use – moisturiser, primer, foundation and powder should ideally be sans-SPF. Having said this, some products with SPF that I own photograph beautifully (L’Oreal True Match being one of those), but if you’ve never tested them, it’s safer to err on the side of caution. My favourite foundation for photography is by far the Giorgio Armani Luminous Silk Foundation – I am wearing it in both the pictures above, and – if I do say so myself – I think it captures the light beautifully, leaving my skin looking glowy and healthy.
Contour, Contour, Contour
Features can definitely get lost in photos, so I definitely make sure to bring back colour and definition to my face. I am planning on doing a post all on contouring soon, but to keep things short and simple, I use Mac Harmony Blush with a Sigma F35 Tapered Highlighter Brush to sculpt out my cheekbones and temples. I also find it important to bring back some warmth and colour to my skin, so to the high points of my face (i.e. where the sun would naturally hit) I apply bronzer – usually Nars Bronzing Powder in Laguna. I also always apply blush, as you can sometimes look a little washed out and lost in photos. All these steps are done with a much heavier hand than I would ever do in the daytime in order for them to even show up in pictures. This also means you have to spend a little longer blending everything out, and I like to just go back over everything with the brush I used for my foundation.
Define those Eyes
You don’t necessarily need to be the master of smokey eyes to look great in pictures. I think the most important element of your eye makeup is defining the upper lash line. I personally love to line my eyes with a gel liner – something like the Mac Blacktrack Fluidline. It is equally important to tight line – this is lining the inside of the eye. I find this a little unflattering on the lower waterline, but doing it on the upper really helps to darken the lash line and create drama. Lashes are also a must for me; they make your eyes stand out and really pop in photos. My ultimate favourites for my eye shade are the Ardell Demi Wispies. My final tip is to give some love to your eyebrows. I tend to go in much heaver with my brow pencil, my favourite being the Anastasia Beverley Hills Brow Wiz in Taupe. As you can see from the pictures I still don’t go over the top, but they are lot more defined than I would go for an everyday look.
Hopefully this post has been somewhat useful or interesting and I hope that you can use some of these tips when you’re next being photographed! I am by no means claiming to be an expert, and I am completely self taught. Have you got any tips for makeup for photography?
–RachelElizabeth
L’Oreal Paris La Nude Palette | Review and Swatches
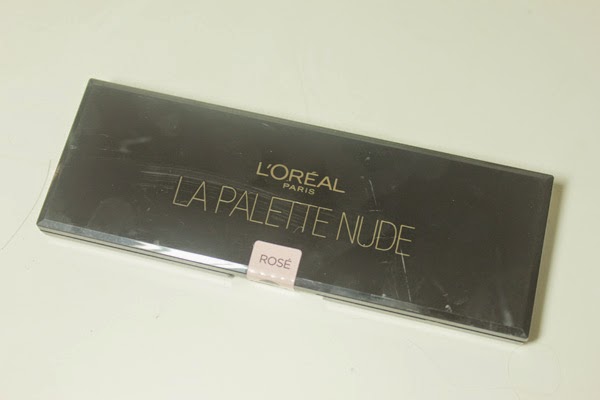
When I received an email from Boots that L’Oreal were coming out with a new neutral eyeshadow palette I immediately jumped on the waiting list. There are a few brands that dominate the budget eyeshadow front – Sleek and Makeup Revolution are probably the most popular in the blogging world, so when I saw that one of the big dogs of the high street brands were joining in the huge neutral palette trend, I was very exciting to see how it would compare…
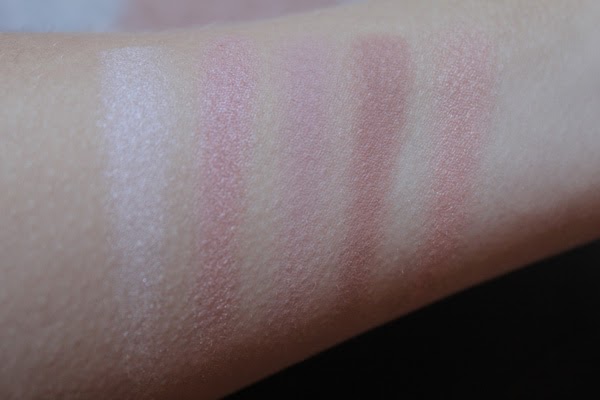
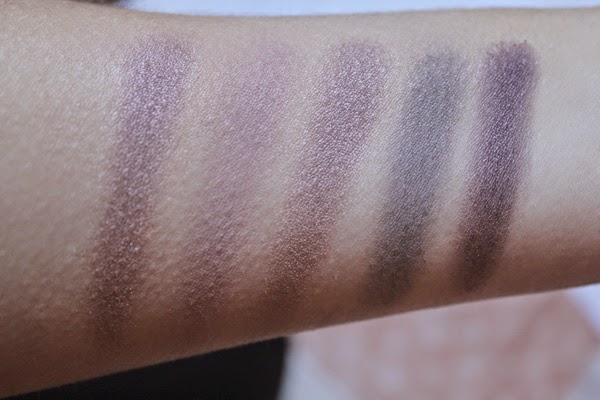
The L’Oreal Paris La Nude Palette contains 10 neutral shades that err on the rosey side (do I spy a Naked 3 dupe?). There are 6 shimmery shades and 4 mattes which I was very pleased with. Overall I was really impressed with the quality of the shadows. They were all very smooth to apply and the pigmentation is decent. I would say that the shimmery shades performed a little better than the mattes, but from experience this does tend to be the case. The selection of colours are very well thought out and all the shades work really well together. Its mainly cool toned, but what I love is the inclusion of the warm medium matte brown shade (fourth from the left) which is a really nice transition shade. The first half of the palette is perfect for subtle everyday shades, but you can create some really great smokey and dramatic looks with the other half. The best part about this palette is that you don’t need any extra shades, making it a great standalone travel product.
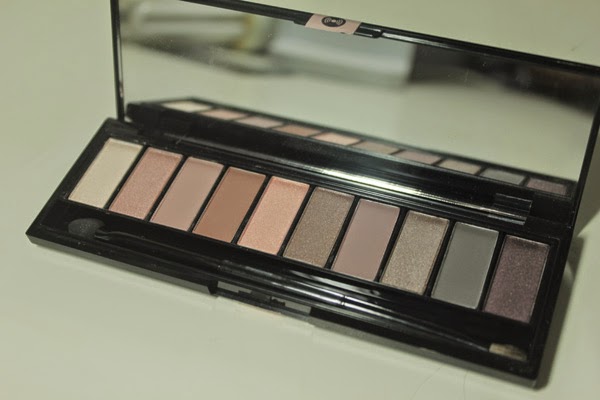
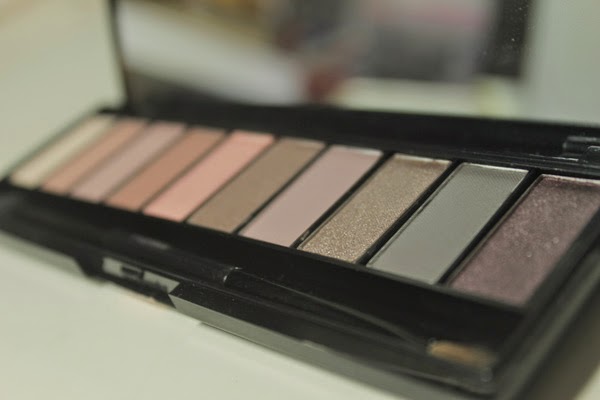
I wouldn’t say that this is the most unique palette – it has a incredibly similar tone to the Urban Decay Naked 3 Palette (check out my review of that here). However, it is less than a third of the price of the Urban Decay option, so if you don’t have that – or you’re an eyeshadow palette junkie like me – then maybe you should check this out. Regardless of the similarities, this is probably one of my favourite palettes from the high street. Have you checked this one out yet?
–RachelElizabeth
FOTD | Halloween Edition – Pop Art

I know Halloween has been and gone, but I still thought it would be fun to share with you what I wore. I had a lot of fun creating this pop art inspired look, and although it took me a long time, I definitely think that the end result was worth it. If you’re interested in how I did this look, keep reading…
I started with my standard foundation routine – the Hourglass Veil Mineral Primer to ensure extra longevity, my L’Oreal True Match in W4 followed by the Nars Radiant Creamy Concealer in Custard under my eyes and on any blemishes. I then set this all in place with the Mac Mineralize Skinfinish Natural in Medium Plus.
Now onto the fun part. I primed the eyes using my standard Nars Smudgeproof Pro Prime Eyeshadow Primer. I then used the hot pink out of the Urban Decay 15th Anniversary Palette (no longer available but any pink would work) all over my eye lid, and created a winged out effect using an angled brush. I then lined my eyes using the Mac Blacktrack Fluidline and extended the line to reach where I had winged the eyeshadow to. With the same liner, I outlined the shape of the eyeshadow, to create a slight cut crease look, and connected it to the inner corner. I lined the waterline with the Nyx Jumbo Eyeshadow Pencil in Milk to create a bright eyed cartoon effect, then lined under the lashline with the fluidline. Next up was the eyebrows. I started by creating the basic shape with a black eyeliner and then went back over that with the fluidline to make sure it was really dark. I created the expression marks in the crease and in between the eyebrows by making a sad expression and following my natural lines.
The tear was pretty simple – I drew the basic shape with a bright blue eyeliner pencil and then set it in place with a corresponding eyeshadow. I then lined that again with the fluidline. Next up was the lips – I started by lining and filling in my lips with my trusty Kiko Precision Lip Pencil in 306 and topped it with the Bourjois Rouge Edition Velvet in Hot Pepper to create a vibrant and long lasting lip shade. I then lined the lips with the fluidline. Next up was the dots – the part I was worried about the most. I used my favourite Maybelline Color Drama Intense Velvet Lip Pencil in Red Essential as the tip was a bit thicker than a regular pencil which actually made drawing on the dots quite easy. They may not have been the neatest – I struggled on my cheeks where my skin was slightly more squidgy – but I think it worked for the overall effect. The finishing touches were to line the perimeter of my face with the gel liner and then spray my hair yellow with coloured hairspray (link here).
So I hope you enjoyed this post. If you were interested in what outfit I wore, it was an aztec style dress from Missguided – but I think any bright dress could have worked for this look. What did you go as for halloween?
L’Oreal Color Riche L’Ombre Pure Eyeshadows | Review and Swatches
Unlike many of the latest hyped beauty releases, I actually picked these up before I had heard anybody talk about them. Eyeshadows is one of the areas of beauty that the budget options just generally don’t perform that well. Of course there are exceptions, and the L’Oreal Infallible Eyeshadows are definitely the best I have come across. So when I saw that L’Oreal had released another line of single eyeshadows I was very intrigued, and couldn’t stop myself picking up a few to try out.
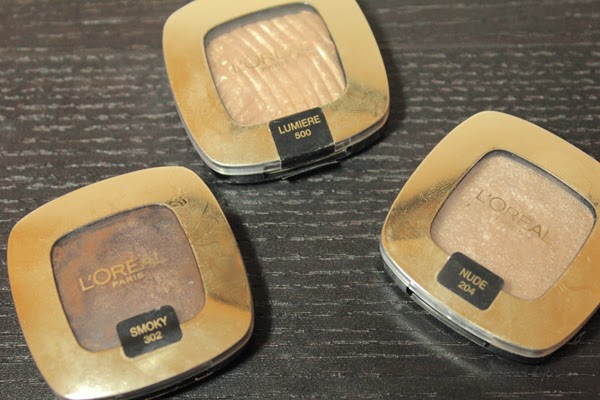
The L’Oreal Color Riche L’Ombre Pure Mono Eyeshadows are separated into 5 different categories: Nude, Smoky, Lumiere, Matte and Pop. The Nude and Smoky formulas feel much like a pressed pigment, and are quite similar to the Infallible shadows. They are both incredibly pigmented, buttery and shimmery. The Lumiere seems very similar to the formula of shadows like the limited edition Mac Extra Dimension Eyeshadows or the Estee Lauder Pure Color Gelée Powder Eyeshadows. They are very smooth and feel almost like a cream and are beautifully pigmented. As for the Matte and Pop shadows, I am yet to try them, although when swatching them in store, they seemed a little hit and miss.
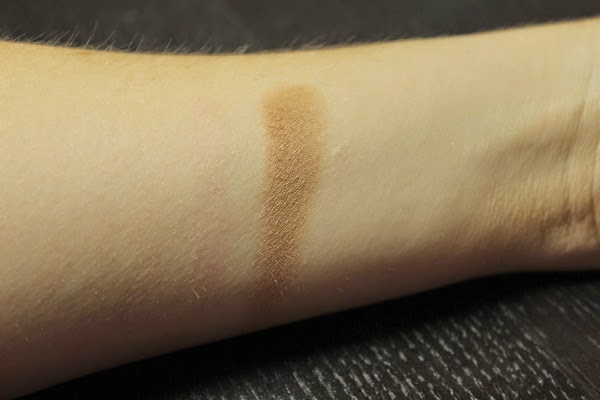
Nude 204 Golden Nude is a light shimmery champagne shade, perfect for an all over lid shade or inner corner highlight if you have deeper skin. It has got a bit of glitter in but it’s nothing too chunky or overbearing. Smoky 202 Die For Chocolate is a gorgeous deep warm brown shade with a golden sheen. Warning on this shade – mine has actually crumbled when travelling, and this is because of how soft and buttery the shades are. It is still usable, but it is now irritatingly messy and I thought was worth mentioning. 500 Lumiere Gold Mania is a stunning true gold shade.

Die For Chocolate, Gold Mania, Golden Nude
I would 100% recommend these to any eyeshadow lover, especially as they’re only £5.49 a pop! They are a great budget option, and I have honestly been reaching for these over some of my more expensive shadows. Have you picked up any from the range yet?
–RachelElizabeth
L’Oreal Glam Bronze in Golden Bronze | Review
If there is one area that the high street hasn’t quite nailed on the head, it’s bronzers. There’s something about the budget options that is always a bit off. They’re normally too shimmery, too orange, too patchy… The list goes on and on. When I was browsing the aisles of Boots and spotted this new release from L’Oreal, I was very intrigued. From just looking at it from afar, I could tell that it was a gorgeous shade, and I had to pick it up. So prepare yourself, I may just have found the perfect budget bronzer…
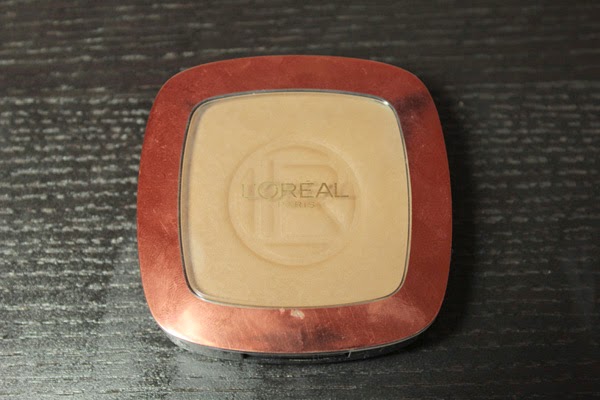
The L’Oreal Glam Bronze in Golden Bronze retails for £7.99. There are two shades in this line, and this is the darker of the two (if you’re very pale, the lighter shade may be worth checking out!). It is a somewhat neutral bronzer; it is not overly red, orange or grey based, and sits somewhere in the middle of all of those. I sit somewhere between an NC20 and an NC30 and I find this too be a perfect shade of bronzer for me, particularly when I’m tanned. It is completely matte, which I love, and therefore can be used for both bronzing up the skin and contouring.
It is quite pigmented, but not so pigmented that it becomes difficult to apply or blend into the skin. It applies beautifully and evenly to the skin and also wears incredibly well – longevity tends to be an issue for me when it comes to budget cheek products.

This bronzer has definitely surprised me and is up there with my absolute favourite, Nars Laguna. If you’re in the market for a new bronzer, I would highly recommend picking this up!
–RachelElizabeth