Tanning Routine | Xen Tan Absolute Luxe Dark Lotion

I love being tanned. I fake tan all year round, especially for nights out, but as summer slowly approaches (emphasis on the slowly), I get even more into my tanning routine. I wouldn’t necessarily deem myself an ‘expert’ on fake tan, but I feel like I’ve been doing it long enough that I don’t often make horrendous mistakes, and I have picked up a few tips and tricks along the way.


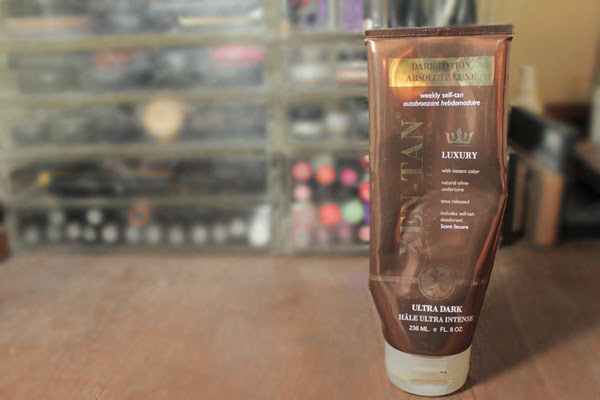
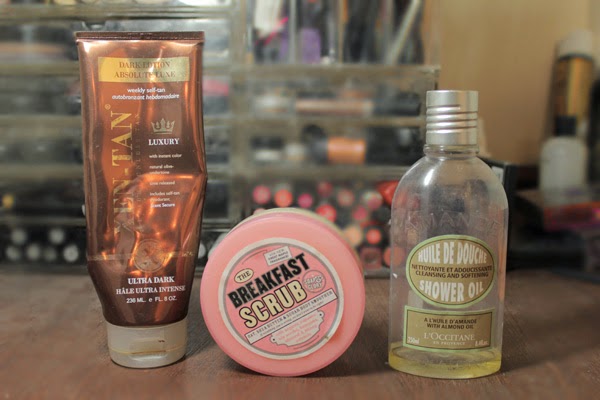
The star of the show. This is an incredible fake tan, and the hype surrounding it proves that. I apply it with the Xen-Tan mitt and it is extremely easy to apply. The guide colour is quite dark, so it’s easy to see where you haven’t applied yet. On initial application, it does have that biscuit-esque fake tan smell, but after you leave to develop for around eight hours (I usually leave it overnight) the smell does disappear after washing it off. I find that it lasts around a week, and fades evenly in that period. I use this for both my body and my face, and surprisingly, even though I have relatively sensitive skin, it doesn’t break me out. Unfortunately, this is not a purse-friendly product, and if you are planning on buying this, try not to buy it for the RRP. Sites like feel unique and beauty bay always have this on offer. 


But before applying fake tan, it is important to prep the skin properly. The first step is to exfoliate. My favourite scrubs are from Soap and Glory – the current one I’m using is the Breakfast Scrub. They come in a range of scents, and they’re all great. Exfoliating the skin is important, as it creates a smooth surface and gets rid of any flakey dry skin. This will prevent the tan from looking patchy. 


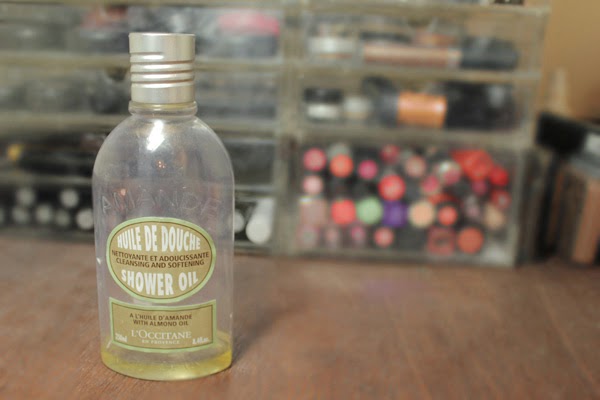
The next step after exfoliating is to shave. Since using this shower oil, I have been getting a much closer and smoother shave and it leaves my skin really soft. I also use this as a shower gel on the days after I have applied my fake tan. I find that some shower gels can be quite stripping and cause my tan to go quite patchy, but this oil is incredibly moisturising and helps maintain my tan. Although it is an oil, it doesn’t leave any greasy residue on the skin.

The final prep step would be to moisturise. The reason I haven’t included any in particular is because I haven’t found one that I love and that I would entirely recommend. I tend to use body butters – particular those from The Body Shop – and anything really rich in texture. It is important to have your skin moisturised before you apply your tan and to keep moisturising on the days after you have applied. This is to help extend the wear of your tan, and help it fade more evenly.

I hope that this post was useful to both you tan-lovers and newbies. One day I may venture from my beloved Xen-Tan, but for now (3 bottles later) I am completely smitten. What is your favourite fake tan?

RachelElizabeth

Manicure Monday #11 | Nails Inc Baker Street

Cue an ode to one of my favourite nail polishes ever… Since I first laid eyes on this colour I was instantly smitten. I’m not the biggest lover of blue nails in general, but cobalt is a colour that instantly makes me happy. This is the kind of colour that livens up any outfit and really pops on the nails. 

As you may have noticed I like nails inc polishes (check out Manicure Monday #3). Baker Street is no exception to this love. The formulation is impeccable – its smooth, opaque and easy to apply, and is incredibly long lasting. I particularly love the brushes on nails inc polishes – I am one of the only thin-brush devoted fan, I find them much easier and less messy to apply. The only downside to these is the price point. They aren’t cheap, but I really feel the price reflects the quality of the polishes. They have great on trend shades, and are always ahead of the game when it comes to new colours and finishes.


I am really loving extra bright nails at the moment. The sun has briefly been showing its face here in the UK, and it has got me in the mood for spring and summer. Although this will probably be short lived, watch out this week on the blog for some more spring and summer inspired posts.

-RachelElizabeth

Hair Care Routine | Charles Worthington Volume and Bounce Review

I am no expert when it comes to hair – I prefer to be low maintenance when it comes to styling on an everyday basis, so I tend to look for products that can create nice textured hair without having to use much heat. A little background on my hair: it is relatively thick, it is naturally quite straight, and is very flat. Since I cut my hair shorter, I have paid more attention to adding more volume to my hair, as it is more likely to hold now I have less hair. There is a lot of hype around Charles Worthington products, and I have managed to make my whole routine full of them.

I love volumising shampoos – I have relatively greasy hair, and if I use anything too moisturising at the scalp, it builds up and I’d need to wash my hair again the next day. This shampoo is great for keeping my scalp clean – I usually wash my hair every other day, but with this one I could even leave it to the day after (with the help of dry shampoo, of course). This one is particularly good at creating voluminous styles as it very lightweight. The only downside perhaps is the scent. To me it smells a lot like Calpol… 
The conditioner is also really lightweight, which is also great for not weighing down the hair. I only apply conditioner from the middle to the tips of my hair, and I find this moisturising enough for everyday use. If you have dry hair this may not be enough for you. It has a similar scent to the shampoo.


This has often been deemed as the dupe for the Oribe Dry Texturising Spray. I do agree that it is similar, but this has a much more hairspray-feel to it. To use this, I apply it on dry hair on the underneath sections of the hair near the roots. I find that this gives instant volume much like the Oribe offering, but has much more lasting power. This is probably my favourite product of the range – it gives lots of volume without having to tease or put that much effort in.


I admit, I’m a bit scared of mousse. Ever since the days that I used to use it to create those infamous crunchy wet-looking curls that everyone rocked in the Noughties, I have been quite put off the idea of it. However, I use this in the roots and through the lengths of the hair, brush through and then blow dry, and it creates great results. I find that mousse is the best product to use for true volume, and I find that the volume does last for a few days (with the help of the texturising spray of course). This product has made me want to try more volumising mousses – I am very interested in the Oribe mousse…

I thought it was mandatory to include an awkward selfie so I could show off my hair after having used all these products. Above is first day hair, where I blow dry it upside down until it is roughly 70% dry and leave the rest to dry naturally. I like that these products give my hair an effortless look, but still is nicely voluminous (at least compared to my incredibly flat hair anyway). I definitely recommend these products if you are on a budget and are looking to add some volume to your hair – I personally would much rather spend my money on makeup rather than haircare… 

RachelElizabeth

Revlon ColorBurst Matte Balms | Review and Swatches

I was a little late on the bandwagon on these – every Boots and Superdrug I went in to, the stands were really messy and half of the shades were missing. But finally, after rifling through the drawers underneath the displays, I picked up three shades on 3 for 2 at Boots. I have been so excited for these ever since I heard American bloggers and youtubers talking about them months ago, and I am so happy these have finally hit the UK. The Revlon ColorBurst Matte Balms retail for £7.99, and are still currently on offer at Boots.


I picked up three shades: Standout, a deep blue-toned red, Shameless, a true rich purple and Elusive, a neutral yellow-based mid-tone pink. I’ve found that all shades perform quite consistently, which is great to see across a range. They apply with a slightly satin finish, but I found that they dry much more matte. The pencil shape makes them really easy to apply – they are much more precise than a regular-shaped lipstick. All three are very creamy and incredibly pigmented. What is great about this formula is that isn’t too drying, which can be the downfall of some matte lipsticks.

The only con I’ve noticed is that they aren’t as long wearing as other matte formulas that I own – especially the Mac mattes and the Nars Velvet Matte Lip pencils. Saying that, they do hold up relatively well throughout the day, even when eating food and drinking. The formula just means you have to take extra steps to making it last longer – I find blotting and reapplying several layers works well. 

Standout


Shameless


Elusive


All in all, I would definitely recommend these lip products. They haven’t topped the list of my favourite matte formulas, but they are definitely good option. If you are new to matte lips, these might be a good place to start as they’re easy to apply and not to expensive. Have you picked up any of these?

RachelElizabeth

Manicure Monday #10 | Bourjois Amande defile

Spring is officially here! At least on my nails anyway. The sun has decided to show its face a bit in England and it’s got me craving those pretty pastel colours that I love every year. Upsettingly, this should have been a post about Essie Mint Candy Apple – a cult favourite – but as I was just about to apply I noticed that it was all gloopy and I had barely any left! This could call for my first every nail polish repurchase…

Regardless, I decided to choose the Bourjois Paris So Laque Nail Enamel in Amande Defile, which is quite similar to the Essie option, but perhaps a smudge lighter – a pale duck egg blue shade. This formula really is gorgeous – it’s opaque (which can be an issue for pastel colours), long lasting and incredibly shiny. Bourjois is a slightly more expensive brand on the high street, this polish coming in at £5.99, but I think the formula is good enough to warrant that still affordable price tag. The rest of the shades also look gorgeous and I’m surprised I haven’t already picked more up! This is one of my favourite summer shades, and it was one of my most worn of last year.


I have yet to try Bourjois’ 1 Seconde formula, which is raved about a lot, but if it is anything like this formula then I’m sure I will love it! Have you tried any Bourjois nail polishes?

RachelElizabeth

Loreal True Match Foundation | Review

I have completely hopped on the bandwagon with this one. L’Oreal True Match Foundation is one of the most popular and talked about foundation in the blogging and youtube worlds. I was never that interested in trying it until one of my favourite bloggers Amelia Liana claimed it to be a dupe for my all time fave Giorgio Armani Luminous Silk – read my review here. Giorgio Armani is owned by L’Oreal, so it would be no surprise if the formulas were actually very similar. Now I thought this was a a big claim, and I just had to try it out for myself.

The Claims:

In 20 true-to-skin shades across warm, cool and neutral tones, True Match 
super-blendable liquid foundation perfectly matches the colour and texture of your skin, hiding imperfections with its fine, creamy texture.The result: Flawless coverage

The Verdict:

I was very shocked at actually how similar it is to Luminous Silk. It has the exact same silky feeling, and although it feels really thin in consistency, it provides medium to full coverage. It has that same somewhere in between matte and dewy finish, which makes it look very natural. To my surprise, it looks good in photography, despite the inclusion of SPF 17 (what a random number!), something that the Giorgio Armani offering doesn’t have. 

One difference I have noticed is the buildability. With Luminous Silk I could keep building layer and it would never look heavy or cakey, but I find with True Match that it can head that way if I go overboard. However, it gives a good enough coverage in one layer that I don’t find I need to go in with other layers. I don’t find the staying power quite as good either – it’s still impressive, but my skin doesn’t look quite as good for as long as LS.

Saying that, I still really love this foundation, and at £9.99, it is less than a third of the price of Luminous Silk. This a great foundation in its own right, and has topped the list of my favourite budget foundations. There is a great shade range – there are options of warm, neutral and cool shades. I picked up the shades W1 and W4, which are both great yellow-toned colours, which I can mix or use separately depending on the time of year or whether I’m fake tanned (W4 is very similar to 5.5 in luminous silk by the way). If you’re in the market for a new foundation, and you can’t stretch your budget, then I’d definitely suggest giving this one a go. It hasn’t topped my love for Luminous Silk, but it definitely comes close, which will definitely save me some money!

RachelElizabeth

Best of | Primers

Primers are a necessary step in my makeup routine – I have both oily skin and eyelids and have always had problems with longevity and my makeup creasing or not applying well. I’ve tried quite a few primers now, and I think I have found the best of the best…


Hourglass Veil Mineral Primer
Lets get the price out of the way first… This is a pricey option at £52 – although $52 in the States making it much more cost effective if you can buy it there. However, this is absolutely worth the money. Using face primers in the past, I never really saw too much of a difference, but this creates the smoothest base to apply makeup on. It isn’t a silicone based primer so it doesn’t leave your face feeling squeaky clean but rather leaves it smooth and perfected. What I love most about this primer though, is how it extends the length of wear of my makeup. When I wear this primer, my makeup will stay on all day without fail. The pump is also great – it dispenses the perfect amount of product to cover the entire face. I can find no fault with this product, and if you can fit this into your budget, even as a product only to be used for special occasions, I would 100% recommend. 

Again this isn’t the most budget-friendly eye primer on the market, but it definitely delivers. I had been using the Urban Decay Primer Potion for years -it’s the only other eye primer I have ever used. However, recently I wasn’t satisfied with the results. I found that my eyeshadows weren’t blending that well and it just didn’t last as long as I wanted. I decided to try this because it’s massively hyped in the blogging world, and it has definitely lived up to my expectations. It has a doe-foot applicator, making it really easy to apply, and has a similar texture to the hourglass primer, in that it’s creamy and smooths out the eyelid. My eyeshadow never creases when I use this, and without primer my eyeshadows always crease. It makes my eyeshadow stay on all day, and it really is just great.

If you have trouble with your makeup staying on, these are must-haves. I see these as investments – why spend all this money on makeup if it isn’t going to last on your face? Beauty addict logic…

-RachelElizabeth

A Cream Deodorant? | Kiehls Superbly Efficient Anti-Perspirant & Deodorant Cream Review

I admit, deodorant is a bit of a boring subject, and if I didn’t love this one so much I would definitely not be writing a post on it! I haven’t had the best of luck with the bog-standard deodorants, so I decided to do some research. This one kept popping up, and I was getting pretty desperate, so in my basket it went…

Kiehls Superbly Efficient Anti-Perspirant and Deodorant Cream

The Claims:
Superbly Efficient Anti-Perspirant & Deodorant Cream with Orange, Lemon and Linseed Extract. Our anti-perspirant and deodorant cream is extremely gentle, yet highly efficient. Leaves skin feeling soft, soothed and conditioned with 24-hour protection against sweat and odour.

The Verdict:
A cream deodorant does seem quite bizarre on first glance, and it was still equally strange applying it for the first time. It feels quite unnatural putting a cream on your armpits… It doesn’t have a very strong smell, it just smells very clean. In terms of anti-perspirant qualities it absolutely delivers – this works better than any other deodorant I’ve tried in terms of stopping odour and sweat. Unfortunately it didn’t keep me sweat-free during a gym sesh, but that was to be expected. I have noticed that my underarms are more moisturised and that it creates a much smother shave.


A short but sweet review for this one, I’m afraid. There’s not much more to say that I think it’s really great. If you’re willing to dish out a bit more for a deodorant then this is definitely one to try.

RachelElizabeth

3 Red Lips

Red lipsticks are my weakness – I have managed to build quite a substantial collection. Everybody can pull off a red lip, its just a matter of finding one with the right tone to suit your face. Personally, I wear all sorts of reds, as I normally like to play up the lips when doing my makeup. Today I bring you three of my faves, from high-end to budget friendly.

Yves Saint Laurent Rouge Pur Couture Glossy Stain – 9 Rouge Laque

The most expensive of the lineup, and one that was very hyped on its release. This was a very innovative product from YSL – if you haven’t read about/bought it already, this is a long lasting lip colour with a glossy finish. I like to apply 2 or 3 layers and blot in between to ensure the longest lasting application. The glossy finish lasts around 4 hours, and when it fades it leaves a stain on the lips. What I love about this particular formula, is that is really easy to reapply unlike some lip stains and it doesn’t dry out your lips. Shade 9 is a bright yellow toned red. 


Maybelline Superstay 14hr Lipstick in Non-Stop Red
The budget option and a Lisa Eldridge recommendation (if you don’t watch her videos on youtube, you must!). This is a really great long-lasting matte formula that really does stay on the lips for hours. You have to make sure that your lips are well exfoliated and hydrated as imperfections can show through. However, if you like a matte formula, you will no doubt enjoy this. Non-Stop Red is a bright slightly pink-toned red.


Urban Decay Revolution Lipstick in F-Bomb
Last not least, is the most classic shade of red amongst the three in this post. The release of the Revolution lipsticks was also a big one. They claim to have everything – longevity, high pigmentation and hydration. I am pleased to say that this lipstick really does deliver, and is one of the most comfortable lipsticks to wear even though it is a long lasting formula. F-Bomb is a slightly deepened blue-toned red, and one of those reds which make your teeth look really white.


I could ramble on about red lipsticks all day, and I have such an extensive list of favourites that would have made this blog post tediously long. As you may be able to tell from the three I decided to feature in this post, I love long-lasting formulas and I would recommend all of these completely. What’s your go-to red?

RachelElizabeth

Hourglass Ambient Lighting Powder

I have been quite hesitant to write this review because 1) there is so much hype around this product and 2) I’ve never really made my mind up about it. Ever since the launch of the Hourglass Ambient Light Powders the blogging world has gone absolutely crazy for them, and naturally I had to pick one up.

I went to the Hourglass counter in Liberty, and when talking with the makeup artist, she said that Dim Light was the one that I should go for. It is described as ‘a neutral peach beige powder that blurs imperfections and highlights a radiant complexion with the perfect balance of warm and cool tones’. She applied it on my face over a full face of makeup and I must admit that I was pretty impressed looking in the mirror. My face looked flawless and the powder seemed to create a blurred effect on my face. From that first application I was completely sold and got it straight away. 

However, since using this more, the initial wow-factor has definitely worn off. I generally use powder in my routine to add a touch more coverage, take away shine and set all my makeup in place. Unfortunately this powder does none of these things. The only way I use this is as a a finishing powder over my completed makeup look just as an added blurring effect. This blurred effect is not long-lasting though and it isn’t incredibly obvious. Reading others’ reviews on this powder, it seems that this is suited more to those who don’t like using a usual powder on a regular basis. 

So this was a bit of a blah product for me. Personally, for the price, it is not worth splurging as it is merely a luxury and pointless addition to my makeup collection. I admit I was drawn in by the hype of this, and I am tempted to try another colour – perhaps a more highlighting shade – just in case I really am missing something…

P.S. I am currently playing around with my schedule and contemplating making Manicure Monday a fortnightly post. When I find my perfect schedule I will be sure to update you!

-RachelElizabeth