Bobbi Brown Shimmer Brick in Beige | Review and Swatches

Cue all the heart eye emojis. Bobbi Brown is a brand that I don’t own too much from, but so many of their products have reached cult status in the blogging world. I had been drooling over this highlighter for the longest time so I decided to put it on my christmas list, and my mum was nice enough to get it for me! Keep on reading to find out my thoughts…

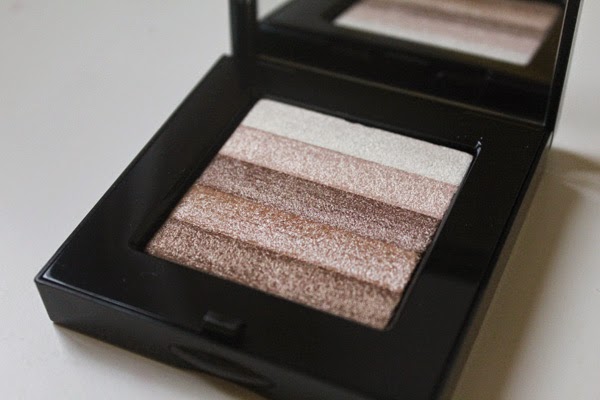
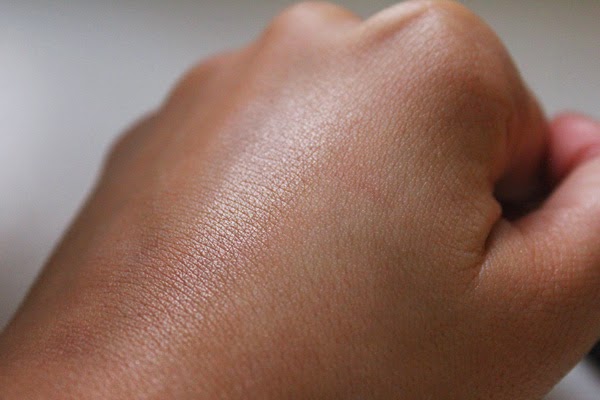
The Bobbi Brown Shimmer Brick in Beige (£32.50) contains five strips of shimmery colour ranging from a soft white to a deep bronze. When swirled together, it is a beautiful golden beige, a perfect highlighter for when I’m slightly more tanned. What is great about the shimmer bricks is that they’re really customisable – you can focus your brush on either end of the product depending if you want a lighter or darker payoff.

Surprisingly, even though it looks intensely shimmery in the pan, it doesn’t come off too glittery on the skin. It isn’t the most natural looking highlighter, but it definitely isn’t garish or reminiscent of a disco ball. Currently I love using the Sigma E40 Tapered Blending Brush for highlight as it gives really precise application. I put it on the tops of my cheekbones, tip and bridge of the nose, in between the brows, cupids bow and chin (everywhere, really). If you love glowy skin, you will love this.


I also think this highlight captures the light beautifully in photography. This is definitely a splurge item, but if you feel like treating yourself or putting it on your wishlist, then I would highly recommend it. Would you pay this much for a highlighter? 
 
RachelElizabeth

Max Factor Creme Puff Blush in Nude Mauve | Review and Swatches

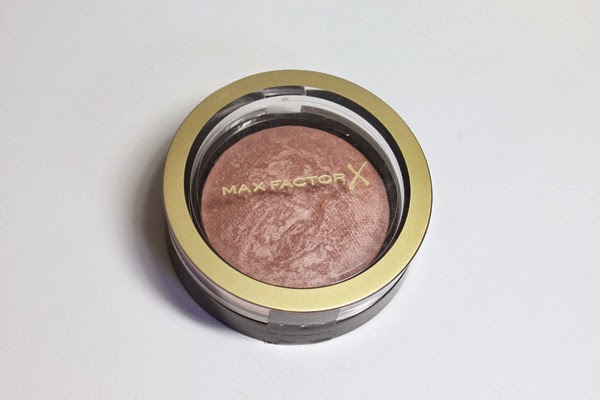
I love a new release, but there are only certain occasions when I will stalk the counter until I have one in my hands. Max Factor have recently released a stunning new line of blushes (that I’m sure you’ve already seen all over the blogging world) and I really could not pass this one up…


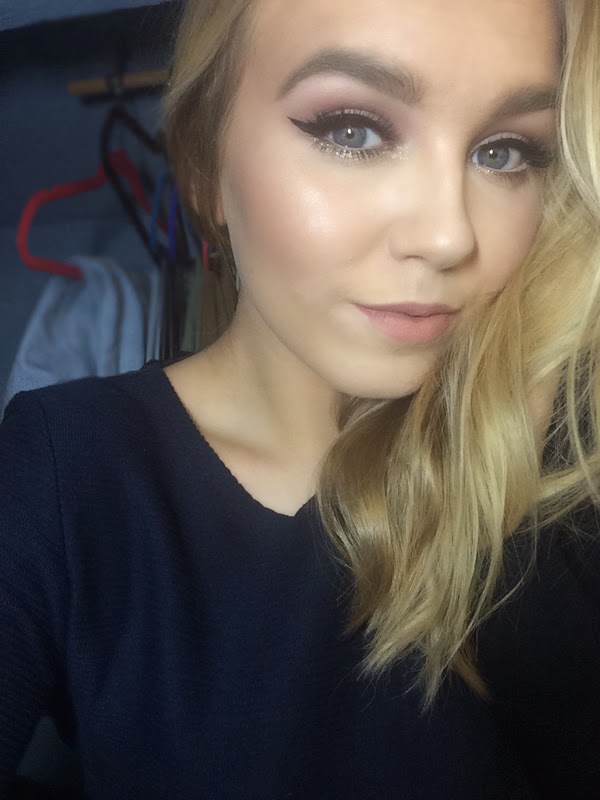
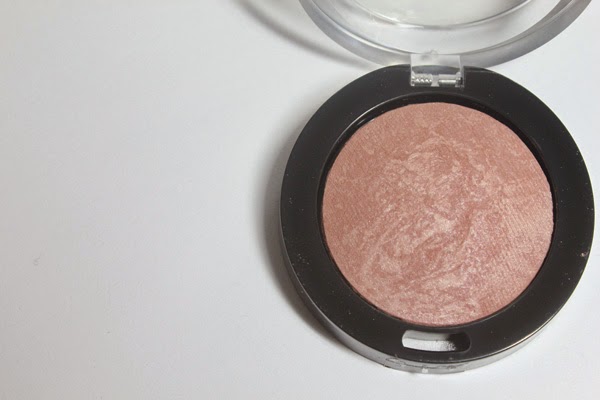
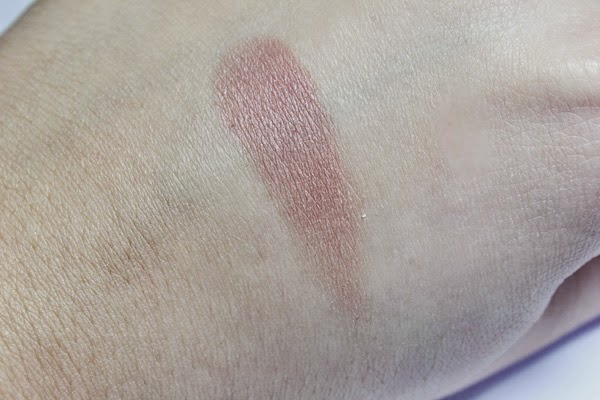
The Max Factor Creme Puff Blush in Nude Mauve is a shimmery brown-toned mauve. These blushes are baked and marbleised, giving a soft and glowy finish. For me, this has the perfect amount of pigment – it is strong enough that I don’t need to layer it up to create my desired intensity, but not so pigmented that it becomes hard to blend and looks over the top. The colour reminds me of my all-time favourite blush, the Tarte Amazonian Clay Blush in Exposed, but a shimmery version. It has the same sculpting effect while still adding a healthy flush to the skin. It is one of those shades that goes with everything. I’ve found myself reaching for this when I don’t know what blush to wear, and it has become a fail-safe option. 

What has impressed me the most about this blush is the way that it wears. I don’t know if it’s just me, but most budget cheek products have the tendency to go patchy on my skin by the end of the day and just don’t sit or wear well. This blush, however, seems to be an exception to this trend – it still looks perfect after hours of wearing makeup.


I loved this formula so much that I actually went and purchased another shade the other day that I’m yet to try. There weren’t actually too many colours that caught my eye, but Nude Mauve is definitely worth checking out. Have you tried any of these blushes yet? 

RachelElizabeth

FOTD | Go-to Night Out Makeup

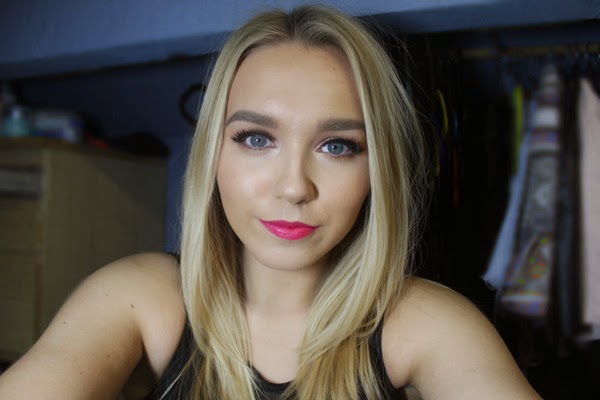
If you’re at university, or you have been, you’ll understand the feeling that you may not have that much time to do your makeup before a ‘spontaneous’ night out. Or maybe you’re not one to spend hours getting ready. Recently I have found my favourite look for a night out that I can throw together pretty quickly, and as an added bonus, it looks really nice in photography. So if you’re into the bold lips, lashes and brows, keep on reading…

I’m always one to focus most of my time on my base. When it comes to a night out, I rarely skip using the Hourglass Veil Mineral Primer as it keeps my makeup in place better than any other product I’ve tried. For foundation lately, my favourite has to be L’Oreal True Match – this is a great budget alternative for my beloved Giorgio Armani Luminous Silk (check out my full review here). I add the Nars Radiant Creamy Concealer anywhere I may need some extra coverage, and I also take a shade lighter under my eyes and on the high points of my face to highlight. I set everything in place with a powder, either the Mac Mineralize Skinfinish Natural or the Hourglass Ambient Lighting Powder in Dim Light. I also found it important to add colour and definition to the cheeks or your face can look pretty flat in pictures. I bronze up the skin with Nars Laguna Bronzing Powder, and have been loving the Anastasia Beverly Hills Contour Kit to add shadows under the cheekbones and on the temples, and I also like using the lighter shades to set my under eye concealer and any highlighting I have done. I’ll top the look off with a little powder highlighter – my favourite recently has been the Bobbi Brown Shimmer Brick in Beige. I add some to the tops of my cheeks, the tip of the nose, the cupids bow and the chin. 


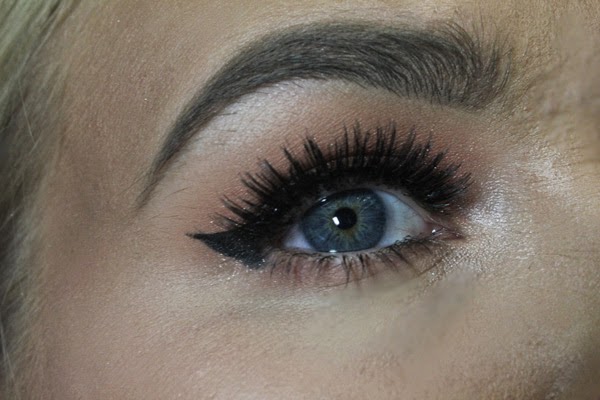
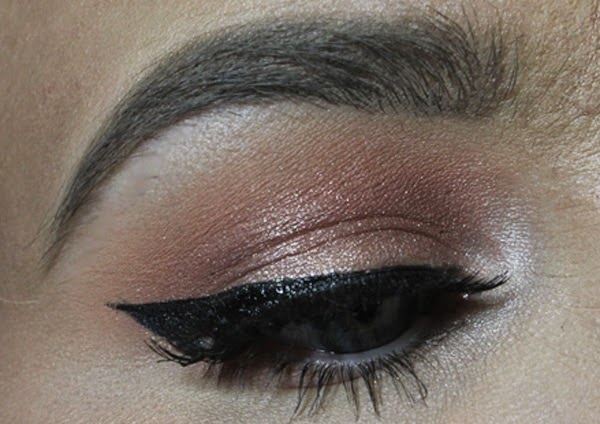
This eye makeup is incredible simple and easy to achieve. I start by defining the crease, and I do this by building up different shades of orangey-browns, increasingly getting darker to achieve a blended and blown out look. Any matte browns will work for this, but I tend to reach for my Makeup Geek Eyeshadows, in particular Peach Smoothie, Creme Brulee and Cocoa Bear. I will then pack a shimmery shade all over the lid, and my absolute favourite for this is Mac Tan Pigment. It catches the light beautifully and is amazing for any warm-toned look. I then create a winged out eyeliner with the Kat Von D Tattoo Liner in Trooper, apply lashings of mascara, and then a pair of false lashes. These will help your eyes really pop and add instant glamour to any look. The pair I’ve used in this look are the Eylure no. 121 which are thick, fluffy and are longer on the outer corner, which help to emphasise the winged-out shape of this look. I’ll then run some of the shades I used in my crease along the lower lash line to balance out the look. To finish off the eyes, I filled in my brows with the Anastasia Dip Brow Pomade in Blonde, going for quite a strong brow which I think works well with this look. 

Finally, the star of the show, the bold lip. I find that I can wear any colour with this look, but my favourite shade to wear by far is a bright pink. I’m definitely a lipstick addict, so I have several favourites, but the shade I went for in this look is Mac Viva Glam Miley Cyrus which I have a full post on here. With a bright lip, you tend to need a little added colour on the cheeks, so for blush my go to is Tarte Amazonian Clay Blush in Exposed as it is a no-brainer shade that goes with any look.


I hope you enjoyed this look, and perhaps if you’re not so into bold lips this may have inspired you to give one a go? I think they are so flattering and will also reduce your getting ready time as the eyes really don’t need as much work. Let me know your go-to look for a night out below! 

RachelElizabeth

Nars Dual Intensity Eyeshadow Palette | Review and Swatches

Nars do always produce the most swoonworthy palettes, don’t they? This is, surprisingly, my first palette from the brand, and ever since they announced that they were releasing it I knew it had to be mine. Continue reading for a full in-depth review and swatches of this beautiful palette…

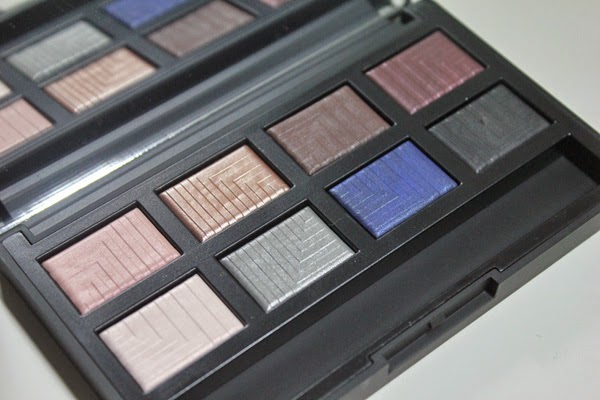
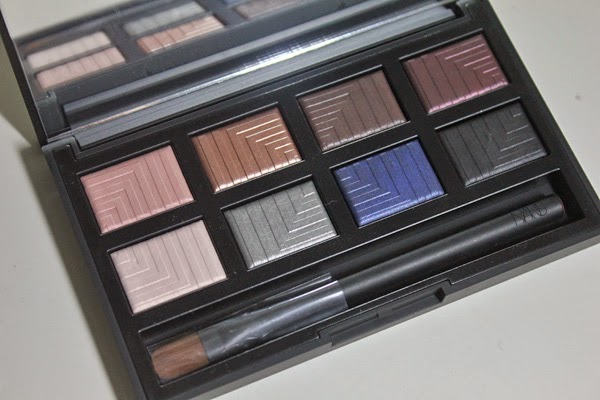
A somewhat recent release from Nars were their Dual Intensity Eyeshadows. These were a pretty big release as they were eyeshadows that were marketed as a sheer wash of shadow when used dry and as an intensely pigmented product when used wet. When you use regular eyeshadows wet, the eyeshadow then becomes unusable unless you always use it wet as it creates a hardened film over where the water has touched it. These, however, promise that they are versatile enough that using them wet will not affect, or indeed ruin, the texture of the eyeshadow. The single versions of these will set you back £21, which is rather steep for only one shade. The Nars Dual Intensity Eyeshadow Palette is £45 for eight shades, and although the shadows are are slightly smaller (1g vs. 1.5g) it is actually far better value for money (£5.63/g vs. £14/g). All of these shades, with the exception of Ursa Major, are part of the permanent line as a single eyeshadow, so if you like, or would consider purchasing, more than two shades from this palette, then it is definitely worth the investment. 


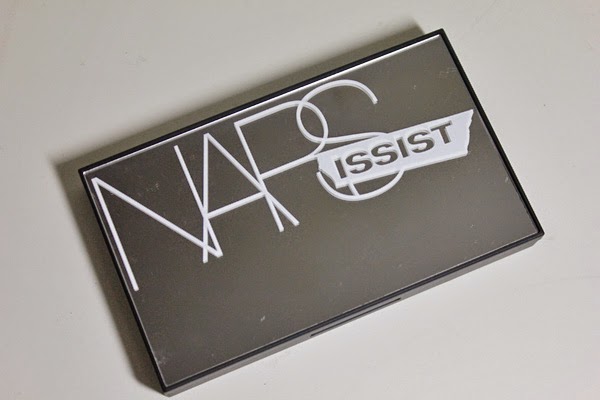
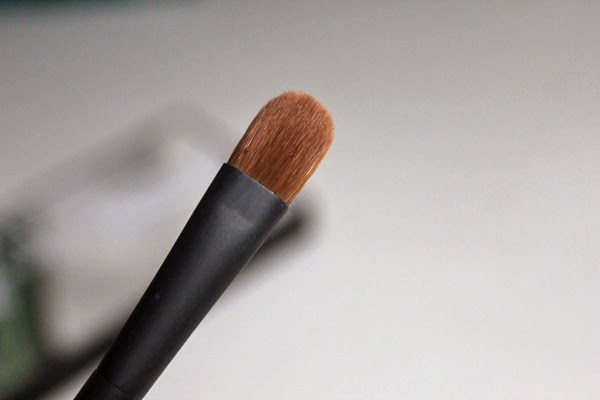
The packaging on this palette does feel really expensive. The top is mirrored which does attract fingerprints, but is much easier to wipe clean than the original rubberised packaging that Nars is infamous for. It is plastic but it feels very sturdy and protective of the shadows. The palette also comes with a travel size #49 Wet/Dry Eyeshadow brush, which I personally found much better to use when the shadows are wet as opposed to when they are dry. This is definitely a decent brush and not one that you should immediately disregard like many brushes that are included with palettes. 


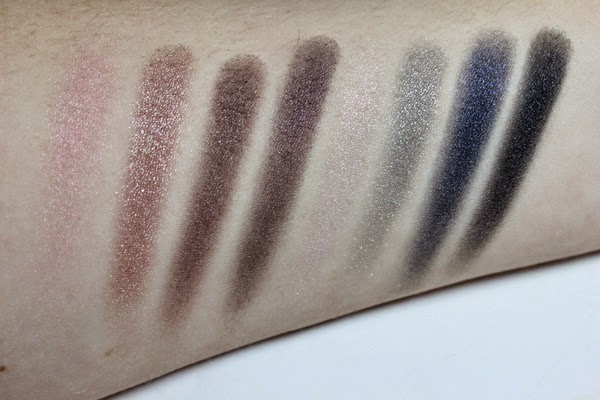
Top Row: Europe, Himalaia. Bottom Row: Andromeda, Lysithea


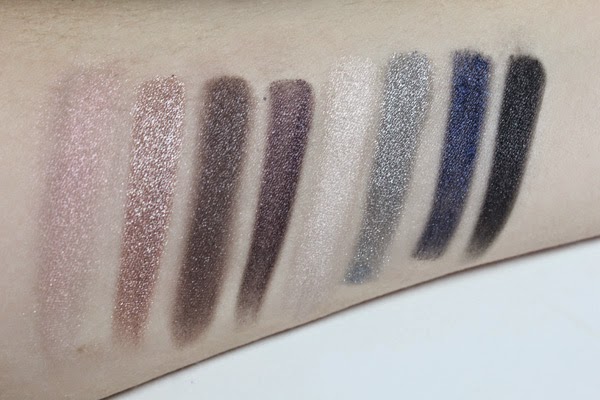
Top Row: Ursa Major, Subra. Bottom Row: Giove, Sycorax

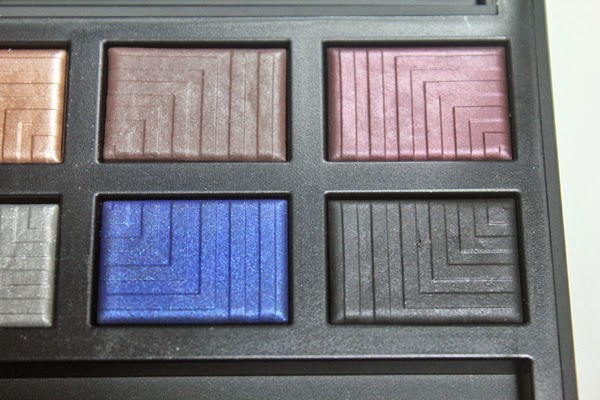
As for the eyeshadows themselves, there is varying quality throughout this palette. Some were definitely more pigmented than others, and there were some that needed to be used wet to have decent pay off. 

Europa is described as a ‘Gossamer pink peach’. As you will be able to see in the swatches, this is pretty sheer when used dry, however it could be used as a pretty wash of colour all over the lid for a natural, understated eye look. It is still not the most pigmented when used wet, but it does leave a pretty iridescent pink sparkle. 

Himalaia is described as a ‘Shimmering topaz’. This is probably my favourite shade in the palette as it is great both wet and dry. It is shimmery and pigmented when dry but becomes metallic and bold when wet. It is similar to Mac Tan Pigment in the sense that it’s a slightly rose gold-esque shade. Love.

Ursa Major is described as a ‘Chocolate glaze’. It is a cool-toned brown with silver shimmer. What is nice about this shade is that when it’s dry it can be used to build up intensity in the crease or the outer corner without being too intense, but when used wet it is a deep rich brown, perfect for smokey eyes or even to be used as a liner. 

Subra is described as a ‘Black orchid’. When applied dry it is a deep blackened plum shade, which is semi-opaque, much like Ursa Major. But it transforms when it is used wet into a pigmented plum-toned purple. When used in the latter way, this is another of my favourite shades in the palette.

Andromeda is described as an ‘Alabaster’. Because I am quite fair, this barely shows up on my skin when it is used dry, except when it catches the light. It is another shade that really differs when used wet as it then becomes quite an intense, shimmery, slightly pink-toned white. This is a very versatile shade as it can be a very soft and subtle highlight or it could be really amped up to create a lot of drama and intensity and looks especially gorgeous on the inner corners of the eyes. 

Lysithea is described as a ‘Shark grey’. When used dry it is a muted and sheer grey with an intense silver shimmer running throughout. It is fantastic when used wet as it is a metallic true silver. Although silver is not my favourite shade to wear, if I am ever in the mood to rock a silver smokey eye, this will 100% be my go-to. 

Giove is described as a ‘Navy’. This is the brightest and arguably the most hard to wear shade of the palette, but it is truly quite stunning. It is much darker and smokier when used dry, which is great for those who are new to colour in their looks. For those who are far more daring and bold, it is a vibrant but deep navy shade when wet and would make for a stunning and striking blue makeup look. I can also see this working great as a liner for both the upper and lower water lines to add an unexpected pop of colour to your look without straying too far from black. 

Sycorax, the final shade in the palette, is simply described as ‘black’. When used dry it is a really great black eyeshadow as it is not so pigmented that it is overwhelming. It is extremely opaque and intense when used wet, so would also be perfect as a liner, or if you were going for a really dark smokey eye this would be stunning. 


(Dry Swatches)


(Wet Swatches)

I am absolutely in love with this palette, and it is definitely something a little different than the average. The wet/dry formula may mean that it takes a little longer than usual to apply your eyeshadow, but trust me, it is worth it. This is limited edition so if you like the look of this, make sure you snap it up fast! What do you think of the palette? Is it something that you would splurge on?

RachelElizabeth

Too Faced Chocolate Bar Palette | Review and Swatches

With the exception of the Urban Decay Naked Palettes this palette has to be one of the most hyped and talked about in the blogging world. It combines many girls two favourite things: chocolate and eyeshadow. How could that not be a bestseller?

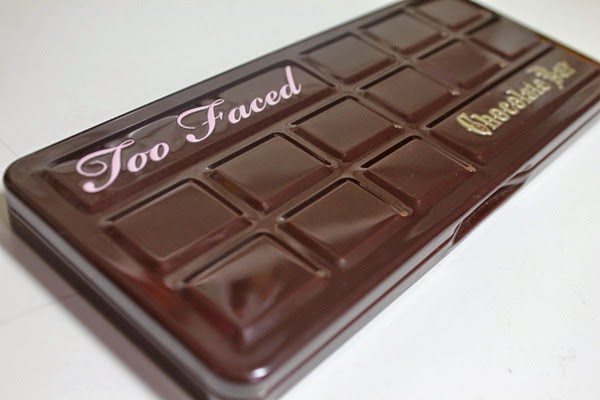
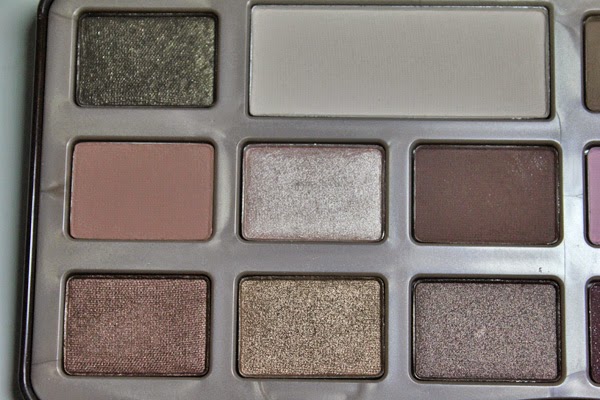
The Too Faced Chocolate Bar Palette contains 16 eyeshadows, with varying finishes. The first thing that you will notice when you open this palette is the smell. To me it smells like really sweet chocolate, something along the lines of Milka or anything Kinder. The eyeshadows are infused with cocoa powder which not only makes this palette smell delicious but has somewhat of a special quality to it. The tin packaging feels fairly robust and protective, but the closing is only magnetised rather than a click which is slightly unsatisfying. 


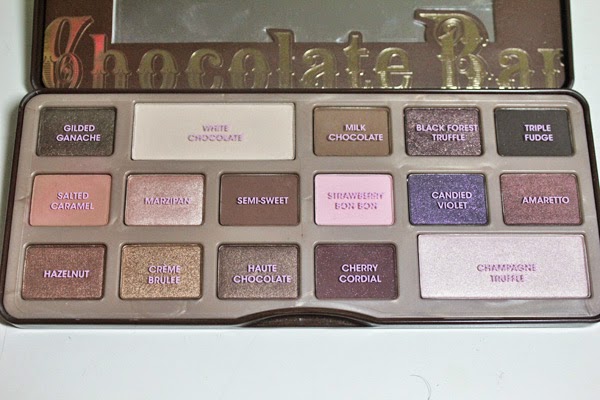
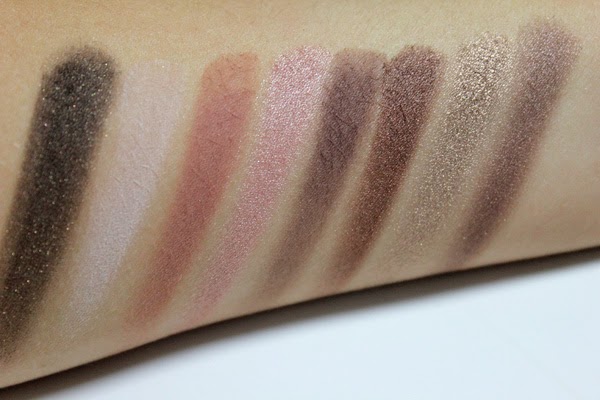
When it comes to the eyeshadows themselves, the formula is stunning. Beginning with the left half of the palette, pictured below, there are three matte shades and 5 shimmers. Gilded Ganache is a deep blackened brown with a golden shimmer running throughout. White Chocolate is a creamy beige which is perfect for highlighting. Salted Caramel is a warm mid-toned brown, the perfect warm transition shade for your crease. Marzipan is a champagne shade with a gorgeous metallic finish. Semi-Sweet is another great crease shade – a neutral medium slightly darker brown. Hazelnut is a shimmery bronze which really catches the light. Creme Brulee is a metallic true gold and finally Haute Chocolate is a shimmery cooler taupe-brown. 


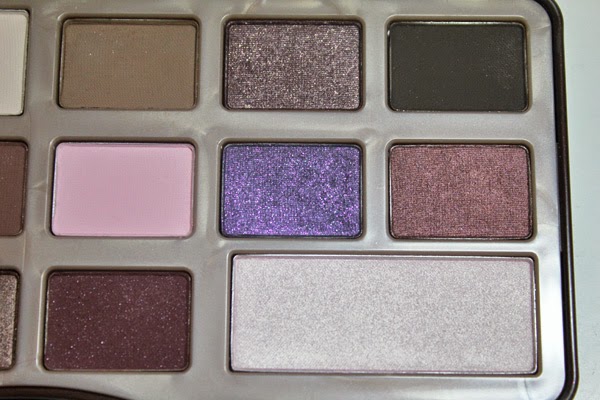
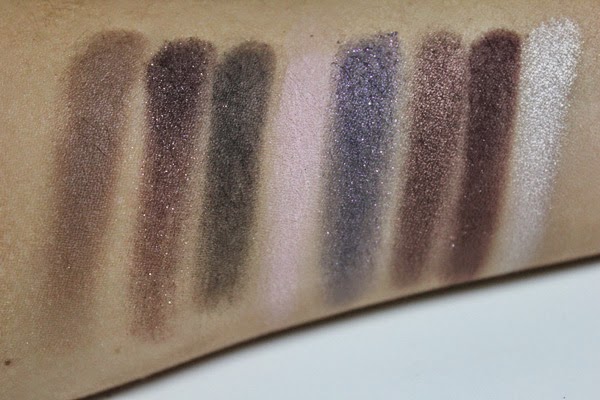
The right hand side of the palette has a lot more of the colourful shades. Milk Chocolate is another great transition shade, but it is much more neutral than Salted Caramel. Black Forest Truffle is a deep plum with silver and gold shimmer – I actually found this one to not be as pigmented as some of the other shades. Triple Fudge is the darkest shade in the palette, but it is a deep cool brown which is a softer alternative to black. Strawberry Bon Bon is a matte baby pink shade, which can be really pretty when used as a lid shade. Candied Violet is an indigo shade with pink and silver glitter – this was another shade that ran a little sheerer but it is pretty to layer over a base due to the amount of glitter. Amaretto is a really metallic bronzey-burgandy shade. Cherry Cordial is a matte red-toned brown with tiny (almost unnoticeable) flecks of silver glitter. The final shade in the palette is Champagne Truffle which is the other larger highlight shade – a gorgeous metallic pearl. 


Overall, I think this palette performs really well. There are a few slightly worse shades, namely Black Forest Truffle and Candied Violet, but they can be built up for higher opacity, or as I mentioned above, they can be intensified by wearing them over an eyeshadow base. I don’t think that the layout is the best that I’ve seen in a palette – the shades that are next to each other aren’t necessarily the best colour combinations in the palette. If it’s overwhelming, then it is useful to look at the palette as having two separate halves, like it was separated in this post as then you have a more neutral side vs. a more colourful side. 

Despite the negative aspects I managed to find, I really do love this palette. For the most part, the shadows are buttery and extremely pigmented. It’s also nice to see a neutral palette that has a few unique shades thrown in – it encourages us neutral lovers to experiment a little and get out of our comfort zones. Have you tried this palette? Let me know your thoughts in the comments!

RachelElizabeth

BEST OF | Pink Makeup

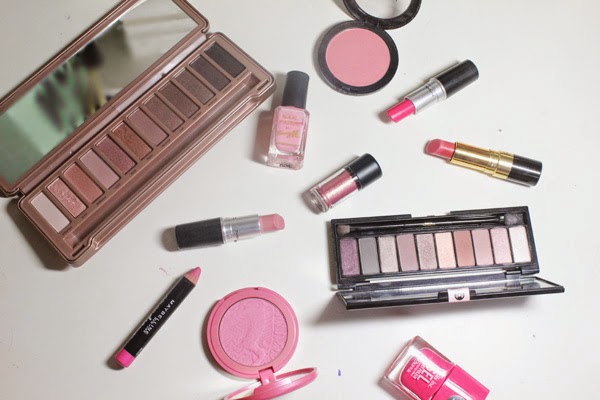
Valentine’s Day may be long gone, but there’s no reason to put down our pink-hued makeup just yet. For me, pink screams Spring. There’s something about the colour that adds a freshness, a youthfulness and a brightness to any makeup look. Whether it is a bright pop of fuchsia you’re craving, or the more toned-down rose option, this post will include something for you…


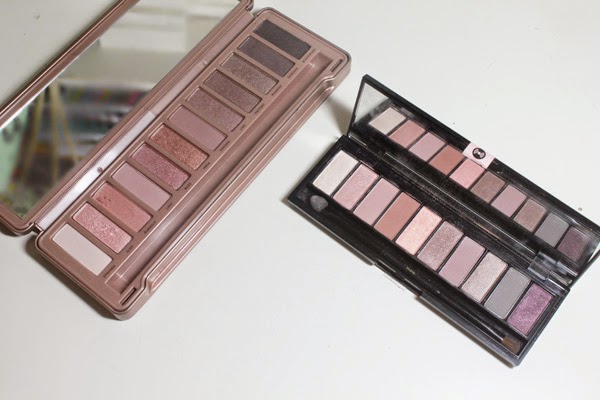
I’ll begin with perhaps the most unapproachable area of makeup when it comes to all things pink – the eyes. I can’t say that I’m a lover of neon fuchsia eyeshadow (although I was known to rock that look many, many years ago) but here I bring you subtle rose-tinted shades that while they add a hint of colour, won’t stretch you too far from the neutral spectrum. The most obvious option is the well-loved Urban Decay Naked 3 Palette, which is a stunning rose-hued neutral palette. I have posted three looks with this palette which you can check out here. If this palette is slightly out of your budget, or if you’re still on the fence about these pink hues, a great affordable alternative comes in the form of the L’Oreal La Paris Nude Palette which delivers many similar shades (full review here). The final stunning pink option (in the top image) is the Mac Pigment in Rose. This is a really interesting mixture of gold and rose, and it is intensely shimmery and metallic. If you’re a neutral lover and you want to add colour to your arsenal, this comes highly recommended.


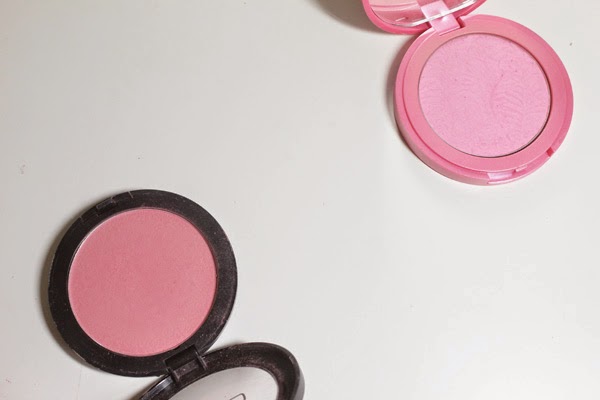
From the hardest feature to the easiest to incorporate pink is the cheeks. A pink blush is the nearest to a natural flush without using a full-on red shade. Finding the right shade of pink can add a gorgeous youthful glow to the skin. The first blush I bring you is from my favourite formula, and it is the Tarte Amazonian Clay Blush in Dollface. These are the most long-lasting and smooth blushes I have ever tried and (apologies to all my non-American readers) you need to try one out ASAP. Ordering from Sephora is achievable these days so it is a little easier to get hold off. This shade is a pop of light pink that isn’t too warm or too cool so it would suit a huge range of skintones. On the more budget-friendly side is the Gosh Blush in Flower Power. This is slightly easier to wear that the bubblegum hues and works great on those with more yellow undertones in the skin. Having said that, I also feel this is a universal shade, and the slight shimmer adds a really pretty, but subtle, sheen to the cheeks.


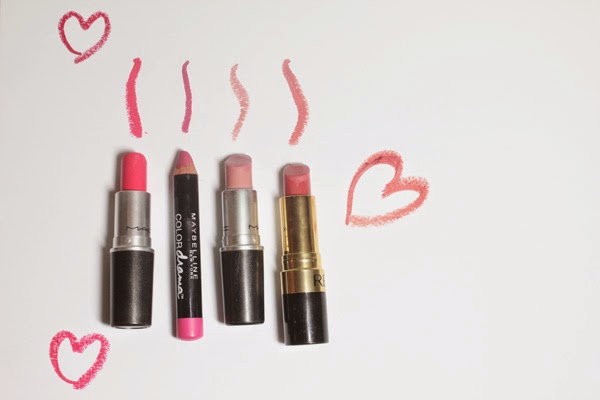
My favourite way to incorporate pink, and my favourite makeup category in general, is definitely lipstick. If you’re like me and love to experiment with your lip colour and wear bold, bright shades, then Mac Lipstick in Impassioned is one of my all-time favourite shades. This colour is probably the shade that suits me the most out of anything I’ve tried, but I can see this working on so many people, fair to dark skin. It is a yellow-toned pink that leans slightly towards red. Stunning. For a slightly more blue hued fuchsia shade, I can’t recommend the Maybelline Color Drama Lip Pencil in Fuschia Desire enough (check out my full review of these here). Moving on to the more parred-down options, for those who love nude-pink shades, Mac Lipstick in Creme Cup will definitely become an instant favourite. The formula is gorgeously creamy and the shade is very flattering. Finally, a favourite everyday shade of mine would have to be Revlon Super Lustrous Lipstick in Pink in the Afternoon. This is a stunning warm-toned mid pink. It adds colour to your lips but it isn’t so much of a statement. This is definitely the one I’d recommend for those who are new to or slightly wary of pink on the lips.


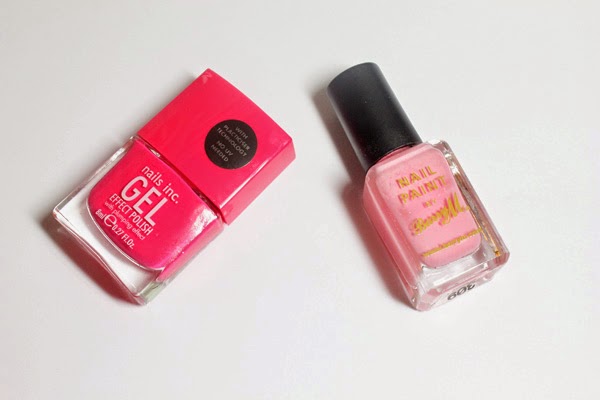
And finally, we finish on nails. For the bright, in-your-face option, this Nails Inc Gel Effect Polish in Covent Garden Place is a fun and intense fuchsia, which i think looks amazing on the toes especially. This Barry M Nail Paint in Strawberry Ice Cream is definitely more everyday appropriate, but still adds enough pink to make it fresh and fun.

So that rounds up my pink-themed makeup picks. It’s funny because I wouldn’t really associate myself as a pink gal, but there’s something about pink makeup that is just really incredible, and it is a universally flattering shade. What are your favourite pink picks?

RachelElizabeth

Let’s Talk About Bacne

I apologise if things are getting a little TMI in these parts today, but we shouldn’t be ashamed of talking about our supposedly embarrassing issues. Bacne (or back-acne, body acne etc.) is an issue that I’ve dealt with on and off for quite some time now, but I’m happy to tell you that I have found my solution, and hopefully this can work for all my fellow sufferers out there…


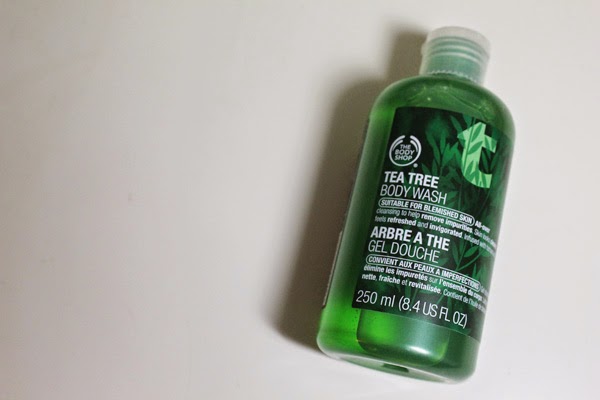
I’ve been much more into working out recently, and working out equals getting very sweaty whilst wearing a sports bra. I was breaking out in the whole area where the bra had been touching and rubbing against my skin, and I knew I had to bring out my tried and tested shower gel. Introducing The Body Shop Tea Tree Body Wash. This stuff works wonders for me. I will use this on any areas I’m breaking out on my body and it tends to clear up in about a week. If you’re unfathomably flexible, then you may be able to reach all areas of your back with just your hand, but I find using some sort of bath lily or loofah really helps. It’s almost important to me that I don’t stay in my sweaty gym clothes for too long after a workout – this seems to really aggravate my skin. 

Do let me know if you have any other tips for treating and getting rid of one of the most irritating skin issues, as I’d love to try some other products. Also, if you’re going to give this one a go, make sure you get it when The Body Shop are having an offer (when are they not?) – I got mine for £3.60!

RachelElizabeth

The Perfect Nude Lip Liner? Makeup Forever Aqua Lip Liner 3C | Review and Swatches

We probably have Kylie Jenner to thank for everyone’s recent obsession with lip liner. I mean, who wouldn’t want to have lips like hers? A nude lipliner is a must for any makeup lover – they’re not just for over-lining either. If you’re like me, and your lips lack a definite line or are slightly asymmetrical, a nude lipliner will be your best friend. It will also do wonders for longevity, and trust me, when you find your favourite lip liner, you will never turn back…

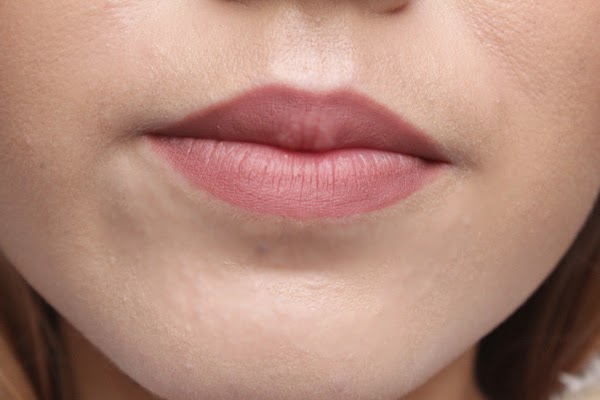
When I picked up the huge Sephora Give Me More Lip Set while I was in New York, I was so excited to try out the Makeup Forever Aqua Lip Waterproof Lip Liner Pencil in 3C. It is a ‘medium natural beige’, which is quite similar to my natural lip colour, but slightly more brown. It isn’t so brown that it looks unnatural, but it mimics a shade that could be someone’s natural lip shade. The texture is impeccable; I have never tried such a creamy lip pencil. This makes it so easy to apply and fill in the entire lips. Like a usual pencil, it has a matte finish, but it doesn’t feel drying. It is also possibly the longest lasting lip product I have tried, and I really want need to get my hands on some more shades.



If you’re from the UK and you are really annoyed at me mentioning Make Up Forever which is notoriously difficult to source, I have heard that it is coming to Debenhams in the near future! I for one am very excited for that day to come…

RachelElizabeth