FOTD | Halloween Edition – Pop Art


I know Halloween has been and gone, but I still thought it would be fun to share with you what I wore. I had a lot of fun creating this pop art inspired look, and although it took me a long time, I definitely think that the end result was worth it. If you’re interested in how I did this look, keep reading…


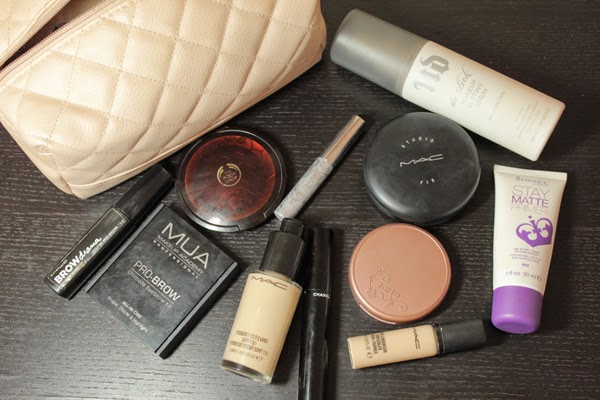
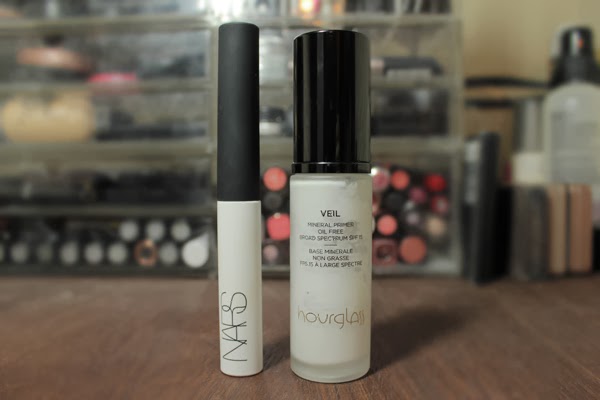
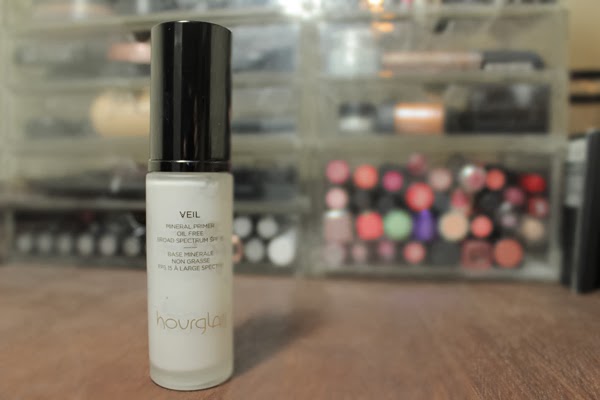
I started with my standard foundation routine – the Hourglass Veil Mineral Primer to ensure extra longevity, my L’Oreal True Match in W4 followed by the Nars Radiant Creamy Concealer in Custard under my eyes and on any blemishes. I then set this all in place with the Mac Mineralize Skinfinish Natural in Medium Plus

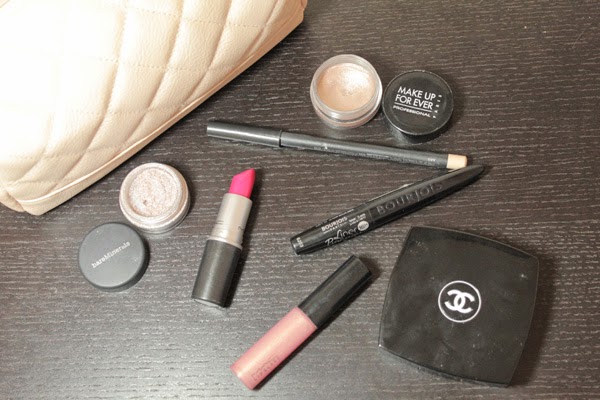
Now onto the fun part. I primed the eyes using my standard Nars Smudgeproof Pro Prime Eyeshadow Primer. I then used the hot pink out of the Urban Decay 15th Anniversary Palette (no longer available but any pink would work) all over my eye lid, and created a winged out effect using an angled brush. I then lined my eyes using the Mac Blacktrack Fluidline and extended the line to reach where I had winged the eyeshadow to. With the same liner, I outlined the shape of the eyeshadow, to create a slight cut crease look, and connected it to the inner corner. I lined the waterline with the Nyx Jumbo Eyeshadow Pencil in Milk to create a bright eyed cartoon effect, then lined under the lashline with the fluidline. Next up was the eyebrows. I started by creating the basic shape with a black eyeliner and then went back over that with the fluidline to make sure it was really dark. I created the expression marks in the crease and in between the eyebrows by making a sad expression and following my natural lines. 

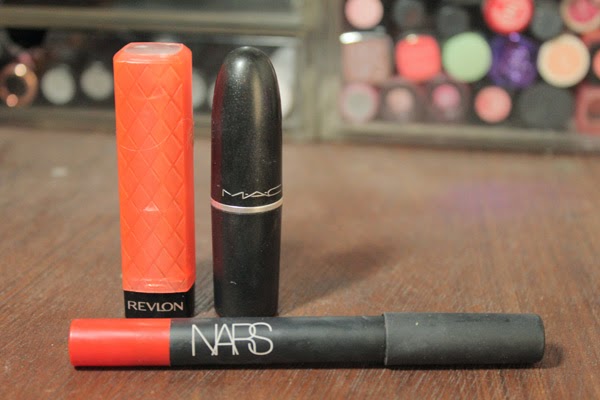
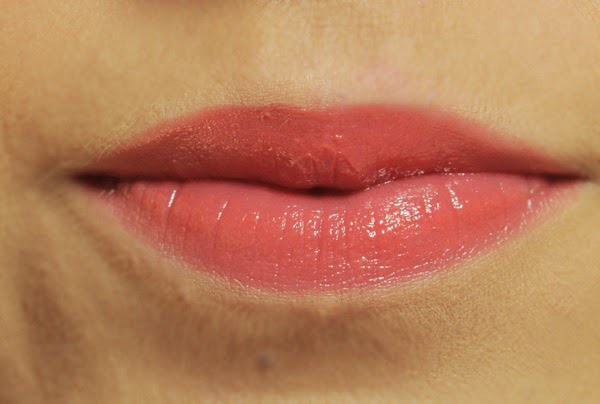
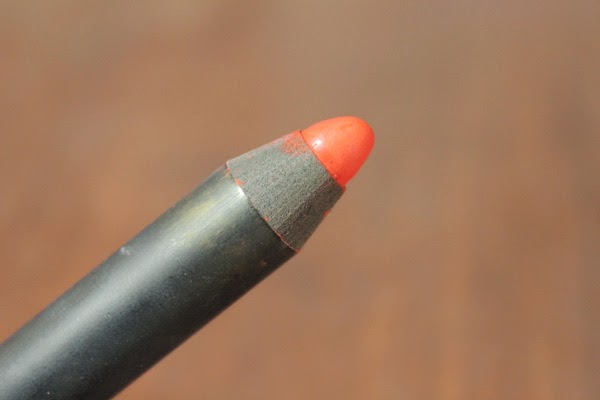
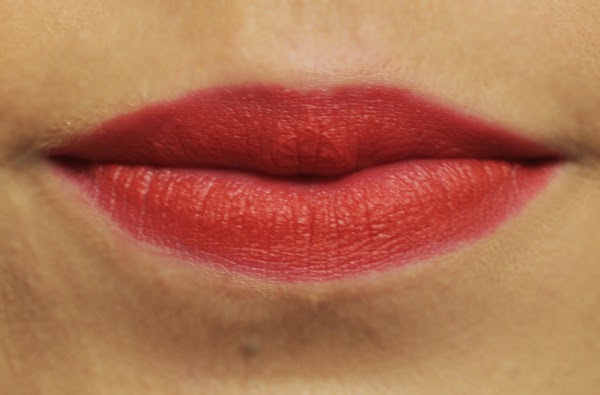
The tear was pretty simple – I drew the basic shape with a bright blue eyeliner pencil and then set it in place with a corresponding eyeshadow. I then lined that again with the fluidline. Next up was the lips – I started by lining and filling in my lips with my trusty Kiko Precision Lip Pencil in 306 and topped it with the Bourjois Rouge Edition Velvet in Hot Pepper to create a vibrant and long lasting lip shade. I then lined the lips with the fluidline. Next up was the dots – the part I was worried about the most. I used my favourite Maybelline Color Drama Intense Velvet Lip Pencil in Red Essential as the tip was a bit thicker than a regular pencil which actually made drawing on the dots quite easy. They may not have been the neatest – I struggled on my cheeks where my skin was slightly more squidgy – but I think it worked for the overall effect. The finishing touches were to line the perimeter of my face with the gel liner and then spray my hair yellow with coloured hairspray (link here).

So I hope you enjoyed this post. If you were interested in what outfit I wore, it was an aztec style dress from Missguided – but I think any bright dress could have worked for this look. What did you go as for halloween? 

Holy Grail | Nars Laguna Bronzing Powder

As a beauty addict, it’s not a very common occurrence to find a product that I cannot live without and I would buy again and again. There’s usually a voice in the back of my head telling me that there’s something better, but when it comes to bronzers, I am completely content. I have found one of the perfect formula and colour, and its also a cult product…


The Nars Bronzing Powder in Laguna is an absolutely gorgeous bronzer. It is more on the orange-terracotta side where bronzers are concerned, but it isn’t dramatically orange or dark that is unwearable. In the pan, it looks a little shimmery, but that really doesn’t translate when applied to the skin. I personally use this bronzing up the skin as opposed to contouring – I sweep this over the high points of my face such as the cheeks, temples and the perimeters of the face. 

A problem that I have found with some more affordable bronzers is that they don’t last throughout the day and become really patchy on my skin. This is what sets this apart from the other bronzers I’ve tried – the formulation is just perfect. The longevity is on point and it is one of my favourite products in my entire collection. 


Would you splurge on a bronzer? I think I’ve figured that when it comes to powder face products, higher end is just the way to go. 

RachelElizabeth

Nars Indian Summer Eyeshadow Duo | Review


It’s a sad fact that in every beauty addict’s drawers that some products are going to get neglected. For me that was my Nars Eyeshadow Duos. I think its due to the packaging – the black opaque products seem to disappear amongst the more eye-catching ones I own, and I tend to forget what colours I even own. Recently, I decided to ‘shop my stash’ and amongst my Nars eyeshadows, there was one that I really wished I hadn’t forgotten about…


Indian Summer contains a light green-toned champagne shade, and a mustard shade. The mustard is definitely what I love about this palette. I have been loving using it in my crease, as it adds an interesting twist on a neutral look. Surprisingly it doesn’t show up too obnoxiously yellow, but it just adds an extra hint of warmth to a look. The other shade is also stunning – it is very metallic and pigmented. It is also a bit of a twist on a classic. It acts very much like a shimmery nude lid colour, but the hint of green adds a little bit more interest and quirkiness to it. 

So this may be an expensive product, but I would definitely say its worth it. There is something quite special and unique about the two colours, and that is what you wish for in higher end products. Would you spend this much on an eyeshadow duo? 

RachelElizabeth

Inside My Sister’s Makeup Bag

Introducing to RachelElizabeth, fellow beauty addict and my older sister Charli. We both started watching YouTube at around the same time (a long long time ago), and she, much like myself, has a rather large beauty stash. I’ve wanted to include her on the blog for a while, and as she often travels back home to visit I thought there was no better introduction than having a nose in her makeup bag. She is a Physiotherapist, so I asked her if she could explain the makeup that she wears on an everyday basis, and, of course, the fun things she adds to spruce it up on the weekends.


Working in a hospital means I don’t get the chance to top up my makeup throughout the day, and as I have oily skin I like to use products that keep me as matte as possible. On a daily basis, I start by prepping the skin – firstly, I use the Urban Decay De-Slick Makeup Setting Spray and then prime with the Rimmel Stay Matte Primer. I find the combination of these products has been the best base to apply makeup on top of. For foundation, I use the Mac Studio Fix Fluid in NC15, followed by concealing under the eyes and any blemishes with the Mac Pro Longwear Concealer also in NC15. This concealer is the only concealer I have tried that doesn’t crease under my eyes, and it stays put on my skin even at its oiliest. To set this all in place and to add a bit more coverage, I use the Mac Studio Fix Powder, again in NC15. To bring a bit of colour and subtle contouring to the face, I switch between the Body Shop Honey Bronze Bronzing Powder in Shade 03 and Nars Bronzing Powder in Laguna (not pictured above). My favourite everyday blush is the Tarte Amazonian Clay Blush in Exposed as I find it is natural enough for daytime when used with a light hand. To fill in my brows, I use the MUA Pro-Brow Ultimate Eyebrow Kit – the medium brown (top right) is the perfect shade for my brows. I used to use Mac Eyeshadow in Omega but I find the MUA option much more pigmented. I then set my brows with the Maybelline Brow Drama Sculpting Brow Mascara in Dark Blond. Finally, I curl my lashes and apply mascara. I use two different ones because most mascaras smudge on my lower lash line. My favourites are the Chanel Volume De Chanel Mascara for my upper lashes and the Clinique Bottom Lash Mascara as it doesn’t smudge or transfer throughout the day. As a final step, I like to use the setting spray once more, just to lock in all the makeup.


“When I’m not working, I like to add a little more excitement to my makeup. In terms of eyeshadow, I like a light shimmery colour on the lids. For this, one of my favourite combinations is the Make Up For Ever Aqua Cream in Shade 13 as a base and the Bare Minerals Nude Beach Eyeshadow. For a little definition, I like to take the bronzer I’ve used that day and blend into the crease of my eye. All three naked palettes are also my go-to eyeshadows. I love winged eye liner and for this I like the Bourjois Liner Pinceau Liquid Eyeliner – it is a nice matte black shade and it doesn’t transfer onto your brow bone. I also like to brighten my waterline with the Mac Chromographic Pencil in NC15/NW20. One of my favourite steps is highlighter, and for this I use the Chanel Poudre Signee De Chanel Illuminating Powder which I think was limited edition, but I love it because it has a very fine golden shimmer running throughout. For a more natural lip, my favourite is the Mac Lipglass in Nymphette as my all time favourite shade in lip gloss is pink with gold shimmer. For a brighter lip for spring and summer, I recently bought the Mac Lipstick in Full Fuchsia. This is great as it is not too matte but not too glossy, it wears really nicely and isn’t too drying.”

RachelElizabeth


3 Orange Lips

Lipsticks are definitely my thing – if you hadn’t noticed in the background of most of my pictures, I have several drawers full to the brim of them. I will wear pretty much any colour, but when it comes to bold lips – and especially because summer is approaching – I tend to gravitate towards orange tones. I find they look great with a tan, and really bring out the blue in my eyes. I think there is an orange lip out there for everyone, from the bright lipstick-phobes to the bold lipstick obsessives. Today I bring you three of my favourites, from the sheer to the in-your-face loud orange.

Let’s begin with the sheerest of the three. The release of the Lip Butters sent the blogging world into a frenzy, and everyone couldn’t get enough of these. This is a slightly newer shade of the bunch, and is a sheer yet bright orange. The formula of these is really great – they apply with the feeling of a lip balm and are really comfortable on the lips. However, unlike some other tinted lip balms, they still deposit a decent amount of colour on the lips. If you’re a little afraid of orange lipsticks then this would be a good place to start. You’re not quite committing to the full-blown bright lip, but it leaves a nice sheer wash of orange. This is a great low maintenance option that you can throw on in the morning and not have to worry too much about it. 


If you are a lover of red lipsticks but you’re not quite ready for a full blown orange lip, then an orange-toned red may be one to try. The Velvet Matte Lip Pencils – another product everyone loves – are amazingly formulated. If you love a matte lip then you need one in your collection. The pencil form makes it so easy to apply, they are so creamy and pigmented and best of all, unlike some matte formulas, they don’t dry out your lips. Red Square is a really vibrant orange-toned red which is perfect for the summer months. This shade is a nice modern twist on the classic red lip, and is another one that will suit so many different skin tones.


I mentioned this lipstick in my top Mac lipsticks post here, and it is one of my favourite and go-to bright lips. It is probably one of the most famous orange lipsticks, and is definitely worth the hype. This is definitely not for the faint-hearted – it is described as a ‘loudmouth orange’ for a reason. It is a bright orange with a slight red undertone, making it easy to wear. The formula on this is beautiful – it has the right amount of moisture to make it comfortable, but it is still extremely pigmented and long-lasting. If you want to go all out, this is one you have to have.


(Apologies for the inconsistencies in lighting – I couldn’t quite get Morange to show up true to life, so I used the picture from my previous post!)

If you liked the format of this post, I have also showcased three of my favourite red lipsticks here. I’m sure that I will do the same with all my other favourite lip colours to wear…

RachelElizabeth

Best of | Primers

Primers are a necessary step in my makeup routine – I have both oily skin and eyelids and have always had problems with longevity and my makeup creasing or not applying well. I’ve tried quite a few primers now, and I think I have found the best of the best…


Hourglass Veil Mineral Primer
Lets get the price out of the way first… This is a pricey option at £52 – although $52 in the States making it much more cost effective if you can buy it there. However, this is absolutely worth the money. Using face primers in the past, I never really saw too much of a difference, but this creates the smoothest base to apply makeup on. It isn’t a silicone based primer so it doesn’t leave your face feeling squeaky clean but rather leaves it smooth and perfected. What I love most about this primer though, is how it extends the length of wear of my makeup. When I wear this primer, my makeup will stay on all day without fail. The pump is also great – it dispenses the perfect amount of product to cover the entire face. I can find no fault with this product, and if you can fit this into your budget, even as a product only to be used for special occasions, I would 100% recommend. 

Again this isn’t the most budget-friendly eye primer on the market, but it definitely delivers. I had been using the Urban Decay Primer Potion for years -it’s the only other eye primer I have ever used. However, recently I wasn’t satisfied with the results. I found that my eyeshadows weren’t blending that well and it just didn’t last as long as I wanted. I decided to try this because it’s massively hyped in the blogging world, and it has definitely lived up to my expectations. It has a doe-foot applicator, making it really easy to apply, and has a similar texture to the hourglass primer, in that it’s creamy and smooths out the eyelid. My eyeshadow never creases when I use this, and without primer my eyeshadows always crease. It makes my eyeshadow stay on all day, and it really is just great.

If you have trouble with your makeup staying on, these are must-haves. I see these as investments – why spend all this money on makeup if it isn’t going to last on your face? Beauty addict logic…

-RachelElizabeth

Festive Makeup #2 | Christmas Day FOTD

Firstly, for all of those who celebrate, I hope you all had a lovely Christmas and ate your weight in gorgeous food – I sure did… Secondly, I really liked how my makeup turned out yesterday, and I used a few new beautiful products so I thought I would share with you my face of the day.

Face
Because I wanted my makeup to last all day I primed with the Hourglass Veil Mineral Primer and then used one of my favourite foundations of late – the Bourjois Healthy Mix Foundation (the old formula – I can’t comment on the current formula!). I then concealed withe the Mac Studio Finish Concealer and set it all with my gorgeous new Hourglass Ambient Lighting Powder in Dim Light  – will review this soon!

Eyes
I primed the eyes with the Urban Decay Primer Potion. I used the Charlotte Tilbury Colour-Coded Eyeshadow Palette in Dolce Vita on my eyes – I used the prime shade (a pale champagne) all over the lid, the smoke shade (a dark cool brown) on the outer corner and into the crease, and packed the pop shade (a gold glitter) on top on the prime shade. I then took a matte black, mine being from the Urban Decay Naked 2 Palette, and lined the upper lash line and smoked it out a little. I then curled my lashes and applied the Chanel Le Volume De Chanel Mascara.

Cheeks
I bronzed up the skin with Nars Bronzing Powder in Laguna, then highlighted with the Kevin Aucoin Celestial Powder in Candlelight. For blush, I went for the Tarte Amazonian Clay Blush in Exposed (sadly not available in the UK!) to keep the cheeks neutral and so they didn’t compete with the red lip.

Lips
For lips I used the Urban Decay Revolution Lipstick in F-Bomb, which is my first venture into this line, which I’ve been dying to try. Spoiler alert: this may be the start of a new addiction…


Gold and red are a classic combination for this time of year, but one that I think can work all year round. There were a lot of luxury products in this look that are heavily coveted in the blogging world, and I will make sure to let you know what I think after I’ve had a chance to work with them a bit longer.

Seeing as it’s Christmas, I want to take the opportunity to thank everyone who has supported my blog in this first month, and I am very excited and motivated for the months to come!

RachelElizabeth

The Naked 3 Weekender | Look 1

Ever since Urban Decay announced even the name of this palette, it’s all anyone can talk about. If you’ve been living under a rock and haven’t heard of this palette or the Naked series from Urban Decay, may I present the beauty that is the Naked 3 Palette (£37 here) – the new offering of all brand new ‘rose-hued’ neutrals.

I’ve been playing with this palette for about a week now, and I will go ahead and say that I am in love. There are so many reviews and swatches of this palette so instead I thought I would give you 3 different looks I came up with everyday this weekend…

Look #1 – The Romantic


This look is very much focused on the rose-gold and lighter end of this palette. For this romantic look I started off by priming the eyes with the Eden Eye Shadow Primer Potion sample that came with the palette, and then packed Burnout on the inner two thirds of the lid, and the coppery Trick on the outer third. I took the lighter matte shade Limit and swept that in the crease to create some definition, and used the lightest shade Strange to highlight under the brow and the inner corners of the eyes. 

To finish off the eyes, I lined the eyes and did a slight wing with Mac Fluidline in Blacktrack and applied lashings of the Chanel Volume de Chanel Mascara. I bronzed up the skin with Nars Bronzing Powder in Laguna and applied Mac  Powder Blush in Pink Swoon for a light pink flush on the cheeks. For lips, I wanted a peachy nude so went for the Sleek Pout Paint in Minx


I really liked how this look turned out, and I can definitely see this becoming a go-to everyday eyeshadow combination. Tomorrows look – subtle smokey eye for everyday.

RachelElizabeth