Manicure Monday #8 | Barry M Hi Shine Gelly Nail Paint in Lychee

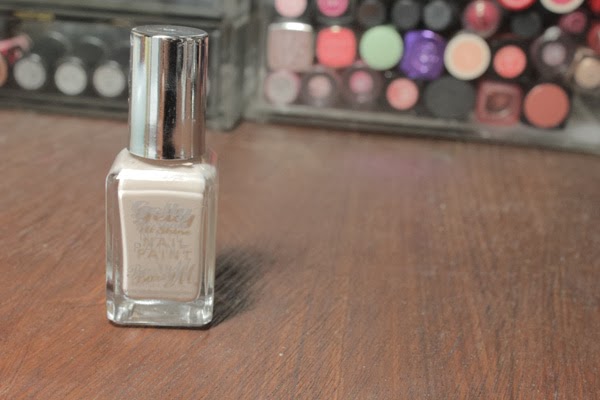
As I’ve mentioned before, I often head to Barry M when looking for a new nail polish. They are the high street brand who are always on top of the latest nail trends, and one of the cheapest on the market as well. The Gelly Hi Shine range is an extremely highly blogged range, promising the same finish as a gel manicure. 


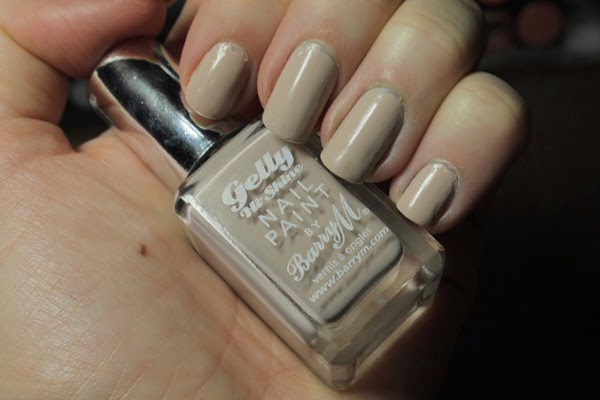
Lychee is a pale beige that pulls slightly yellow. On my skin tone, it is the perfect nude shade. As for the formula, it is one of the best I’ve tried. It is opaque in two coats, applies incredibly smooth and is shiny without a top coat. It is one of my most long-wearing nail polishes and I definitely want to try more of the range. 


I have just picked up 3 shades of the matte range from Barry M which I have been contemplating buying ever since the release, so expect them coming up soon on Manicure Monday…

-RachelElizabeth

Manicure Monday #7 | My Nailcare Essentials

Firstly, I want to explain the lack of posts this blog has seen over the last couple of weeks. I have just come back to university and I had a lot of deadlines at the beginning of the semester and getting back into the workload has been more difficult than I first thought. Excuses aside, today’s post is the start of an attempt to get back in to the swing of things, and what better way to do that than strip it back to basics and talk about my nail care routine…

OPI Nail Envy (£18.65 here)
I use this product for two things – a nail strengthener, as its advertised, and as my base coat. This is a really great product if your nails are in a bad condition. When mine are, I paint a layer on my nails everyday for 7 days and then they are much stronger and healthier-looking. However, I’ve been using this as a base coat for a while, and my nails seem much less susceptible to breaking. If you’re thinking about getting this, it is worth checking out QVC as they have some great value deals, as the price tag can seem a little steep.

Seche Vite Fast Dry Top Coat (£9.00 here)
There is a lot hype and controversy around this product but I definitely think that it is worth the hype. It is by far the best top coat I have tried as it dries so quickly and prolongs the wear of my polishes hugely. It also makes any polish look really shiny and glossy, which is something I really like in a top coat. When I finish this bottle I may try another top coat to see if I can find one just as good without the controversial ingredients. 

Kiko Glass Nail File (£2.50 here)
This is my first venture into glass nail files, and I don’t think I will going back to regular files. I find that it creates a smoother line on the nail and it doesn’t feel as harsh or damaging. This file feels much more expensive than it is, and as usual I am so impressed by another product by Kiko. 
What I haven’t included in this post is a nail varnish remover, not because I don’t use them, but because I don’t have a favourite. I do really like the Bourjois Magic Nail Polish Remover, which I’m currently out of, but I don’t see it as essential. What I would like to get into is cuticle oils, as I’m quite lazy in that department, and I think my nails would thank me if I did. What are your nail essentials?

RachelElizabeth

Manicure Monday #6 | How to Remove Glitter Nail Polish

From left to right: Barry M Superdrug 347 (Limited Edition), Maybelline Color Show Brocades in 220 Knitted Gold, Barry M 355 Gold Mine Glitter, Models Own Hedkandi in Ibiza Mix, Barry M in 150 Red Glitter

I love glitter nail polish, and I’m particularly drawn to them around this time of year – as you can probably tell from my last two Manicure Mondays posts. Pictured above are some of my current favourite glitters – I tend to gravitate towards budget brands, and in particular Barry M, as I don’t wear them too often and they do have a really great colour selection in Boots and Superdrug. The only thing that I don’t like about glitter is that is a pain to remove. I wouldn’t recommend scrubbing at your nails with a cotton pad and nail varnish remover as you may with standard nail polish as this can greatly damage and scratch the nails. Read more for my safe and easy way to remove glitter polish…

What You’ll Need:

– 5 Cotton Pads, torn in half
– Some aluminium foil, ripped into 10 pieces
– Nail varnish remover (any will do)
Firstly, I soak the cotton pad in nail varnish remover, and place over the nail, ensuring that the whole nail is covered with product. I then took one of the pieces of tin foil and wrapped it around the finger and cotton pad, then squeezing to secure. I tend to do this one hand at a time because it can get quite fiddly when most of your fingers are wrapped in foil! I leave these on my fingers for around 10 minutes, to ensure that all of the varnish has come off. Then carefully slide and remove and everything should be removed!

I hope this tip was useful, and that glitter won’t be such an annoyance in the future. 

-RachelElizabeth

Manicure Monday #5 | New Years Eve Nails

When it comes to nails at New Year, I always like to amp up the sparkle, and I usually go for a deeper colour as the base. This years look is very cliche, and somewhat reminds me of fireworks in a night sky, very appropriate for the occasion. Its also nice on New Year to pay extra attention to the way your nails go with your outfit and accessories, whether they match or contrast.

For this nail look I used Barry M Nail Paint in Navy which is a really nice long wearing navy colour. Barry M are really great for those on a budget – they’re only £2.99 and they have a really great shade range. They are also really great quality, proving that you don’t necessarily have to spend a lot in the nail department. For the glitter, I used Models Own Hed Kandi in Ibiza Mix which is a polish with a clear base and pink, blue, gold and purple glitter running throughout. The glitter particles are quite large, which give the nails more of a speckly look rather than fine shimmery glitter. I have done quite a thin coat which makes the glitter very sparse, but this is easily buildable. I haven’t tried too many Models Own polishes, but I am very impressed with this glitter. It goes on evenly, which is sometimes an issue for other glitters with larger particles, and this one in particular goes with so many different polishes. 


My last two Manicure Mondays have been very glitter-heavy and removing glitter polishes is not always easy. Stay tuned for next weeks post on my tips and tricks!

RachelElizabeth

Manicure Monday #4 | Festive Nails

I always overload on the glitter at Christmas, and I decided that this year I would attempt some sort of nail art. I am in no way talented at nail art, so this look is definitely simple and easy to do. This is my attempt at a glitter gradient…

For this look you will need 3 nail varnishes – one colour to go as a base, a glitter that is the same colour as the base, and a second glitter of a different colour (I think multicoloured which have the base colour in look especially good). I started by painting a layer of Kiko Nail Enamel in 240 Apple Red as my base colour and as this is a very opaque polish I only needed one coat. Then I painted Barry M Glitter Nail Paint in 150 Red Glitter (Barry M are great for inexpensive glitter polishes!) on the top two thirds of the nail, making sure the top third of the nail was thicker and gradually painting on less polish towards the bottom. Then finally I used China Glaze Nail Lacquer in Twinkle Lights (unfortunately limited edition!) on the top third of the nail, trying not to create two harsh lines by slightly staggering the glitter.

I think the combination of red, gold and green is so festive, but this look could work for any time of the year by changing up the colours. It would look great on new years eve with dark navy or purple. I don’t know how often I will venture into nail art on Manicure Mondays, but this is a nice tame start…

RachelElizabeth

Manicure Monday #3 | Nails Inc Queen Victoria Street

Nails Inc Queen Victoria Street (£9.79 here)

Nails Inc are an extremely innovative nail brand, and their new launches are often really exciting. When I first spotted Queen Victoria Street in stores, I was mesmerised by the unique bright green shade but thought it was a little too garish and expensive to pick up. However, every time I would see it whilst I was shopping I would pick it up, adore it and then still refrain from buying it. I am glad that it is now in my collection, and if you’re one for bright and daring nail colours, this is definitely for you.

The shade didn’t photograph well – it is slightly deeper and more yellow toned in person, but it picks up the brightness. The Nails Inc formula is great and is one of the best for me in terms of chipping and longevity. The one con is the price; Beauty Bay are always discounted but they are still not cheap. For the uniqueness of the shade and the quality of the formula I would personally say it is worth the extra cost.

There goes another Manicure Monday… Keep your eyes peeled for next week for a very christmassy edition – expect lots of glitter!

RachelElizabeth


Manicure Monday #2 | Revlon Nail Enamel in Bewitching

Revlon Nail Enamel in Bewitching (£6.49 here)

Revlon is quickly becoming one of my favourite brands for the nail polish. They have a huge amount of shades and formulas, but the original nail enamels have continued to be my favourite. All of the shades I have are really easy to apply, go on with two or less coats and are one of my longer-lasting formulas that I own. 

Bewitching is a gorgeous rich burgundy shade with a cream finish. I wouldn’t say this is an overly original shade, as it can probably be duped in several other brands, but if you are in the market for a burgundy, this formula is definitely one I would recommend. This polish lasted about 4 days on my nails without any chipping which is a considerably long time for me. 

No doubt another Revlon nail polish will pop up in future Manicure Mondays, and one or two will probably end up in my basket when I am next browsing the aisles of boots. Have you tried any Revlon nail enamels?

RachelElizabeth

Manicure Monday #1 | Kiko Nail Lacquer in 381 Purple Grey

I have a lot of nail polish – whenever I mention it or somebody sees my collection I am always faced with shocked reactions. I thought of starting Manicure Monday because I love talking about and showing off my polishes, but also as a motivation to wear all the ones I have.

Kiko Nail Laquer in 381 Purple Grey (£3.90 here)

Kiko is an Italian brand, slowly making its way into the UK. The first product I ever had was also a nail varnish which my mum bought me as a present from Italy. I have since ventured into the Westfield shop several times and have tried quite a few products from the brand. This nail varnish, was also a gift from my mum from Italy this summer. They ship to many countries across Europe, and I must admit, I am getting very excited about this brand.

Purple Grey is an apt name for what the polish looks like in the bottle, but on the nails it runs much more blue. It is a dark grey-toned blue, a nice colour for autumn/winter. It is an interesting shade and provides the look of black on the nails without being so harsh. I thought it seemed quite original, but looking through my collection I found that Rimmel Salon Pro Nail Polish Lycra in Punk Rock (£4.49 here) is very similar, but is slightly more purple. 

In terms of longevity, I found this average. It lasted about 2 or 3 days without any minor chipping, which is standard for my nails. The brush isn’t too wide or too thin, and the formula is easy to paint on the nails – 2 coats are required for opacity. For the price, I’d say this is a good polish, and I would recommend it if these stormy colours are up your street. 
-RachelElizabeth